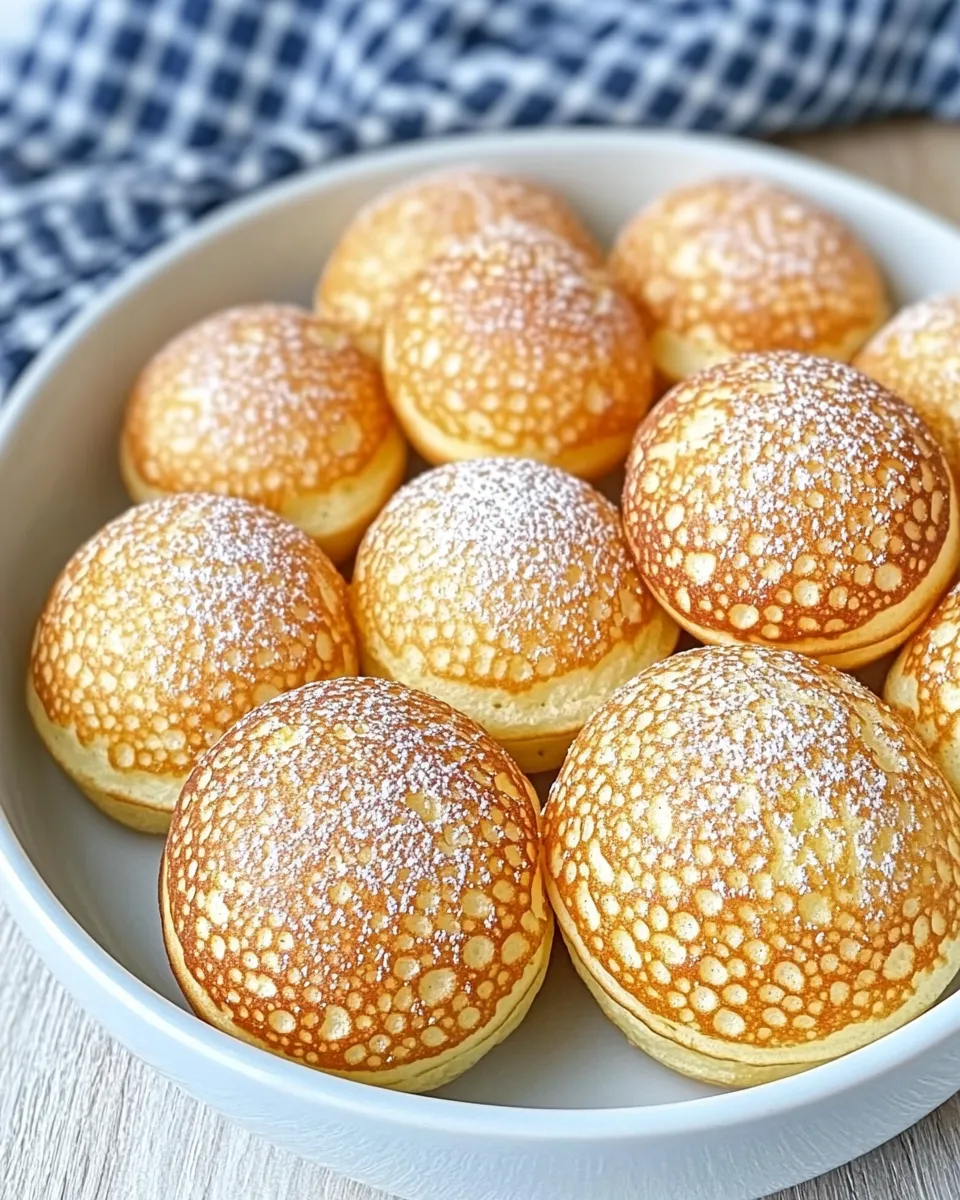
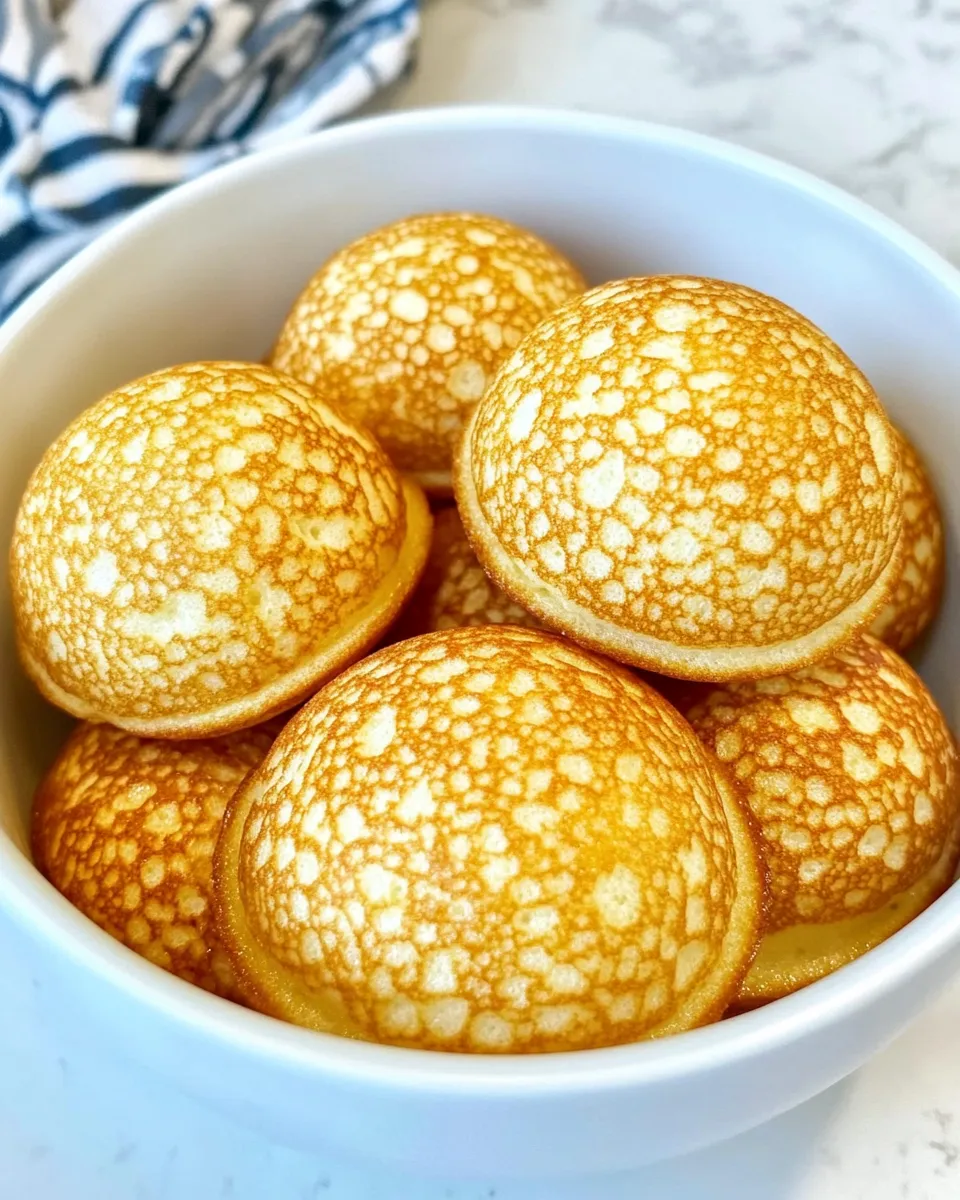
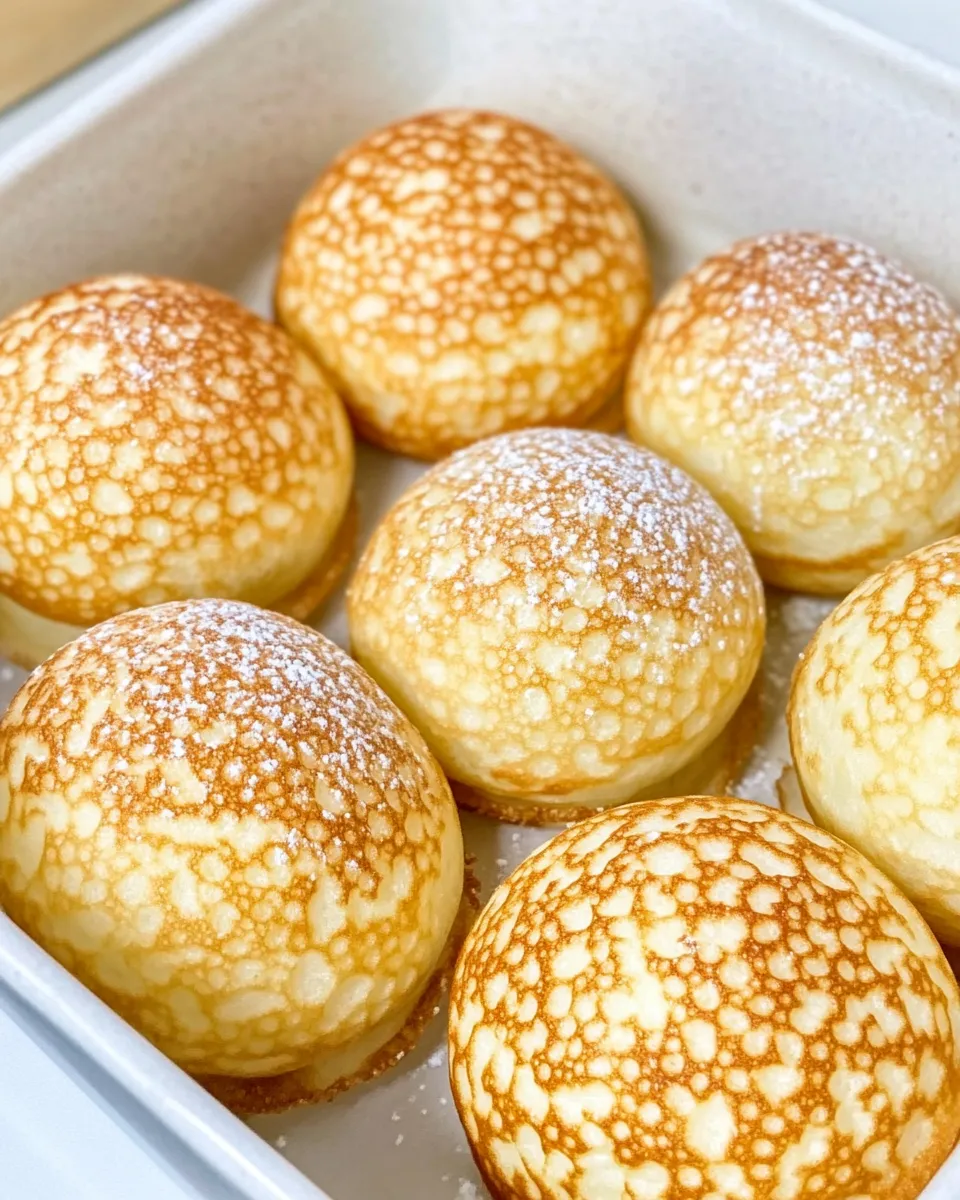
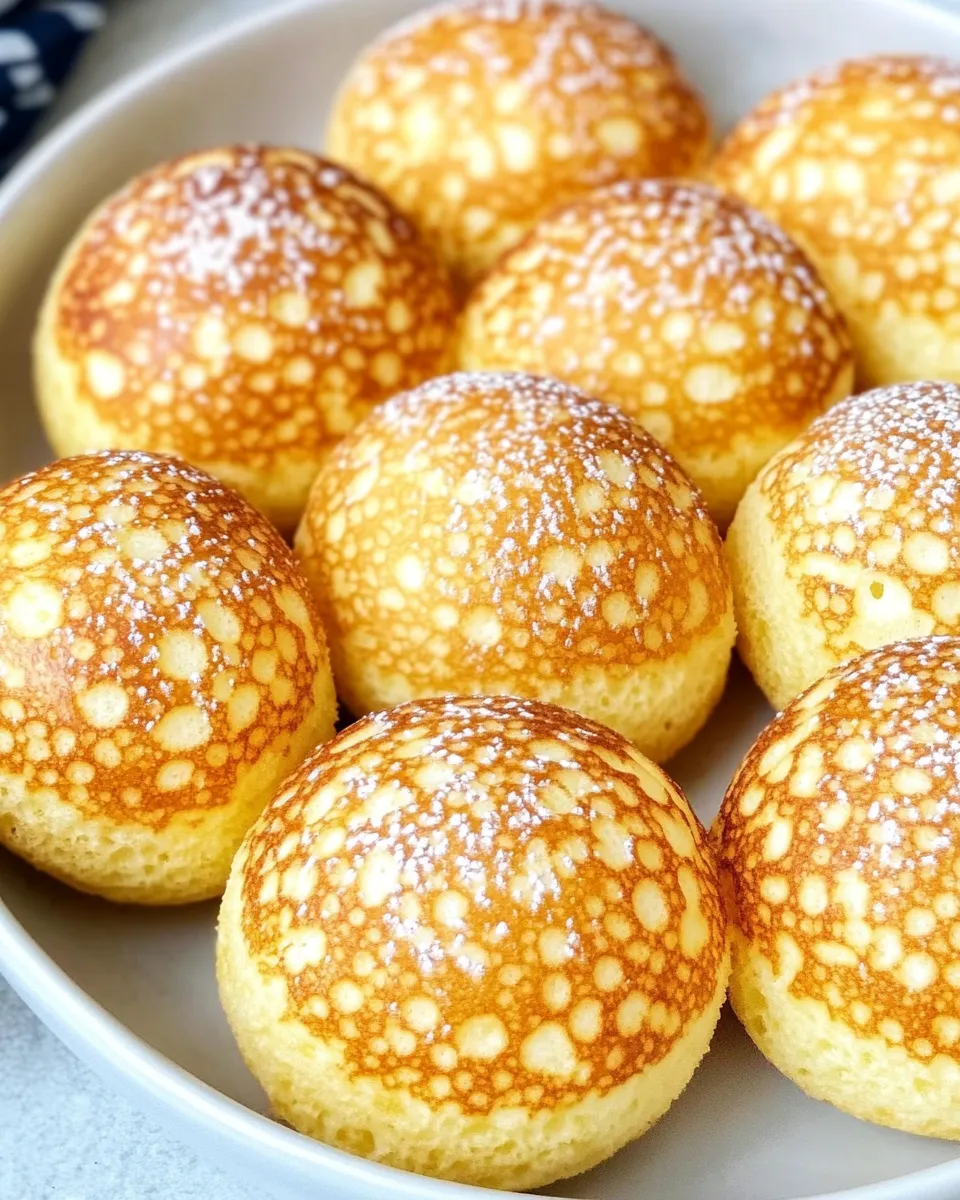
Gluten Free Aebleskiver
When it comes to delightful breakfast treats, few things can top the fluffy, spherical goodness of Aebleskiver. These Danish pancake balls are traditionally filled with fruit, chocolate, or even a dollop of jam, and they are perfect for dipping in syrup or enjoying with a dusting of powdered sugar. Today, we’re diving into a gluten-free version that’s just as delicious and satisfying as the original, allowing everyone to enjoy this delightful dish. With a few special ingredients and some love in the kitchen, you’ll have a batch of Gluten Free Aebleskiver that will impress friends and family alike.
Why This Gluten Free Aebleskiver Stands Out
This Gluten Free Aebleskiver recipe is not just about avoiding gluten; it’s about creating a rich, flavorful treat that everyone can enjoy. The unique combination of spices, including cardamom and lemon zest, adds a depth of flavor that sets these pancake balls apart. The use of buttermilk ensures a tender crumb, while the separation of egg yolks and whites provides that coveted fluffiness. Whether served as a cozy breakfast or a fun dessert, these Aebleskiver will have everyone coming back for seconds!
What We’re Using
- 2 cups gluten-free all-purpose flour: A blend that mimics traditional flour for the perfect texture.
- 1 tablespoon granulated sugar: To add a hint of sweetness.
- 1 teaspoon baking soda: For a light and airy texture.
- 1/2 teaspoon baking powder: To help them rise.
- 1/2 teaspoon xanthan gum: To give structure and elasticity.
- 1 teaspoon ground cardamom: For a warm, aromatic flavor.
- Zest of one lemon: To brighten up the flavor.
- 1 teaspoon pure vanilla extract: For a hint of sweetness and depth.
- 1 3/4 cups buttermilk: For richness and moisture; alternatively, use milk with vinegar.
- 4 tablespoons butter: Melted and cooled, for richness.
- 3 large eggs: Separated into yolks and whites for fluffiness.
- Butter or oil for frying: To prevent sticking and add flavor.
What’s in the Gear List
- Aebleskiver pan: Essential for achieving that signature round shape.
- Mixing bowls: For combining your ingredients.
- Whisk: To mix the batter smoothly.
- Spatula: For flipping and serving.
- Measuring cups and spoons: For accuracy in your recipe.
The Method for Gluten Free Aebleskiver
1. Prepare Your Ingredients
Start by gathering all your ingredients and measuring them out. This helps streamline the cooking process and ensures that you don’t forget anything.
2. Mix Dry Ingredients
In a large mixing bowl, whisk together the gluten-free flour, granulated sugar, baking soda, baking powder, xanthan gum, ground cardamom, and lemon zest until well combined.
3. Combine Wet Ingredients
In another bowl, whisk together the egg yolks, buttermilk, melted butter, and vanilla extract until smooth.
4. Combine Wet and Dry Ingredients
Pour the wet ingredients into the dry ingredients and stir until just combined. Be careful not to overmix; a few lumps are perfectly fine.
5. Beat Egg Whites
In a separate bowl, beat the egg whites until soft peaks form. This will add airiness to your Aebleskiver.
6. Fold in Egg Whites
Gently fold the beaten egg whites into the batter until no white streaks remain. This step is crucial for achieving that light, fluffy texture.
7. Preheat the Aebleskiver Pan
Place your Aebleskiver pan over medium heat and add a small amount of butter or oil into each well. Allow it to heat up until the butter is bubbling but not burning.
8. Fill the Wells
Using a spoon or a piping bag, fill each well about two-thirds full with batter. If you’re adding fillings like chocolate or fruit, add them now.
9. Cook and Flip
Let the Aebleskiver cook for about 2-3 minutes until bubbles form on the surface. Using a skewer or fork, gently flip them over to cook the other side. Cook for an additional 2-3 minutes until golden brown.
10. Serve Warm
Remove the Aebleskiver from the pan and serve immediately with your favorite toppings such as maple syrup, powdered sugar, or fresh fruit.
Season-by-Season Upgrades
- Spring: Add fresh berries or lemon curd for a bright, fruity filling.
- Summer: Use peaches or cherries for a sweet, summery twist.
- Fall: Incorporate pumpkin puree and spices for a seasonal flavor.
- Winter: Fill with chocolate or hazelnut spread for a cozy treat.
What Not to Do
- Don’t overcrowd the Aebleskiver pan; give each ball enough space to cook evenly.
- Avoid using too high of a heat, which can burn the outside while leaving the inside raw.
- Don’t skip the step of folding in the egg whites; it’s key to achieving that light texture.
- Resist the temptation to peek too often; let them cook undisturbed for the best results.
Make Ahead Like a Pro
If you want to enjoy Aebleskiver without the morning rush, you can prepare the batter the night before. Just mix the dry ingredients and wet ingredients separately, then combine them in the morning. Alternatively, you can cook them ahead of time and reheat in the oven at a low temperature before serving.
Reader Questions
Can I use a different type of flour instead of gluten-free all-purpose flour?
While this recipe is designed for gluten-free all-purpose flour, you can experiment with other gluten-free blends. Just make sure they contain xanthan gum or add it separately for the best results.
What can I use instead of buttermilk?
If you don’t have buttermilk on hand, you can make a substitute by adding 1 tablespoon of white vinegar to 1 3/4 cups of milk and letting it sit for 5-10 minutes before using.
How do I store leftover Aebleskiver?
Store any leftovers in an airtight container in the refrigerator for up to 3 days. To reheat, pop them in a toaster or oven until warmed through.
Can I freeze Aebleskiver?
Yes! Aebleskiver freezes well. Just let them cool completely, then place them in a single layer on a baking sheet to freeze before transferring them to a freezer bag. They can be reheated straight from frozen.
Healthy-ish Favorites
- Gluten-Free Pancakes – Fluffy and delicious, these pancakes are a great alternative.
- Vegan Pancakes – A plant-based version that’s just as satisfying.
- Banana Bread – Sweet and wholesome, perfect for breakfast or snacks.
- Healthy Muffins – Packed with fruits and nuts, they make a great on-the-go option.
Wrap-Up
Enjoying a delicious breakfast doesn’t have to mean compromising on dietary preferences or restrictions. This Gluten Free Aebleskiver recipe offers a delightful solution that everyone can enjoy, featuring a rich blend of spices and textures that make each bite a memorable experience. Whether you’re serving them to guests or enjoying them in the comfort of your own home, these pancake balls are sure to become a favorite in your breakfast repertoire. With just a few simple steps and a little creativity, you’ll impress everyone around your table. So gather your ingredients, heat up that Aebleskiver pan, and get ready to indulge in a treat that’s as fun to make as it is to eat!
Gluten Free Aebleskiver
Ingredients
Equipment
Method
- 1. Prepare Your Ingredients: Gather all your ingredients and measure them out.
- 2. Mix Dry Ingredients: In a large mixing bowl, whisk together the gluten-free flour, granulated sugar, baking soda, baking powder, xanthan gum, ground cardamom, and lemon zest until well combined.
- 3. Combine Wet Ingredients: In another bowl, whisk together the egg yolks, buttermilk, melted butter, and vanilla extract until smooth.
- 4. Combine Wet and Dry Ingredients: Pour the wet ingredients into the dry ingredients and stir until just combined.
- 5. Beat Egg Whites: In a separate bowl, beat the egg whites until soft peaks form.
- 6. Fold in Egg Whites: Gently fold the beaten egg whites into the batter until no white streaks remain.
- 7. Preheat the Aebleskiver Pan: Place your Aebleskiver pan over medium heat and add a small amount of butter or oil into each well.
- 8. Fill the Wells: Fill each well about two-thirds full with batter.
- 9. Cook and Flip: Let the Aebleskiver cook for about 2-3 minutes until bubbles form on the surface, then flip and cook for an additional 2-3 minutes.
- 10. Serve Warm: Remove the Aebleskiver from the pan and serve immediately with your favorite toppings.
Notes
- Experiment with different fillings for variety.
- Don’t overcrowd the pan for even cooking.
- Store leftovers in an airtight container for up to 3 days.