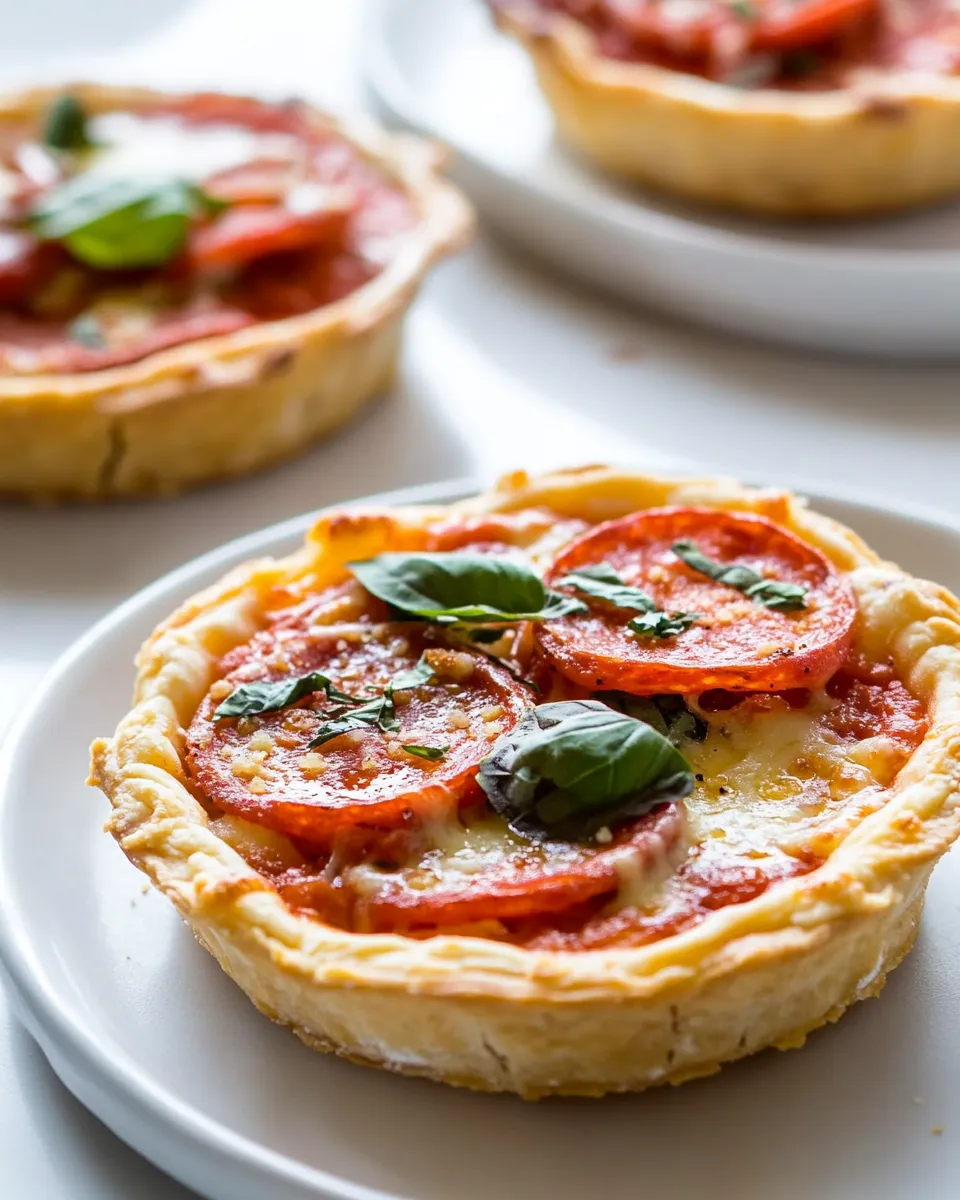
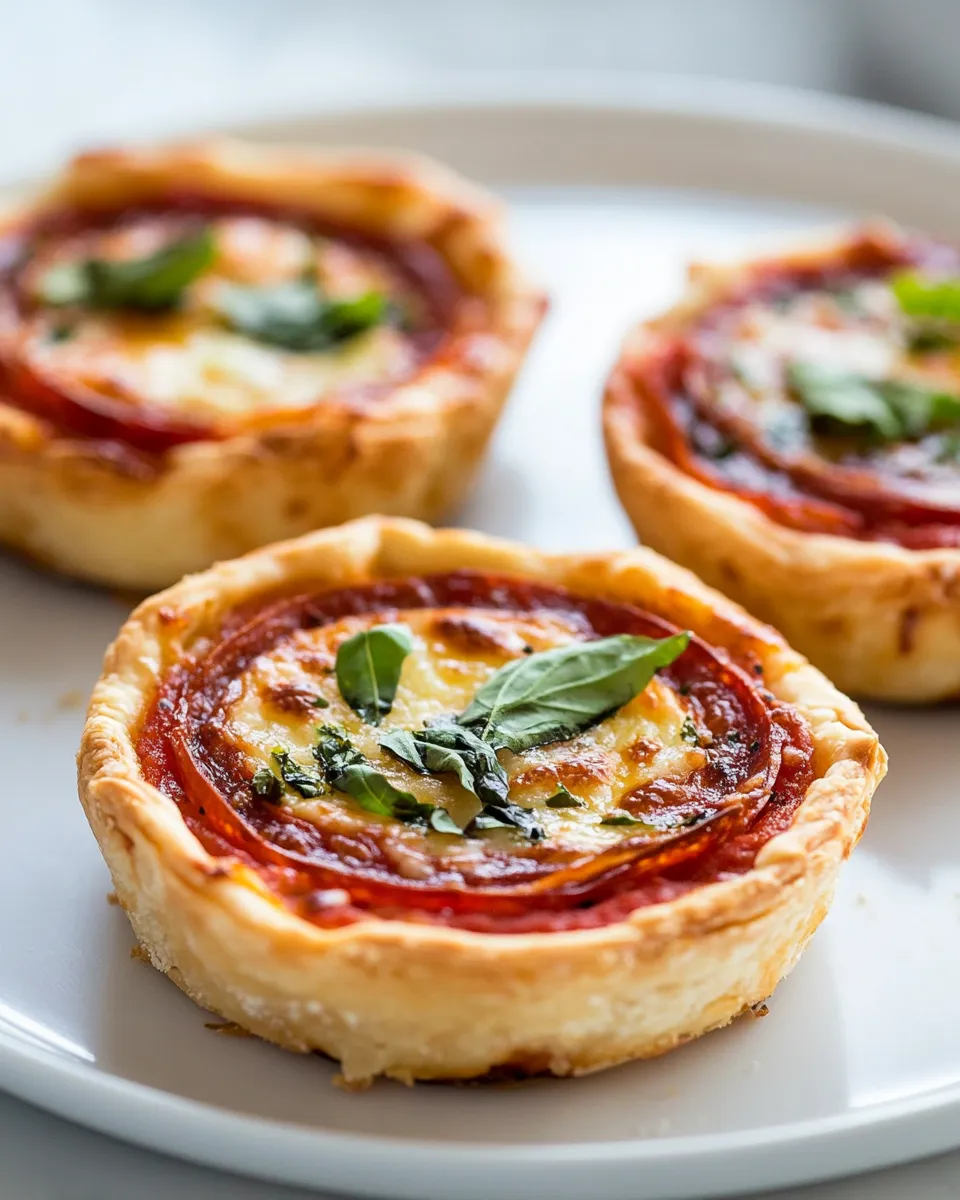
Pie Crust Pizza Tarts
If you’re in the mood for a deliciously unique twist on traditional pizza, then these Pie Crust Pizza Tarts are sure to tickle your taste buds! Imagine the buttery flakiness of a pie crust enveloping your favorite pizza toppings, all baked to perfection in adorable mini tart pans. Not only are they simple to whip up, but they also make for a delightful appetizer or a fun family meal. Let’s dive into the world of savory tarts that combine the best of both pies and pizzas!
What Makes This Recipe Special
These Pie Crust Pizza Tarts stand out because they merge the rich, flaky texture of a classic pie crust with the vibrant, savory flavors of pizza. Each tart is a personal-sized delight, perfect for serving at parties or enjoying as a cozy dinner. The use of a homemade buttermilk pie crust elevates the dish, delivering a buttery flavor that complements the gooey cheese and zesty sauce. Plus, they’re customizable! Use your favorite toppings to make each tart your own.
What Goes In
- 4 mini tart pans – essential for creating the perfect individual servings.
- 1/2 batch My Favorite Buttermilk Pie Crust – a flaky, buttery base that is simple to make and incredibly delicious.
- 4 tablespoons pizza sauce – choose between homemade for a fresh taste or store-bought for convenience.
- 1/2 cup (2 oz) shredded mozzarella – the classic pizza cheese that melts beautifully.
- 12 slices good-quality pepperoni – adds a savory punch; feel free to swap for other toppings like veggies or chicken.
- 2 tablespoons shredded Parmesan cheese – for that extra layer of cheesy goodness.
- 4 small basil leaves – thinly sliced for a fresh, aromatic finish to your tarts.
Recommended Tools
- Mini tart pans – these pans are perfect for creating individual tarts, ensuring even baking and easy serving.
- Rolling pin – essential for rolling out your pie crust to the right thickness.
- Mixing bowl – for combining your pie crust ingredients and mixing your toppings.
- Baking sheet – to catch any drips and ensure even baking of your tarts.
- Pizza cutter – handy for slicing your pepperoni or other toppings into the perfect size.
Build Pie Crust Pizza Tarts Step by Step
Step 1: Prepare the Pie Crust
Start by preparing your favorite buttermilk pie crust. If you’re using a store-bought crust, skip to the next step. For those making it from scratch, combine flour, salt, and cold cubed butter in a mixing bowl. Use a pastry cutter to blend until the mixture resembles coarse crumbs. Gradually incorporate buttermilk until a dough forms. Chill for 30 minutes before rolling out.
Step 2: Preheat the Oven
Preheat your oven to 375°F (190°C). This ensures that your tarts cook evenly and become beautifully golden.
Step 3: Roll Out the Dough
On a lightly floured surface, roll out your chilled pie crust to about 1/8-inch thickness. Use a round cutter or the top of a glass to cut out circles that are slightly larger than your mini tart pans.
Step 4: Assemble the Tarts
Gently press the dough circles into the mini tart pans, ensuring they fit snugly. Use a fork to poke holes in the bottom to prevent bubbling. Spoon 1 tablespoon of pizza sauce into each crust, spreading it evenly.
Step 5: Add Toppings
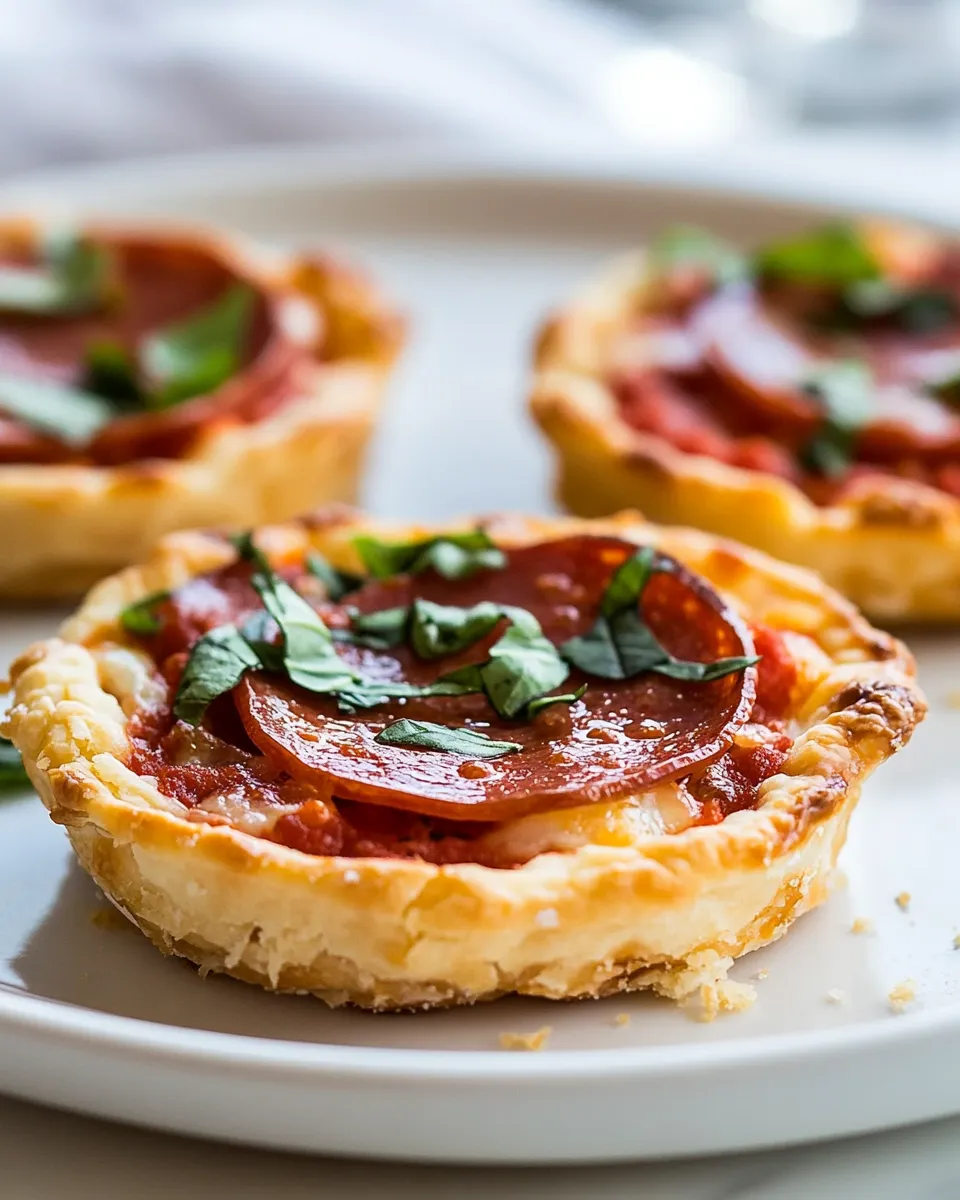
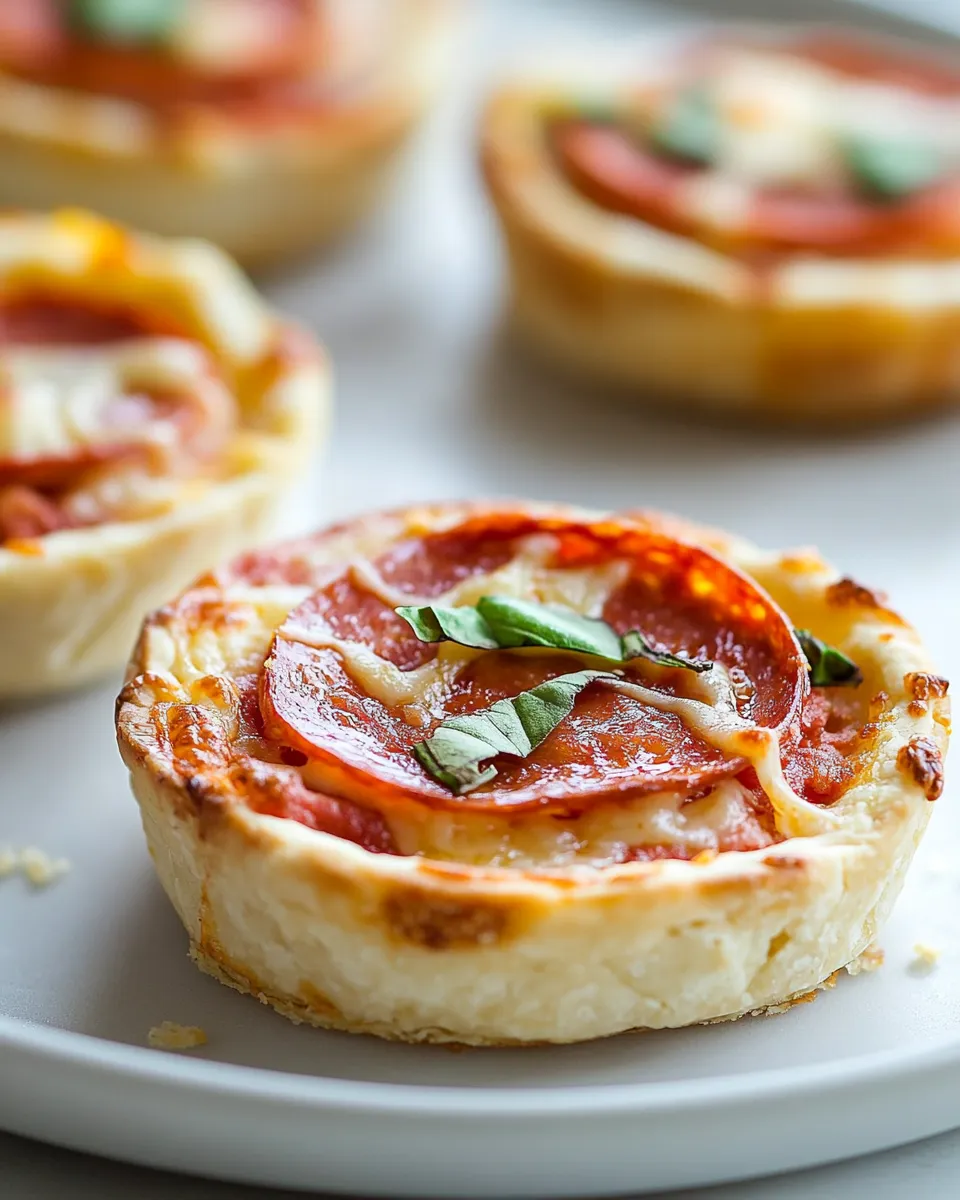
Sprinkle shredded mozzarella cheese over the sauce, then layer on the pepperoni slices. Finish with a sprinkle of Parmesan cheese on top.
Step 6: Bake the Tarts
Place the assembled tarts on a baking sheet and bake in the preheated oven for 20-25 minutes, or until the crust is golden and the cheese is bubbly.
Step 7: Garnish and Serve
Once out of the oven, let the tarts cool for a few minutes. Garnish with thinly sliced basil leaves before serving. Enjoy your warm, savory Pie Crust Pizza Tarts!
Budget & Availability Swaps
- Cheese: Swap mozzarella for provolone or cheddar based on your preference.
- Meat: Use turkey pepperoni or cooked sausage for a different flavor.
- Sauce: If you have tomato paste, mix it with herbs and a splash of water for a quick homemade sauce.
- Basil: Substitute with oregano or your favorite dried herbs if fresh basil isn’t available.
Pitfalls & How to Prevent Them
To ensure your Pie Crust Pizza Tarts turn out perfectly, avoid these common pitfalls:
- Overworking the Dough: Be gentle when mixing and rolling out the dough. Overworking can lead to tough crusts.
- Too Much Sauce: Avoid soggy bottoms by using a moderate amount of sauce. A tablespoon should suffice.
- Uneven Baking: Rotate the baking sheet halfway through cooking for even browning.
- Burnt Cheese: Keep an eye on your tarts during the last few minutes of baking to prevent the cheese from burning.
Freezer-Friendly Notes
These Pie Crust Pizza Tarts are perfect for freezing! After baking, let them cool completely, then place them in an airtight container or a freezer bag. They can be stored in the freezer for up to 3 months. To reheat, simply bake from frozen at 375°F (190°C) for about 15-20 minutes, or until heated through.
Reader Q&A
Can I use a different type of crust for these tarts?
Absolutely! While the buttermilk pie crust is delicious, feel free to use a store-bought puff pastry or even a gluten-free crust if you have dietary restrictions.
What other toppings can I add to my Pizza Tarts?
The possibilities are endless! You can use vegetables like bell peppers, mushrooms, or olives, or even switch up the protein with chicken or bacon. Just keep the proportions similar to the original recipe.
How do I know when the tarts are done baking?
Your tarts are done when the crust is golden brown and the cheese is melted and bubbly. It’s always a good idea to keep an eye on them towards the end of the baking time.
Can I make these tarts ahead of time?
Yes! You can assemble the tarts a few hours in advance and keep them in the refrigerator until you’re ready to bake. Just be sure to add a few extra minutes to the baking time if they go into the oven cold.
More from the Kitchen
- Sally’s Chocolate Chip Cookies
- Pinch of Yum Easy Pasta Recipe
- Minimalist Baker Vegan Chocolate Cake
- Another Delicious Recipe
Serve & Enjoy
There you have it—your delightful Pie Crust Pizza Tarts are ready to be served! These mini tarts are not only visually appealing but also packed with flavor in every bite. Serve them warm as an appetizer or pair them with a side salad for a complete meal. Whether it’s a casual family dinner or a festive gathering, these tarts are sure to impress. Get creative with your toppings and enjoy the fun of personal-sized pizza tarts that everyone can enjoy!
Pie Crust Pizza Tarts
Ingredients
Equipment
Method
- Step 1: Prepare the Pie Crust - Combine flour, salt, and cold cubed butter. Blend until coarse crumbs form. Gradually add buttermilk until a dough forms. Chill for 30 minutes.
- Step 2: Preheat the Oven - Preheat your oven to 375°F (190°C).
- Step 3: Roll Out the Dough - Roll out your chilled pie crust to about 1/8-inch thickness. Cut out circles for tart pans.
- Step 4: Assemble the Tarts - Press dough circles into tart pans. Poke holes in the bottom and add 1 tablespoon of pizza sauce in each.
- Step 5: Add Toppings - Sprinkle mozzarella cheese, layer pepperoni, and finish with Parmesan cheese.
- Step 6: Bake the Tarts - Bake for 20-25 minutes until the crust is golden and cheese is bubbly.
- Step 7: Garnish and Serve - Cool slightly and garnish with basil leaves. Enjoy!
Notes
- These tarts are freezer-friendly; store in an airtight container for up to 3 months.
- Feel free to swap toppings based on your preference!
- Be careful not to overwork the dough to keep it flaky.