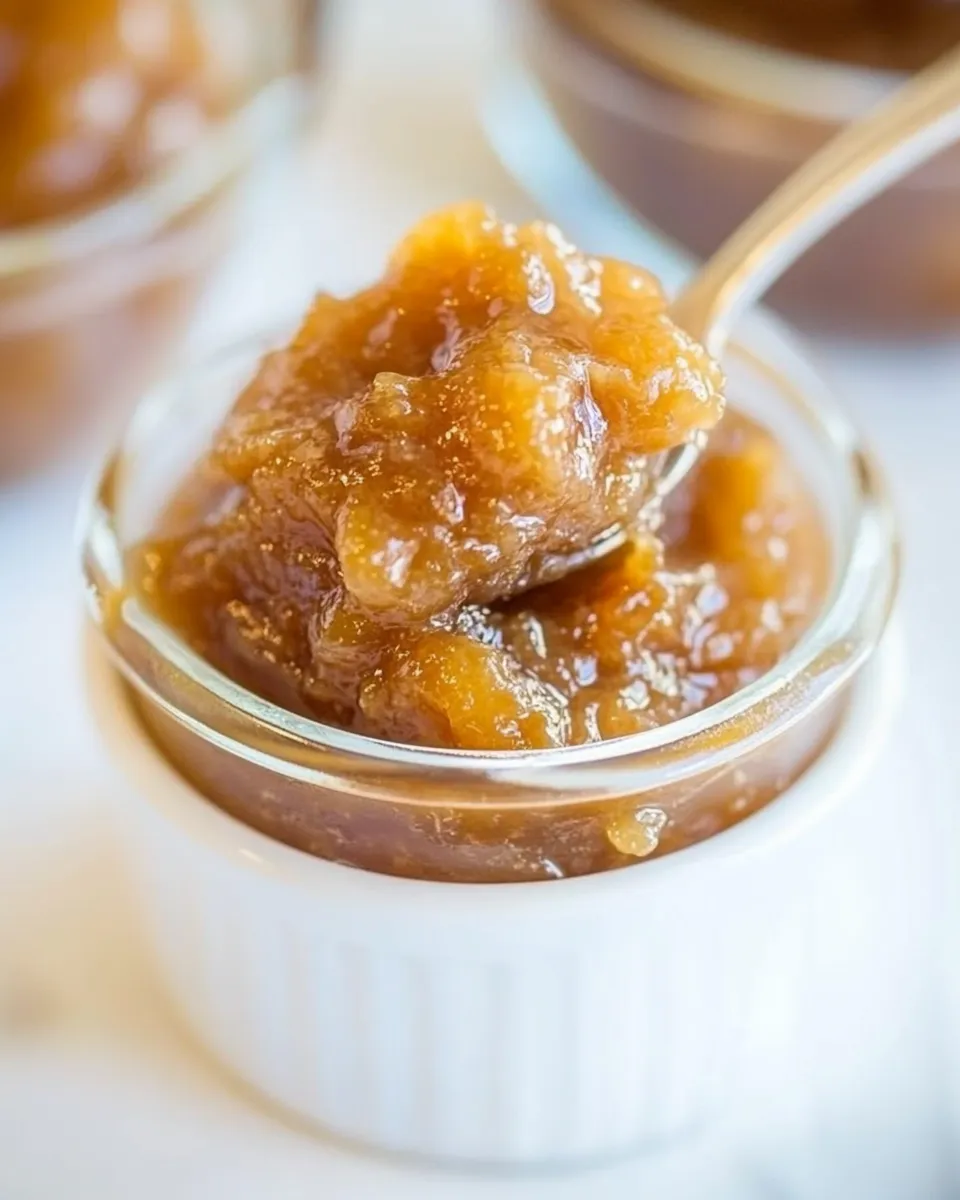
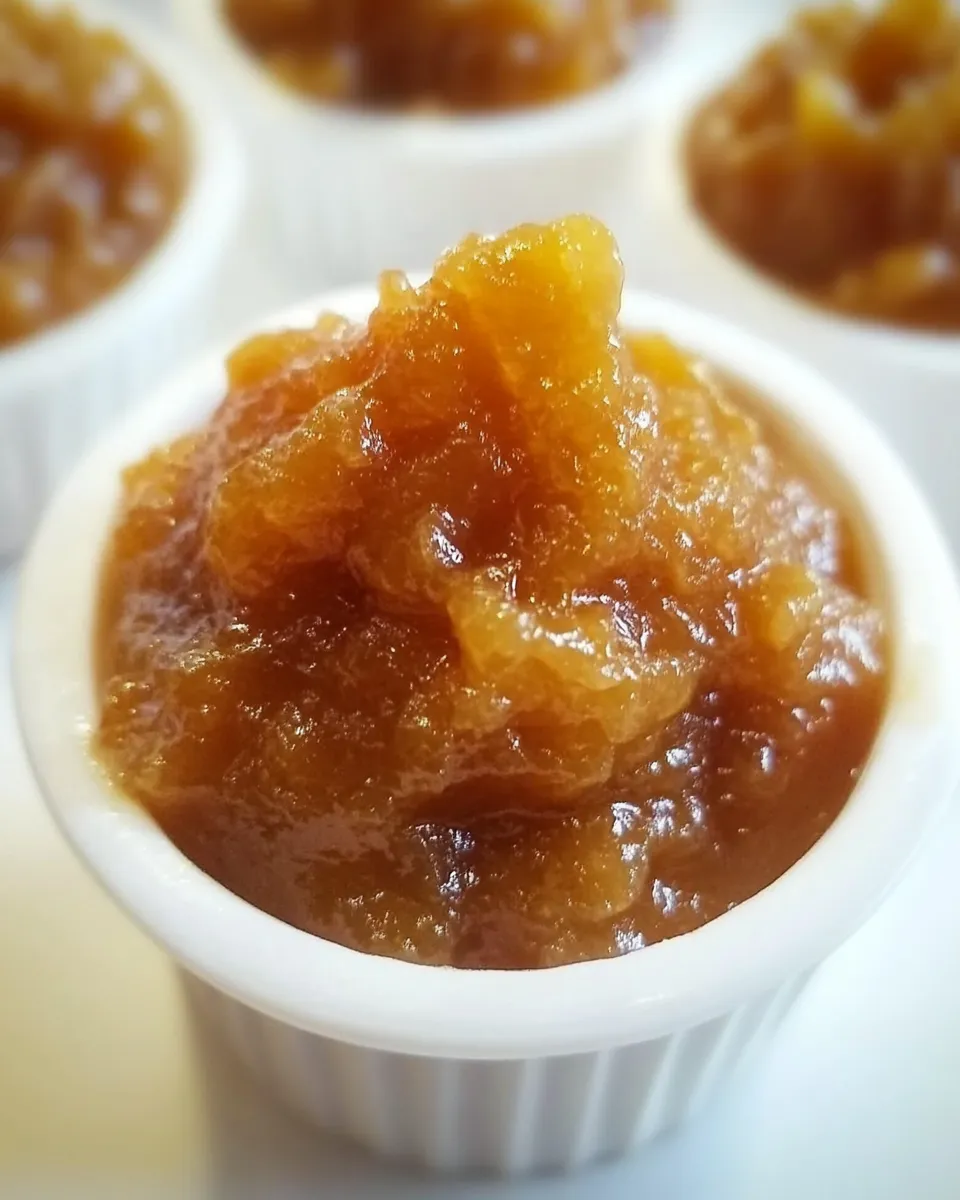
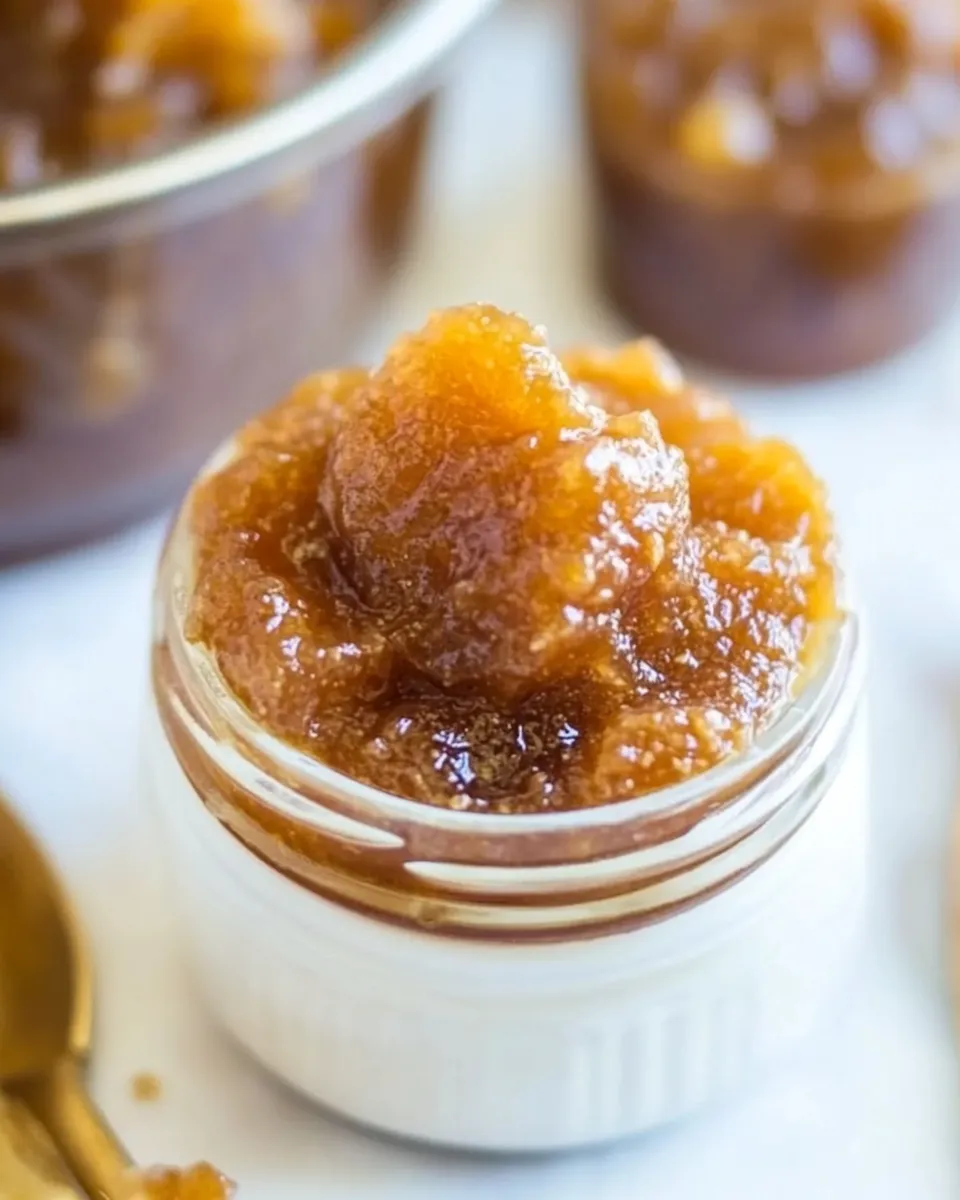
Vanilla Bean and Brown Sugar Caramelized Banana Jam
There’s something utterly delightful about the sweet aroma of caramelized bananas wafting through the kitchen. When you combine ripe bananas with the warm notes of brown sugar and a hint of vanilla bean, you create a jam that’s not just a spread, but a delightful experience. This Vanilla Bean and Brown Sugar Caramelized Banana Jam is perfect for slathering on toast, dolloping on pancakes, or adding a spoonful to your morning yogurt. With just a handful of ingredients, you’ll find yourself reaching for this jam time and again.
Reasons to Love Vanilla Bean and Brown Sugar Caramelized Banana Jam
– It’s incredibly simple to make, using just a few ingredients you probably already have on hand.
– The flavor combination of caramelized bananas, warm cinnamon, and rich vanilla creates a jam that’s both comforting and indulgent.
– This jam can elevate your breakfast, turning ordinary toast into a gourmet treat.
– It’s versatile! Use it as a filling for pastries or as a topping for desserts like ice cream or cheesecake.
– Homemade jam makes for a thoughtful gift when jarred and labeled beautifully.
Shopping List
- 2 medium/large or 3 small ripe bananas (about 1 1/4 to 1 1/2 cups, mashed)
- 1 cup light brown sugar, packed
- 1/2 cup unsalted butter or vegan buttery spread (half of 1 stick)
- 3 tablespoons lemon juice (juice of half of 1 juicy lemon)
- 2 teaspoons cinnamon (or to taste)
- 1 tablespoon vanilla extract (or to taste)
- 2 teaspoons vanilla bean paste or the scrapings of 1 or 2 vanilla beans (or substitute with extra vanilla extract, to taste)
Setup & Equipment
- Medium-sized saucepan: For cooking the jam.
- Wooden spoon or spatula: For stirring the ingredients.
- Potato masher or fork: To mash the bananas.
- Measuring cups and spoons: For accurate ingredient measurements.
- Glass jars with lids: For storing your delicious jam.
From Start to Finish: Vanilla Bean and Brown Sugar Caramelized Banana Jam

Step 1: Prepare Your Bananas
Start by peeling your ripe bananas. Using a potato masher or fork, mash them in a bowl until smooth. You should have about 1 1/4 to 1 1/2 cups of mashed bananas.
Step 2: Combine Ingredients
In a medium-sized saucepan, add the mashed bananas, packed brown sugar, butter, lemon juice, cinnamon, vanilla extract, and vanilla bean paste. Stir well to combine all the ingredients.
Step 3: Cook the Mixture
Place the saucepan over medium heat. Allow the mixture to come to a gentle simmer while stirring frequently. The sugar will dissolve, and the bananas will begin to caramelize, creating a rich, golden color.
Step 4: Simmer and Thicken
Continue to cook the jam for about 10-15 minutes. You’ll want to keep stirring to prevent it from sticking to the bottom of the pan. The jam should thicken and become glossy.
Step 5: Cool and Store
Once the jam has thickened to your liking, remove it from the heat and let it cool slightly. Carefully transfer the warm jam into clean glass jars, seal them tightly, and allow them to cool completely at room temperature before refrigerating.
Nutrition-Minded Tweaks
- For a lower sugar option, substitute half of the brown sugar with a sugar alternative like coconut sugar or a stevia-based sweetener.
- Swap out the butter for a plant-based butter alternative to make this recipe vegan-friendly.
- Add chia seeds for a boost of fiber and omega-3 fatty acids, giving the jam a nutritional upgrade.
- Incorporate spices like nutmeg or allspice for an extra layer of flavor.
Notes on Ingredients
The key to a perfect jam lies in the ripeness of your bananas. The riper the bananas, the sweeter and more flavorful your jam will be. Choose bananas that have plenty of brown spots for optimal sweetness. Additionally, you can adjust the cinnamon and vanilla according to your preference, making this jam truly your own.
Storing Tips & Timelines
Once cooled, store your Vanilla Bean and Brown Sugar Caramelized Banana Jam in the refrigerator for up to 2 weeks. For longer storage, consider freezing the jam in airtight containers for up to 3 months. Just remember to leave a little space at the top of the jars or containers, as the jam will expand when frozen.
Your Top Questions
Can I use frozen bananas for this recipe?
Yes, you can use frozen bananas! Just make sure to thaw them completely and drain any excess liquid before mashing.
What can I use this jam on besides toast?
This jam is delicious on pancakes, waffles, yogurt, oatmeal, or even as a filling for cakes and pastries. The options are endless!
How do I make this jam thicker?
If you prefer a thicker jam, simply continue cooking it for a few more minutes until it reaches your desired consistency. Stir frequently to prevent burning.
Can I double the recipe?
Absolutely! Just make sure to use a larger saucepan to accommodate the increased volume, and adjust cooking times as necessary to ensure proper thickening.
Cook This Next
- Perfect Banana Bread – A classic recipe to use up those ripe bananas.
- Fluffy Pancakes – Serve these fluffy pancakes with your homemade jam.
- Vegan Chocolate Cake – Use the jam as a filling between layers for a delicious treat.
Let’s Eat
Prepare to be amazed by the delightful flavors of this Vanilla Bean and Brown Sugar Caramelized Banana Jam. It’s more than just a spread; it’s a celebration of sweet, caramelized goodness that can elevate any meal or snack. Spread it generously, share it with friends, or keep it all to yourself—either way, this jam is sure to become a beloved staple in your kitchen. Enjoy every luscious bite!
Vanilla Bean and Brown Sugar Caramelized Banana Jam
Ingredients
Equipment
Method
- Start by peeling your ripe bananas. Using a potato masher or fork, mash them in a bowl until smooth.
- In a medium-sized saucepan, add the mashed bananas, packed brown sugar, butter, lemon juice, cinnamon, vanilla extract, and vanilla bean paste. Stir well to combine all the ingredients.
- Place the saucepan over medium heat. Allow the mixture to come to a gentle simmer while stirring frequently.
- Continue to cook the jam for about 10-15 minutes, stirring to prevent it from sticking. The jam should thicken and become glossy.
- Once the jam has thickened to your liking, remove it from the heat and let it cool slightly. Transfer into clean glass jars, seal tightly, and cool completely before refrigerating.
Notes
- Use very ripe bananas for the best flavor.
- Store in the refrigerator for up to 2 weeks.
- This jam can be frozen for up to 3 months.