
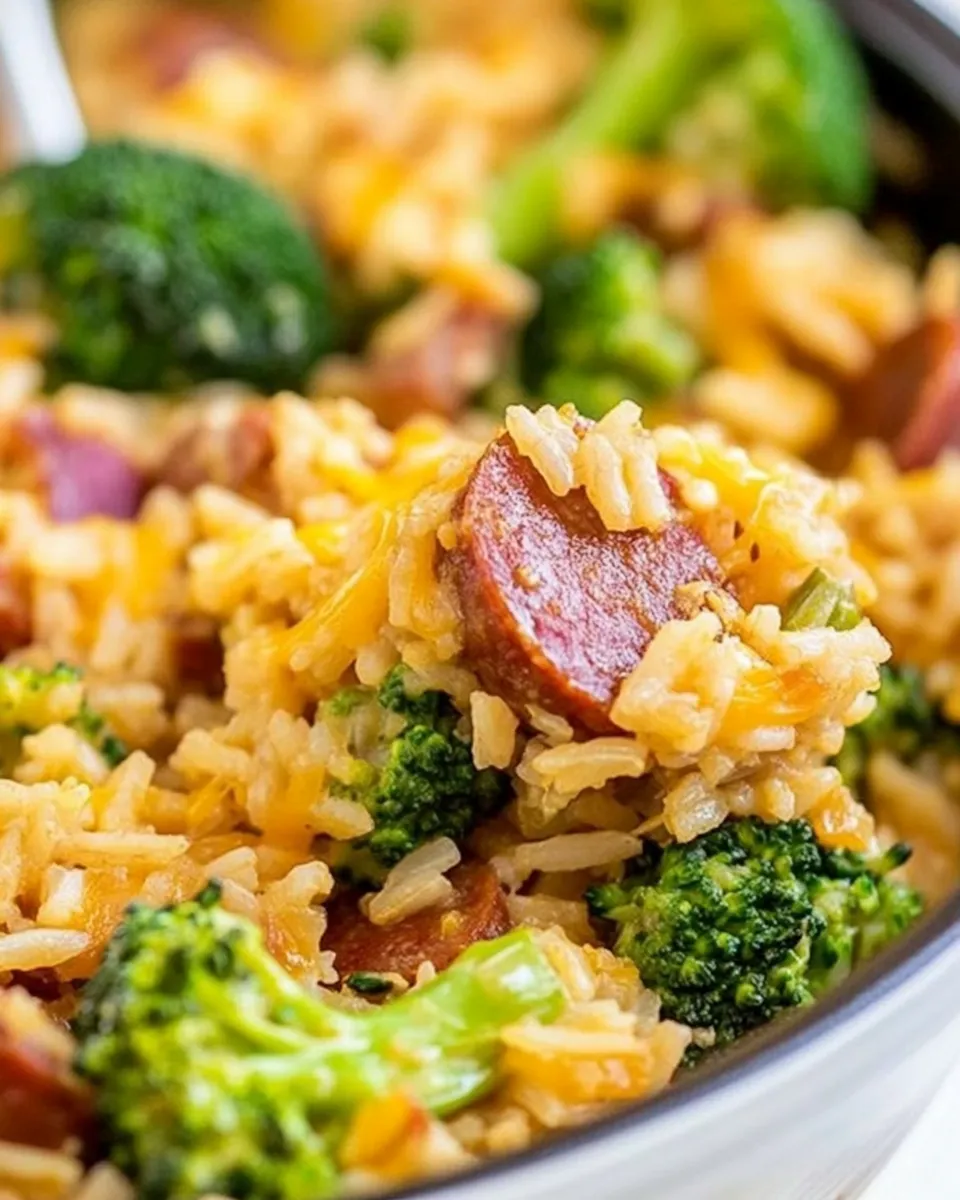
Cheesy Kielbasa Rice and Broccoli Skillet
If you’re looking for a one-pan meal that’s as comforting as it is delicious, look no further than this Cheesy Kielbasa Rice and Broccoli Skillet. Packed with flavor and nutrients, this dish combines savory kielbasa with tender rice and bright green broccoli, all enveloped in a cheesy goodness that will have your family asking for seconds. Not only is it quick to prepare, but it also makes for easy cleanup—perfect for busy weeknights or those lazy weekends when you want a hearty meal without the fuss.
Reasons to Love Cheesy Kielbasa Rice and Broccoli Skillet

There are countless reasons to fall in love with this dish. Here are just a few:
- Quick and Convenient: This skillet meal can be ready in about 30 minutes, making it a fantastic weeknight dinner option.
- One-Pan Wonder: Minimal dishes means less cleanup—just one pan to wash!
- Nutritious: Packed with protein from the kielbasa and vitamins from the broccoli, this meal is as healthy as it is hearty.
- Customizable: You can easily swap ingredients based on your preferences or what you have on hand.
- Cheesy Goodness: Who can resist melty, gooey cheese? It elevates the dish to the next level!
Ingredient Notes
To create this savory skillet dish, you will need the following ingredients:
- 2 tablespoons olive oil: For sautéing the vegetables and kielbasa.
- 14 ounces Polska kielbasa: Sliced on a diagonal for a beautiful presentation and even cooking.
- 1 small onion: Diced to add sweetness and depth of flavor.
- 1 small bell pepper: Diced; any color will work but red or yellow adds a nice sweetness.
- 2 cloves garlic: Minced for aromatic flavor.
- 1 teaspoon salt: Adjust to taste, but this helps to enhance all the flavors.
- 1/2 teaspoon pepper: For a slight kick.
- 1 cup white rice: Long grain, uncooked; this will cook up perfectly in the broth.
- 2 cups low-sodium chicken stock: Adds flavor and moisture to the rice.
- 2 cups broccoli florets: Bite-size pieces, raw; fresh or frozen will work.
- 2 cups shredded cheese: Divided; a cheddar blend is recommended for its meltiness and flavor.
Appliances & Accessories
Before you start cooking, gather these essential kitchen tools:
- Skillet: A large, deep skillet or sauté pan works best for this recipe.
- Wooden spoon: Perfect for stirring and combining ingredients.
- Measuring cups and spoons: For accurate ingredient measurements.
- Knife and cutting board: To dice your vegetables and slice the kielbasa.
Make Cheesy Kielbasa Rice and Broccoli Skillet: A Simple Method

Follow these easy steps to whip up your Cheesy Kielbasa Rice and Broccoli Skillet:
Step 1: Sauté the Kielbasa
In your skillet, heat 2 tablespoons of olive oil over medium heat. Once hot, add the sliced kielbasa. Sauté for about 5-7 minutes, or until the kielbasa is browned and crispy on the edges.
Step 2: Add the Vegetables
Next, add the diced onion, bell pepper, and minced garlic to the skillet. Sauté for another 3-4 minutes until the vegetables are soft and fragrant.
Step 3: Season and Incorporate Rice
Sprinkle in 1 teaspoon of salt and 1/2 teaspoon of pepper. Stir well to combine, then add 1 cup of uncooked white rice. Toss everything together, allowing the rice to soak up some of the delicious flavors.
Step 4: Pour in the Chicken Stock
Pour in 2 cups of low-sodium chicken stock. Bring the mixture to a gentle boil, then reduce the heat to low. Cover the skillet and let it simmer for about 15 minutes, or until the rice is cooked through and has absorbed most of the liquid.
Step 5: Add Broccoli and Cheese
After the rice is cooked, carefully fold in 2 cups of broccoli florets. Cover the skillet again and cook for another 5 minutes, allowing the broccoli to steam and soften. Then, remove the lid and add 1 cup of shredded cheese. Stir until the cheese is melted and everything is well combined.
Step 6: Serve and Enjoy!
Serve your Cheesy Kielbasa Rice and Broccoli Skillet hot, garnished with an extra sprinkle of cheese if desired. Enjoy the comforting flavors and delightful textures with your family or friends!
Holiday-Friendly Variations
This dish is versatile, and you can tweak it for different occasions with these variations:
- Add a Kick: Incorporate some red pepper flakes or diced jalapeños for a spicy version.
- Swap the Protein: Use turkey sausage or chicken for a lighter option.
- Veggie Delight: Add in other vegetables like carrots, peas, or spinach to boost the nutrition.
- Make it Creamy: Stir in a splash of heavy cream or cream cheese for a richer texture.
Things That Go Wrong
Even the best of us can run into hiccups while cooking. Here are some common issues:
- Rice Not Cooking: Ensure you’re using long-grain white rice and that the lid is on tight while simmering.
- Too Watery: If there’s excess liquid, remove the lid and let it simmer for a few more minutes to evaporate.
- Overcooked Broccoli: Add the broccoli towards the end to keep it bright green and slightly crunchy.
- Cheese Clumping: Make sure to add the cheese while the skillet is hot for better melting.
Storage Pro Tips
To keep your Cheesy Kielbasa Rice and Broccoli Skillet fresh, follow these tips:
Allow the skillet to cool completely before transferring it to an airtight container. It can be stored in the refrigerator for up to 3 days. For longer storage, consider freezing it in a freezer-safe container for up to 3 months. To reheat, simply thaw overnight in the fridge and warm it on the stove or in the microwave until heated through.
Ask & Learn
Can I use brown rice instead of white rice?
Yes, but keep in mind that brown rice requires more liquid and a longer cooking time. You may need to adjust the chicken stock and cooking duration accordingly.
What other vegetables can I add to this dish?
You can add a variety of vegetables such as peas, spinach, or even corn to enhance the nutritional profile and flavor.
Is this dish freezer-friendly?
Absolutely! Just make sure it’s cooled before freezing and stored in a freezer-safe container. It can last up to 3 months.
Can I make this dish vegetarian?
Yes! Simply replace the kielbasa with a plant-based sausage and use vegetable broth instead of chicken stock for a delicious vegetarian version.
Next Up in Your Queue
If you enjoyed this recipe, you might also like:
Next Steps
Ready to dive into this delightful dish? Gather your ingredients, follow the steps, and let the savory aromas fill your kitchen. Your next family dinner is just a skillet away! Enjoy the warmth and comfort of this Cheesy Kielbasa Rice and Broccoli Skillet, and don’t forget to share your creations with friends and family. Happy cooking!

Cheesy Kielbasa Rice and Broccoli Skillet
Ingredients
Equipment
Method
- In your skillet, heat 2 tablespoons of olive oil over medium heat. Once hot, add the sliced kielbasa. Sauté for about 5-7 minutes, or until the kielbasa is browned and crispy on the edges.
- Next, add the diced onion, bell pepper, and minced garlic to the skillet. Sauté for another 3-4 minutes until the vegetables are soft and fragrant.
- Sprinkle in 1 teaspoon of salt and 1/2 teaspoon of pepper. Stir well to combine, then add 1 cup of uncooked white rice. Toss everything together, allowing the rice to soak up some of the delicious flavors.
- Pour in 2 cups of low-sodium chicken stock. Bring the mixture to a gentle boil, then reduce the heat to low. Cover the skillet and let it simmer for about 15 minutes, or until the rice is cooked through and has absorbed most of the liquid.
- After the rice is cooked, carefully fold in 2 cups of broccoli florets. Cover the skillet again and cook for another 5 minutes, allowing the broccoli to steam and soften. Then, remove the lid and add 1 cup of shredded cheese. Stir until the cheese is melted and everything is well combined.
- Serve your Cheesy Kielbasa Rice and Broccoli Skillet hot, garnished with an extra sprinkle of cheese if desired. Enjoy the comforting flavors and delightful textures with your family or friends!
Notes
- Allow the skillet to cool completely before transferring it to an airtight container.
- It can be stored in the refrigerator for up to 3 days.
- For longer storage, consider freezing it in a freezer-safe container for up to 3 months.