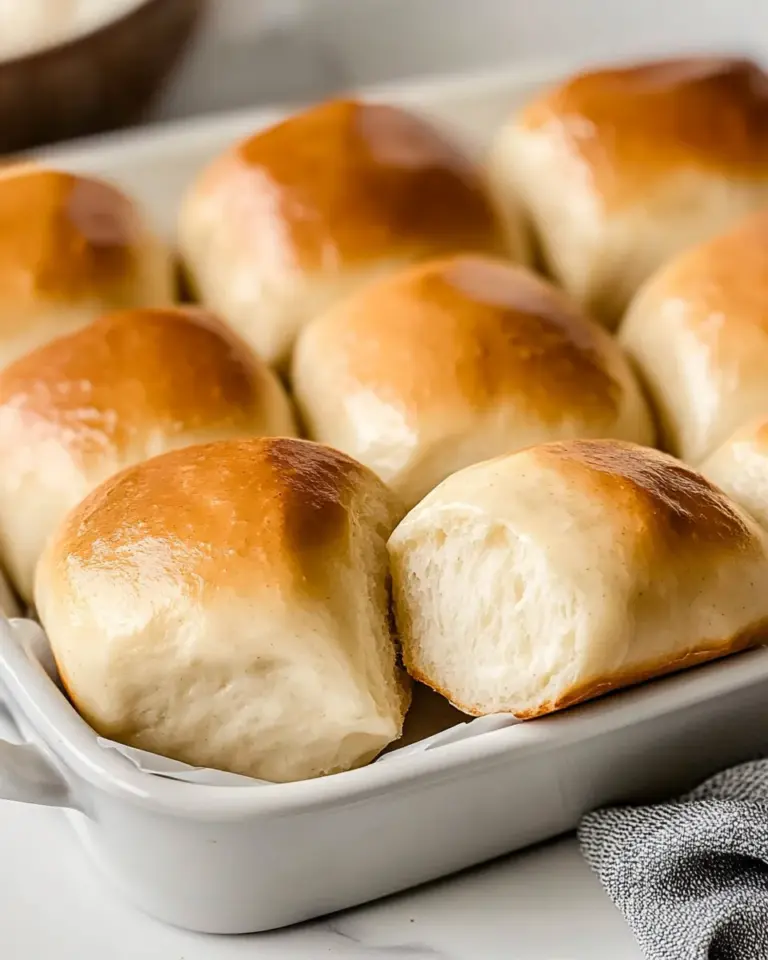
Cheese Biscuits
There’s something incredibly comforting about a warm, cheesy biscuit fresh from the oven. They are the perfect addition to any meal, whether you’re enjoying them at breakfast, as a side with dinner, or just as a snack. These Cheese Biscuits are not only easy to make but are also incredibly versatile. You can customize them with your favorite shredded cheese and enjoy the delightful smell wafting through your kitchen. Let’s dive into this cheesy goodness!
What Makes This Recipe Special

This Cheese Biscuits recipe stands out because it’s simple and requires just a handful of ingredients. The use of self-rising flour means you don’t need to worry about measuring out baking powder or baking soda. Plus, the option to make them gluten-free allows everyone to enjoy these fluffy, cheesy delights. The combination of the cheese melting into the dough creates a rich flavor that is irresistible. Perfect for gatherings or a cozy night in, these biscuits are sure to be a hit!
What You’ll Gather
- 2 cups self-rising flour – Choose gluten-free flour if needed.
- 1-2 cups shredded cheese – Use cheddar, tasty, or Gouda based on your preference.
- 1 1/3 cups milk – Almond milk works wonderfully for a dairy-free option.
- Optional seasonings – Consider adding garlic powder, herbs, or black pepper for extra flavor.
Tools of the Trade
- Mixing bowl – For combining your ingredients easily.
- Whisk – To mix the dry ingredients uniformly.
- Baking sheet – A flat surface for baking your biscuits.
- Parchment paper – To prevent sticking and make cleanup easier.
- Measuring cups – For accurate ingredient measurements.
Cheese Biscuits Made Stepwise

Step 1: Preheat the Oven
Start by preheating your oven to 425°F (220°C). This ensures that your biscuits bake evenly and develop a lovely golden crust.
Step 2: Prepare Your Baking Sheet
Line a baking sheet with parchment paper. This will help your biscuits not stick and make cleanup a breeze.
Step 3: Combine Dry Ingredients
In a mixing bowl, whisk together the self-rising flour and any optional seasonings you want to add. This step is crucial for ensuring the even distribution of flavors throughout your biscuits.
Step 4: Add Cheese
Stir in the shredded cheese of your choice. Make sure the cheese is evenly distributed throughout the flour mixture.
Step 5: Mix in the Milk
Pour in the milk and gently stir the mixture until it forms a soft dough. Be careful not to overmix, as this can lead to tougher biscuits.
Step 6: Shape the Biscuits
Using a spoon or your hands, scoop out portions of the dough and place them onto the prepared baking sheet. Leave some space between each biscuit, as they will expand while baking.
Step 7: Bake
Place the baking sheet in the preheated oven and bake for 15-20 minutes, or until the biscuits are golden brown on top.
Step 8: Cool and Serve
Once baked, remove the biscuits from the oven and let them cool on a wire rack for a few minutes. Enjoy them warm, fresh out of the oven!
Better-for-You Options

- Use whole wheat gluten-free flour for added fiber.
- Opt for reduced-fat cheese to lower the calorie count.
- Incorporate fresh herbs like chives or parsley for added nutrients and flavor.
- Replace almond milk with oat milk for a creamier texture.
Common Errors (and Fixes)
Making Cheese Biscuits can be straightforward, but here are a few common mistakes to avoid:
- Overmixing the dough: This can lead to tough biscuits. Mix just until combined.
- Not preheating the oven: Ensure your oven is hot before placing the biscuits inside for the best rise.
- Using too much or too little milk: The dough should be soft but not sticky. Adjust the milk as needed.
- Skipping the parchment paper: This can lead to sticking and messy biscuits. Always line your baking sheet.
Shelf Life & Storage
These Cheese Biscuits are best enjoyed fresh, but they can be stored for later. Here’s how:
- Room temperature: Store in an airtight container for up to 2 days.
- Refrigerator: Keep for up to a week; reheat in the oven to restore their fluffiness.
- Freezer: Freeze for up to 3 months. Reheat directly from frozen, adding a few extra minutes to the baking time.
FAQ
Can I use other types of cheese in this recipe?
Absolutely! You can substitute cheddar, Gouda, or any cheese you prefer. Just keep in mind that different cheeses may alter the flavor and texture slightly.
Can I make the dough ahead of time?
Yes, you can prepare the dough and refrigerate it for up to 24 hours before baking. Just let it sit at room temperature for about 30 minutes before baking.
What can I serve with Cheese Biscuits?
These biscuits pair wonderfully with soups, stews, or even salads. They can also be enjoyed on their own with a little butter or jam.
Can I make these Cheese Biscuits vegan?
Yes! You can substitute the milk with a plant-based milk and use a vegan cheese alternative to make them completely vegan-friendly.
Serve with These
- Creamy Soup – A warm bowl of soup complements these biscuits perfectly.
- Vegetable Stew – A hearty stew makes for a comforting meal.
- Fresh Green Salad – The lightness of a salad balances the richness of the biscuits.
- Spicy Salsa – For a twist, try these biscuits with a zesty salsa dip.
Final Bite
These Cheese Biscuits are a delightful addition to any meal or a scrumptious snack on their own. With their fluffy texture and cheesy flavor, they are sure to impress everyone at the table. Whether you’re serving them alongside a hearty soup or enjoying them fresh from the oven, these biscuits are a must-try for any cheese lover.
As you embark on this baking adventure, remember that the joy of cooking comes not just from the final product but from the process itself. So gather your ingredients, preheat that oven, and let’s make some delicious Cheese Biscuits!

Cheese Biscuits
Ingredients
Equipment
Method
- Step 1: Preheat the Oven - Start by preheating your oven to 425°F (220°C).
- Step 2: Prepare Your Baking Sheet - Line a baking sheet with parchment paper.
- Step 3: Combine Dry Ingredients - In a mixing bowl, whisk together the self-rising flour and any optional seasonings.
- Step 4: Add Cheese - Stir in the shredded cheese until evenly distributed.
- Step 5: Mix in the Milk - Pour in the milk and gently stir until it forms a soft dough.
- Step 6: Shape the Biscuits - Scoop out portions of the dough and place them onto the prepared baking sheet.
- Step 7: Bake - Place the baking sheet in the oven and bake for 15-20 minutes.
- Step 8: Cool and Serve - Remove from the oven and let cool on a wire rack for a few minutes before enjoying.
Notes
- Use whole wheat gluten-free flour for added fiber.
- Opt for reduced-fat cheese to lower calories.
- Incorporate fresh herbs for extra flavor.