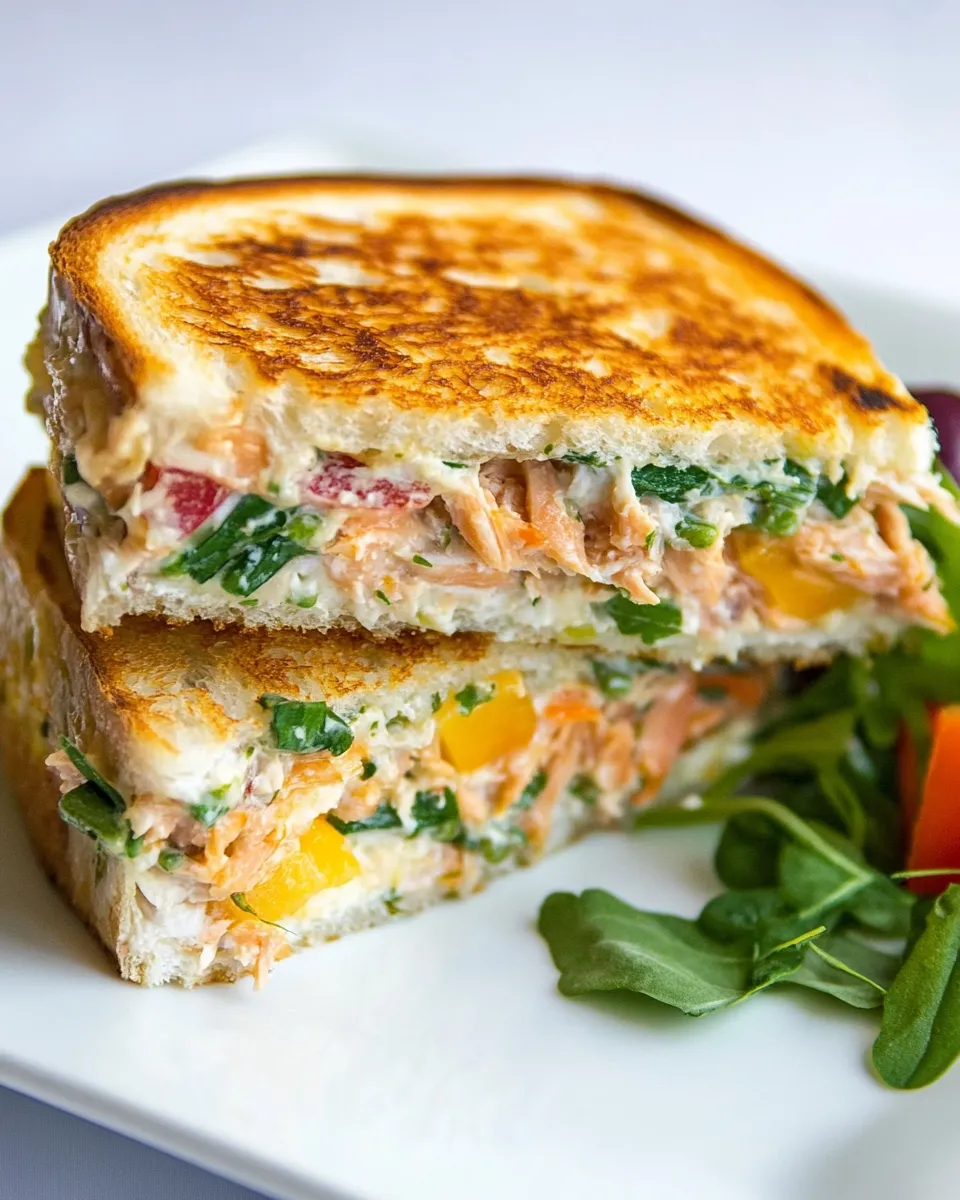
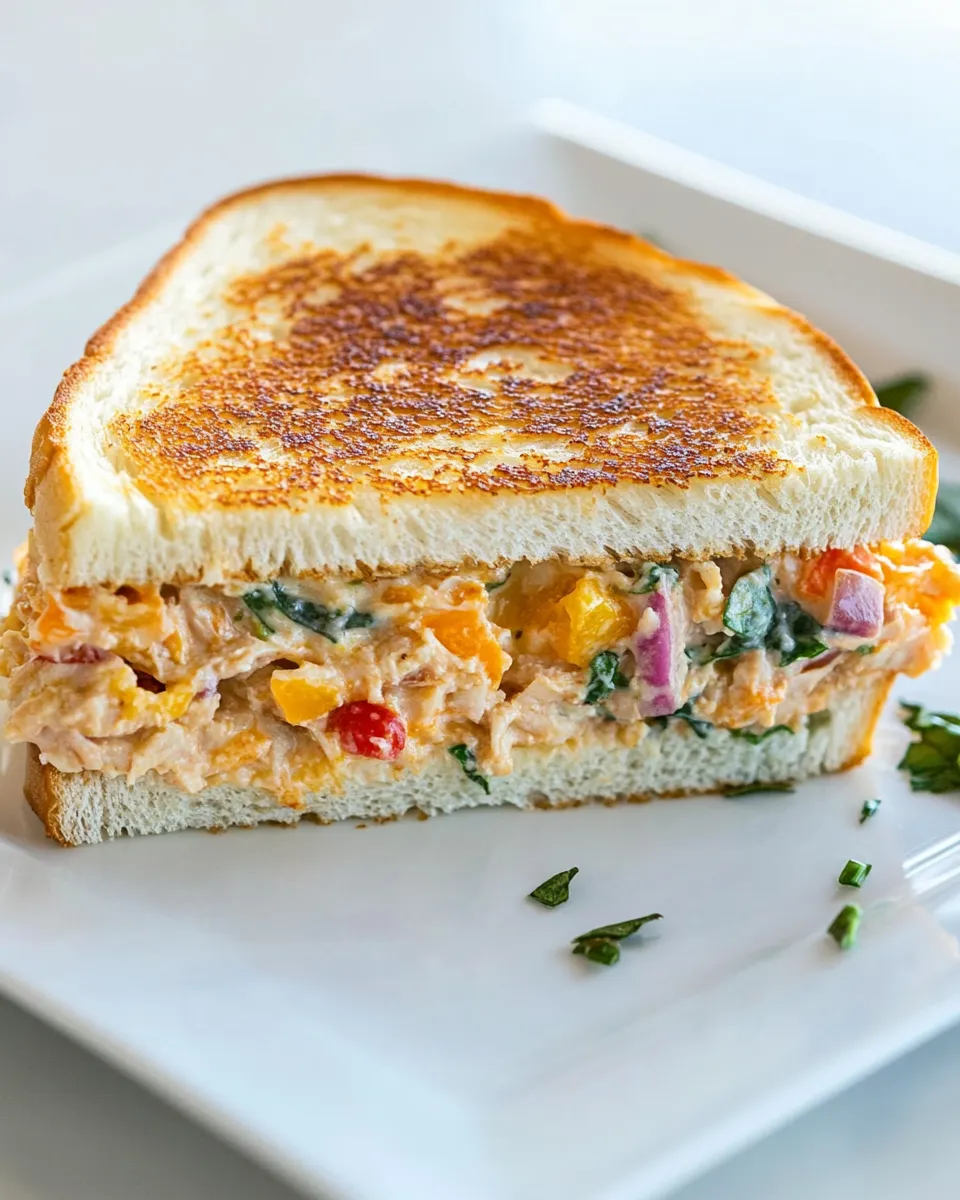
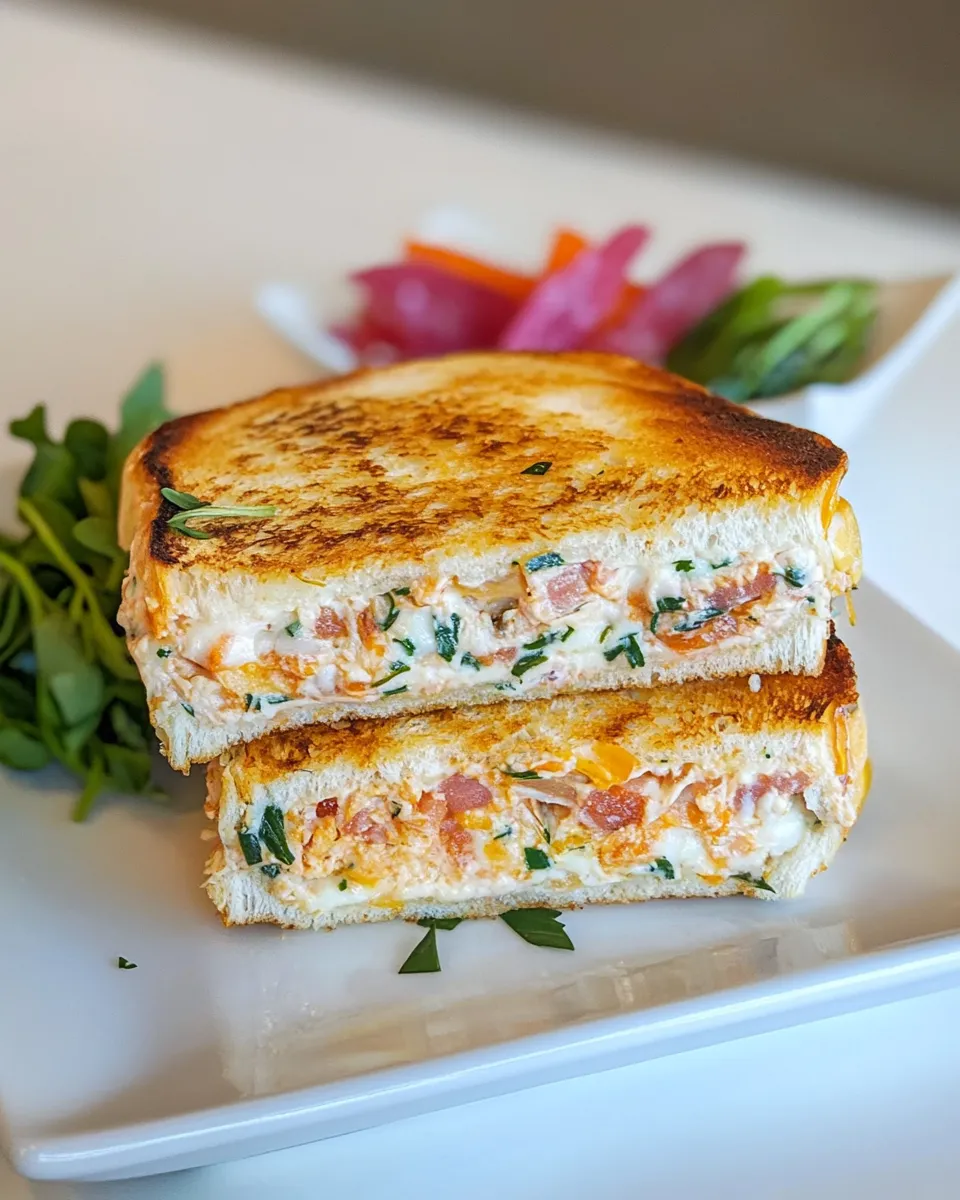
Tuna Melt
Ah, the Tuna Melt—a classic comfort food that perfectly balances creamy, savory tuna salad with the irresistible crunch of toasted bread and the gooey goodness of melted cheese. Whether you’re whipping it up for a quick lunch or treating yourself to a cozy dinner, this Tuna Melt recipe is sure to hit the spot. With just a few simple ingredients, you can create a satisfying meal that’s hearty enough to fuel your day. Let’s dive into every delicious detail!
What You’ll Love About This Recipe
This Tuna Melt is not just about the flavors; it’s about the memories that come with it. Here’s what makes this recipe a must-try:
– **Quick and Easy**: Perfect for those busy weeknights or lazy weekends.
– **Customizable**: Add your favorite veggies or spices to make it your own.
– **Comforting**: The combination of warm, melted cheese and savory tuna is pure bliss.
– **Filling**: With hearty bread and protein-packed tuna, it’s a meal that satisfies.
The Ingredient Lineup
To make this Tuna Melt, you’ll need the following ingredients:
- 1 (12 oz) can solid white tuna, well drained
- 1/3 cup mayonnaise
- 1/4 cup chopped red onion
- 1/4 cup finely chopped baby dill pickles
- 2 Tbsp minced parsley
- 1 Tbsp minced dill
- 1 Tbsp fresh lemon juice
- Salt and black pepper, to taste
- 6 hearty bread slices, such as sourdough or whole wheat bread
- 1 large tomato, sliced
- 1 cup shredded cheddar cheese, or 6 slices cheddar
- 3 Tbsp softened butter
Toolbox for This Recipe
Before you get started, gather these essential tools:
- Mixing Bowl: For combining your tuna salad ingredients.
- Spatula: To spread the tuna mixture on bread and flip your melts.
- Skillet or Griddle: For toasting your sandwiches to golden perfection.
- Knife: To slice your tomatoes and bread.
Tuna Melt Cooking Guide

Now, let’s get cooking! Follow these simple steps to create your delicious Tuna Melt.
Step 1: Prepare the Tuna Salad
In a mixing bowl, combine the drained tuna, mayonnaise, chopped red onion, dill pickles, minced parsley, minced dill, fresh lemon juice, salt, and black pepper. Gently mix until everything is well incorporated. Taste and adjust seasoning as needed.
Step 2: Assemble the Sandwiches
On a clean surface, lay out your slices of bread. Spread a generous amount of the tuna salad mixture onto three slices. Top each with sliced tomatoes and a handful of shredded cheddar cheese or a slice of cheddar cheese.
Step 3: Top and Butter
Place the remaining slices of bread on top of the tuna salad and cheese. Spread softened butter on the outside of each sandwich to ensure a crispy, golden crust.
Step 4: Cook the Tuna Melts
Heat a skillet or griddle over medium heat. Carefully place the sandwiches in the pan, buttered side down. Cook for about 4-5 minutes until golden brown. Flip the sandwiches and cook for another 4-5 minutes, pressing down gently with a spatula to help the cheese melt.
Step 5: Serve and Enjoy
Once both sides are crispy and golden, remove the sandwiches from the skillet. Let them cool for a minute before cutting in half. Serve warm and enjoy every cheesy, flavorful bite!
Low-Carb/Keto Alternatives
If you’re looking to enjoy a Tuna Melt while keeping it low-carb or keto-friendly, consider these alternatives:
- Portobello Mushrooms: Use large portobello caps as a bread substitute for a low-carb option.
- Almond Flour Bread: There are many recipes available for keto-friendly bread made with almond flour.
- Cheese Wraps: Melt cheese into a wrap shape for a creative, low-carb option.
- Salad Base: Serve the tuna salad over a bed of greens instead of bread for a refreshing meal.
Things That Go Wrong
Even the best cooks have off days! Here are some common pitfalls to avoid:
- Too Dry Tuna Salad: Make sure to mix in enough mayonnaise to keep the salad moist.
- Burnt Bread: Keep an eye on the heat; too high can burn the outside before the cheese melts.
- Uneven Cheese Melt: Press down on the sandwich with a spatula to ensure even melting.
- Sloppy Sandwiches: Don’t overstuff your Tuna Melt, or it may fall apart while cooking.
Storing, Freezing & Reheating
To keep your Tuna Melt experience enjoyable, here are tips for storage:
You can store leftover tuna salad in an airtight container in the refrigerator for up to 3 days. However, once assembled, it’s best to eat the Tuna Melt fresh. If you want to freeze the tuna salad, it can be frozen for up to 3 months. When you’re ready to enjoy it, thaw it in the refrigerator overnight and then assemble your sandwiches. For reheating, use a skillet on low heat to warm the sandwich without burning it.
Tuna Melt FAQs
Can I use a different type of fish for this recipe?
Absolutely! You can substitute canned salmon, mackerel, or even crab meat for a different flavor profile.
What can I add to the tuna salad for extra flavor?
Feel free to add ingredients like diced celery, jalapeños, or even a splash of hot sauce for a kick!
Can I make this recipe dairy-free?
Yes! Use dairy-free cheese and a vegan mayonnaise alternative to make this Tuna Melt dairy-free.
What sides pair well with Tuna Melt?
Consider serving your Tuna Melt with a side of crunchy pickle spears, fresh salad, or some crispy sweet potato fries for a complete meal.
You Might Also Like
If you enjoy this Tuna Melt, you might want to check out:
See You at the Table
There you have it—a Tuna Melt that’s not only delicious but also quick and easy to prepare. Whether you’re making it for a special occasion or just a cozy night in, this recipe will surely become a favorite. So grab your ingredients, fire up the skillet, and enjoy every bite of this comforting classic. Happy cooking!
Tuna Melt
Ingredients
Equipment
Method
- In a mixing bowl, combine the drained tuna, mayonnaise, chopped red onion, dill pickles, minced parsley, minced dill, fresh lemon juice, salt, and black pepper. Gently mix until everything is well incorporated. Taste and adjust seasoning as needed.
- On a clean surface, lay out your slices of bread. Spread a generous amount of the tuna salad mixture onto three slices. Top each with sliced tomatoes and a handful of shredded cheddar cheese or a slice of cheddar cheese.
- Place the remaining slices of bread on top of the tuna salad and cheese. Spread softened butter on the outside of each sandwich to ensure a crispy, golden crust.
- Heat a skillet or griddle over medium heat. Carefully place the sandwiches in the pan, buttered side down. Cook for about 4-5 minutes until golden brown. Flip the sandwiches and cook for another 4-5 minutes, pressing down gently with a spatula to help the cheese melt.
- Once both sides are crispy and golden, remove the sandwiches from the skillet. Let them cool for a minute before cutting in half. Serve warm and enjoy every cheesy, flavorful bite!
Notes
- Store leftover tuna salad in an airtight container in the refrigerator for up to 3 days.
- For a low-carb option, use portobello mushrooms instead of bread.
- To prevent burnt bread, monitor the heat while cooking.