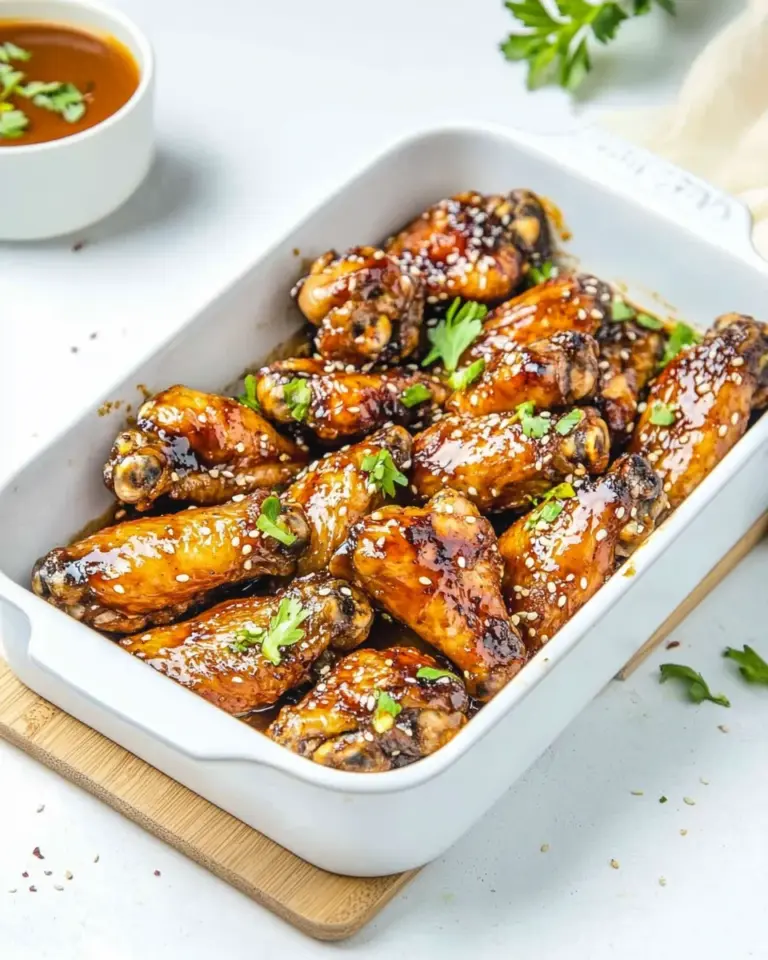
Trashed Wings
Get ready to dive into a plateful of crispy, spicy, and utterly delicious Trashed Wings! These wings are perfect for game day, a casual get-together, or simply when you crave something finger-licking good. With just a handful of ingredients and a bit of frying magic, you’ll have a crowd-pleasing dish that will have everyone coming back for more. Let’s explore how to make these tasty treats that are sure to elevate your snacking game!
Why This Trashed Wings Stands Out

Trashed Wings are not your average chicken wings; they’re a tantalizing twist on the classic that packs a serious punch in flavor. What sets these wings apart is their crispy exterior combined with the mouthwatering tang of Buffalo sauce. The key is in the frying technique that locks in moisture while creating a crunchy texture that contrasts beautifully with the fiery sauce. Whether you prefer the drumsticks or flats, these wings deliver a satisfying bite every time.
What Goes In
To create the perfect Trashed Wings, you’ll need the following ingredients:
- Vegetable oil for frying – The oil provides the necessary heat to achieve that crispy skin.
- 4 pounds bone-in, skin-on chicken wings (flats and drums separated) – Choose quality wings for the best results.
- 1 cup Buffalo sauce (store-bought or homemade) – This will be the star of the show, giving your wings that signature heat.
- Kosher salt and freshly ground black pepper to taste – Essential for enhancing the natural flavor of the wings.
Tools & Equipment Needed
To make your Trashed Wings, gather the following tools:
- Large heavy-bottomed pot or deep fryer – For frying the wings evenly.
- Thermometer – To monitor the oil temperature for frying.
- Slotted spoon – Perfect for removing the wings from the hot oil.
- Mixing bowl – For tossing the wings in sauce.
- Paper towels – To drain excess oil after frying.
Cooking Trashed Wings: The Process

Get your apron on and let’s get cooking! Follow these simple steps to create your delicious Trashed Wings.
Step 1: Prepare the Wings
Start by rinsing the chicken wings under cold water. Pat them dry thoroughly with paper towels. This step is crucial for achieving crispy wings, as excess moisture will lead to sogginess.
Step 2: Season the Wings
Place the wings in a large mixing bowl. Season them generously with kosher salt and freshly ground black pepper. Toss the wings well to ensure they are evenly coated.
Step 3: Heat the Oil
In your heavy-bottomed pot or deep fryer, pour enough vegetable oil to submerge the wings, usually about 3 to 4 inches deep. Heat the oil over medium-high heat until it reaches 375°F (190°C). Use a thermometer to check the temperature for accuracy.
Step 4: Fry the Wings
Carefully add the wings to the hot oil in batches, making sure not to overcrowd the pot. Fry them for about 8-10 minutes, or until they are golden brown and crispy. Use the slotted spoon to turn the wings halfway through cooking for even frying.
Step 5: Drain the Wings
Once the wings are cooked, remove them from the oil using the slotted spoon and place them on a plate lined with paper towels to drain excess oil. Repeat the frying process with the remaining wings.
Step 6: Toss with Buffalo Sauce
In a large mixing bowl, pour the Buffalo sauce over the hot wings. Toss them gently until they are well-coated in the sauce. The heat from the wings will help absorb the flavor of the sauce.
Step 7: Serve and Enjoy!
Transfer the sauced wings to a serving platter and enjoy them hot! Serve with your favorite dipping sauces, celery sticks, and a side of ranch or blue cheese dressing for the ultimate experience.
Texture-Safe Substitutions

If you’re looking to make some adjustments to the recipe, consider these substitutions:
- Gluten-free Buffalo sauce – Ensure the sauce you choose is gluten-free if needed.
- Air fryer method – For a healthier alternative, cook the wings in an air fryer at 375°F for about 25-30 minutes, flipping halfway.
- Olive oil – Use olive oil instead of vegetable oil for frying if desired, but keep in mind it has a lower smoke point.
Chef’s Rationale
Creating the perfect Trashed Wings is all about balancing flavors and achieving the right texture. The frying method locks in the juices of the chicken while creating a crispy outer layer. Seasoning the wings before frying allows for a burst of flavor with every bite. Tossing them in hot sauce right after frying ensures that the sauce clings beautifully to the wings, enhancing the overall taste experience. This dish is all about indulgence, simplicity, and a touch of culinary finesse!
Storing, Freezing & Reheating
If you find yourself with leftovers (which is rare!), here’s how to store them:
- Storing: Allow the wings to cool completely before transferring them to an airtight container. Store in the refrigerator for up to 3 days.
- Freezing: Place cooled wings in a freezer-safe bag or container and freeze for up to 3 months. Make sure to label the container with the date.
- Reheating: Reheat wings in the oven at 350°F (175°C) for about 10-15 minutes, or until heated through and crispy again. You can also reheat them in an air fryer for a crunchier texture.
Popular Questions
Can I use frozen chicken wings?
Yes, you can use frozen chicken wings. Just make sure to thaw them completely before frying to ensure even cooking and optimal texture.
What is the best sauce for Trashed Wings?
Buffalo sauce is the classic choice for Trashed Wings, but feel free to experiment with other sauces like BBQ, garlic parmesan, or teriyaki for a different flavor profile.
How can I make my wings extra crispy?
To achieve extra crispy wings, ensure they are thoroughly dried before frying, and avoid overcrowding the pot while frying. Frying in small batches allows for better heat circulation and crispiness.
Can I bake these wings instead of frying?
Absolutely! If you prefer baking, preheat your oven to 425°F (220°C), place the wings on a baking sheet, and bake for 40-45 minutes, flipping halfway through, until crispy and cooked through. Toss with sauce after baking.
Quick Weeknight Wins
If you love Trashed Wings, you might also enjoy these quick and delicious recipes:
- Quick Chicken Tacos – A fast and flavorful weeknight meal.
- Easy Pasta Salad – A refreshing side dish to accompany your wings.
- Spicy Sweet Potato Fries – A perfect crunchy side for your Trashed Wings.
- Quick Vegetable Stir-Fry – A healthy dish to complement your meal.
Next Steps
Now that you’re armed with the knowledge to create the ultimate Trashed Wings, it’s time to gather your ingredients and get cooking! Don’t forget to invite friends over; these wings are best enjoyed shared. Capture your culinary adventure, snap a photo, and don’t hesitate to share your experience and variations with the world. Happy cooking!
Indulging in Trashed Wings is more than just enjoying a meal; it’s about savoring each bite of crispy, spicy goodness that brings people together. Whether you’re cheering for your favorite team or enjoying a cozy night in, these wings are sure to deliver satisfaction and smiles all around.

Trashed Wings
Ingredients
Equipment
Method
- Start by rinsing the chicken wings under cold water. Pat them dry thoroughly with paper towels.
- Place the wings in a large mixing bowl. Season them generously with kosher salt and freshly ground black pepper. Toss well to ensure they are evenly coated.
- In your heavy-bottomed pot or deep fryer, pour enough vegetable oil to submerge the wings, about 3 to 4 inches deep. Heat the oil over medium-high heat until it reaches 375°F (190°C).
- Carefully add the wings to the hot oil in batches, making sure not to overcrowd the pot. Fry for about 8-10 minutes, or until golden brown and crispy.
- Remove the wings from the oil using a slotted spoon and place them on a plate lined with paper towels to drain excess oil.
- In a large mixing bowl, pour the Buffalo sauce over the hot wings. Toss gently until well-coated.
- Transfer the sauced wings to a serving platter and enjoy hot!
Notes
- For extra crispy wings, ensure they are thoroughly dried before frying.
- Store leftovers in an airtight container for up to 3 days.
- Reheat in the oven at 350°F (175°C) for 10-15 minutes for best results.