Tiramisu Milkshake Recipe
If you’re looking for a delightful twist on a classic dessert, you’ve landed in the right place. This Tiramisu Milkshake Recipe combines all the delicious flavors of traditional tiramisu into a creamy, dreamy milkshake that’s perfect for any occasion. With rich vanilla ice cream, a hint of espresso, and just the right touch of cocoa powder, this milkshake is sure to indulge your sweet tooth. Whether you’re celebrating a special occasion or simply treating yourself after a long day, this milkshake is a luxurious way to enjoy your favorite dessert in a new form.
Why This Recipe is a Keeper

This Tiramisu Milkshake Recipe is not just a drink; it’s an experience. Here are a few reasons why you’ll want to keep this recipe on hand:
– **Quick and Easy**: It takes only a few minutes to whip up this decadent shake, making it an ideal choice for when you want something delicious without the fuss.
– **Versatile**: This recipe can be easily adapted for different tastes or dietary needs. You can play around with the ingredients to make it your own.
– **Crowd-Pleaser**: Tiramisu is a beloved dessert, and combining it with a milkshake makes it even more enjoyable. Perfect for parties or a cozy night in!
Gather These Ingredients
To make your Tiramisu Milkshake, you’ll need the following ingredients:
- 4 scoops Breyer’s Natural Vanilla Ice Cream
- 2 teaspoons decaf espresso powder
- 1 cup milk (whole or your preferred type)
- Whipped cream for topping
- Cocoa powder for dusting
- 4 lady fingers (store-bought or homemade)
Tools & Equipment Needed
Before you start your milkshake adventure, gather these essential tools:
- Blender: A high-powered blender works best for a smooth texture.
- Measuring cups and spoons: For accurate ingredient measurements.
- Glass or milkshake cup: To serve your delicious creation.
- Spoon or spatula: For scraping down the sides of the blender.
Method: Tiramisu Milkshake Recipe

Now that you have everything ready, let’s dive into the step-by-step process of making your Tiramisu Milkshake.
Step 1: Prepare the Espresso
In a small bowl, combine the decaf espresso powder with a few tablespoons of hot water to dissolve it. This will enhance the flavor of your milkshake.
Step 2: Blend the Ingredients
In your blender, add the 4 scoops of Breyer’s Natural Vanilla Ice Cream, the prepared espresso, and the cup of milk. Blend on medium speed until everything is well combined and smooth.
Step 3: Add Lady Fingers
Break the lady fingers into smaller pieces and add them to the blender. Pulse the mixture a couple of times until the lady fingers are incorporated, but still slightly chunky for texture.
Step 4: Serve the Milkshake
Pour the milkshake into your serving glass or cup. Don’t be afraid to fill it generously!
Step 5: Top It Off
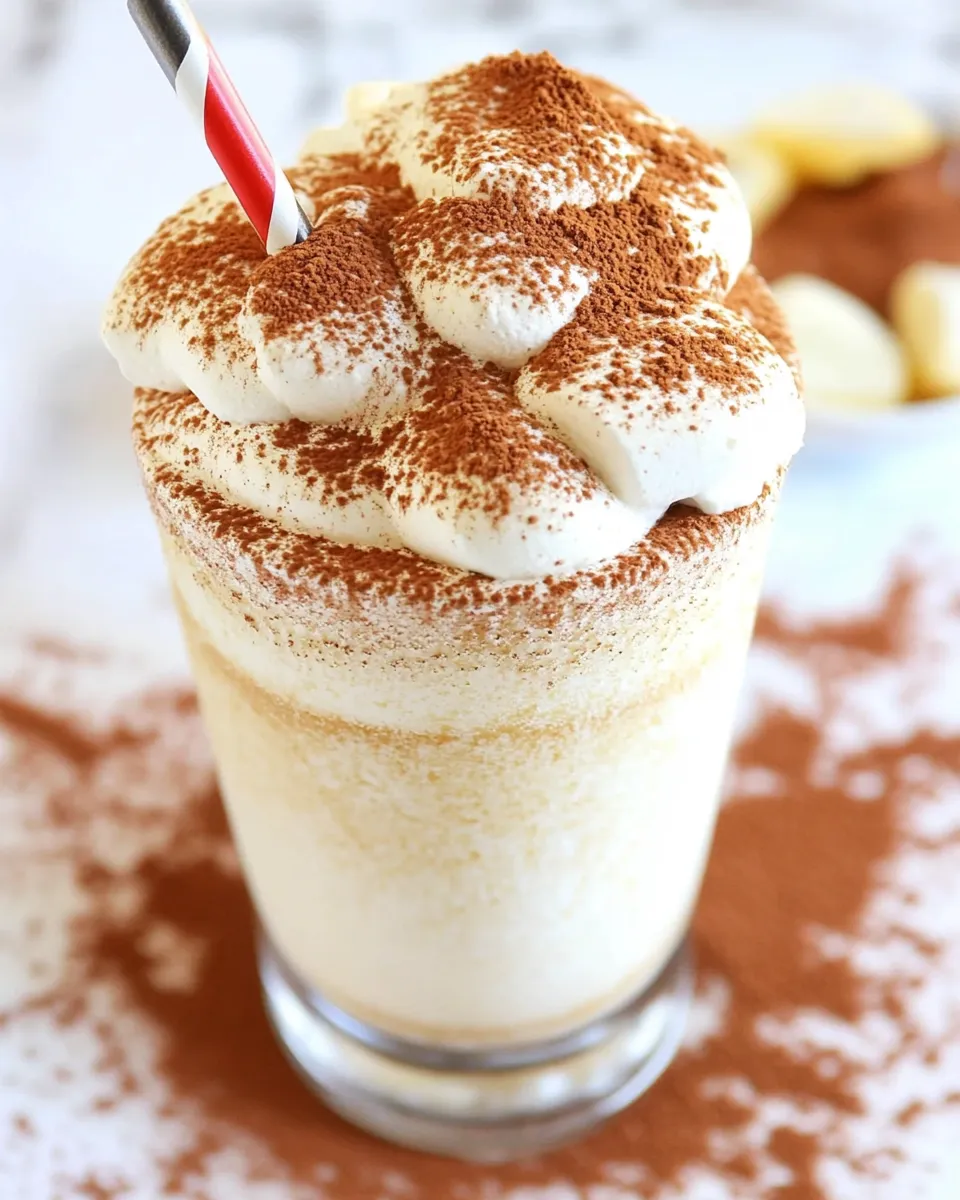
Add a generous dollop of whipped cream on top. Sprinkle cocoa powder over the whipped cream for that signature tiramisu flavor.
Step 6: Garnish (Optional)
If you’re feeling fancy, you can garnish your milkshake with additional pieces of lady fingers or chocolate shavings for extra flair.
Low-Carb/Keto Alternatives

If you’re looking to enjoy this Tiramisu Milkshake while watching your carb intake, here are some alternatives you can try:
- Use sugar-free vanilla ice cream or a homemade version using heavy cream and a low-carb sweetener.
- Replace regular milk with unsweetened almond milk or coconut milk.
- Opt for sugar-free whipped cream for the topping.
- Consider using a sugar substitute in place of the lady fingers, such as a keto-friendly baking recipe for a low-carb version.
Chef’s Rationale
Creating this Tiramisu Milkshake was all about capturing the essence of classic tiramisu—its coffee flavor, creamy texture, and cocoa finish. The use of Breyer’s Natural Vanilla Ice Cream provides a rich base that mimics the mascarpone in traditional tiramisu. The decaf espresso powder gives that authentic coffee kick without the jitters, making it a perfect treat any time of day. The addition of lady fingers not only adds texture but also brings the classic tiramisu flavor to your milkshake. This recipe is a fun way to enjoy a beloved dessert in a new and exciting way.
Storage & Reheat Guide
While this Tiramisu Milkshake is best enjoyed fresh, here are some tips for storage:
- If you have leftovers, store them in an airtight container in the freezer. However, be aware that the texture may change once frozen.
- To enjoy later, let the shake sit at room temperature for a few minutes before blending again to restore its creamy consistency.
- Refrain from storing the whipped cream separately, as it may lose its texture and fluffiness.
Frequently Asked Questions
Can I make this milkshake dairy-free?
Yes! You can substitute the vanilla ice cream with a dairy-free version and use almond milk or coconut milk instead of regular milk.
How can I make this milkshake more chocolatey?
Add a tablespoon of chocolate syrup or use chocolate ice cream to enhance the chocolate flavor in your Tiramisu Milkshake.
Can I use regular espresso instead of decaf?
Absolutely! If you prefer a stronger coffee flavor and don’t mind caffeine, feel free to use regular espresso.
What other toppings can I use for this milkshake?
Besides whipped cream and cocoa powder, consider adding chocolate shavings, crushed nuts, or a drizzle of caramel sauce for extra indulgence.
Explore More
If you enjoyed this Tiramisu Milkshake Recipe, you might also love these delicious treats:
Serve & Enjoy
Your Tiramisu Milkshake is ready to be enjoyed! Serve it alongside your favorite dessert or as a sweet treat on its own. Don’t forget to take a moment to savor each sip of this creamy concoction. With its rich flavors and delightful textures, this milkshake is sure to be a hit with family and friends alike.
Now that you have this Tiramisu Milkshake Recipe in your repertoire, you can enjoy the flavors of tiramisu in a new, refreshing way. Remember to share this delightful recipe with your loved ones, and let the indulgence begin!
Tiramisu Milkshake Recipe
Ingredients
Equipment
Method
- In a small bowl, combine the decaf espresso powder with a few tablespoons of hot water to dissolve it.
- In your blender, add the 4 scoops of Breyer's Natural Vanilla Ice Cream, the prepared espresso, and the cup of milk. Blend on medium speed until well combined and smooth.
- Break the lady fingers into smaller pieces and add them to the blender. Pulse the mixture a couple of times until incorporated, but still slightly chunky.
- Pour the milkshake into your serving glass or cup.
- Add a generous dollop of whipped cream on top. Sprinkle cocoa powder over the whipped cream.
- Optionally, garnish with additional lady fingers or chocolate shavings.
Notes
- For a dairy-free version, use dairy-free ice cream and almond or coconut milk.
- Add chocolate syrup for a richer chocolate flavor.
- Store leftovers in an airtight container, but texture may change when frozen.