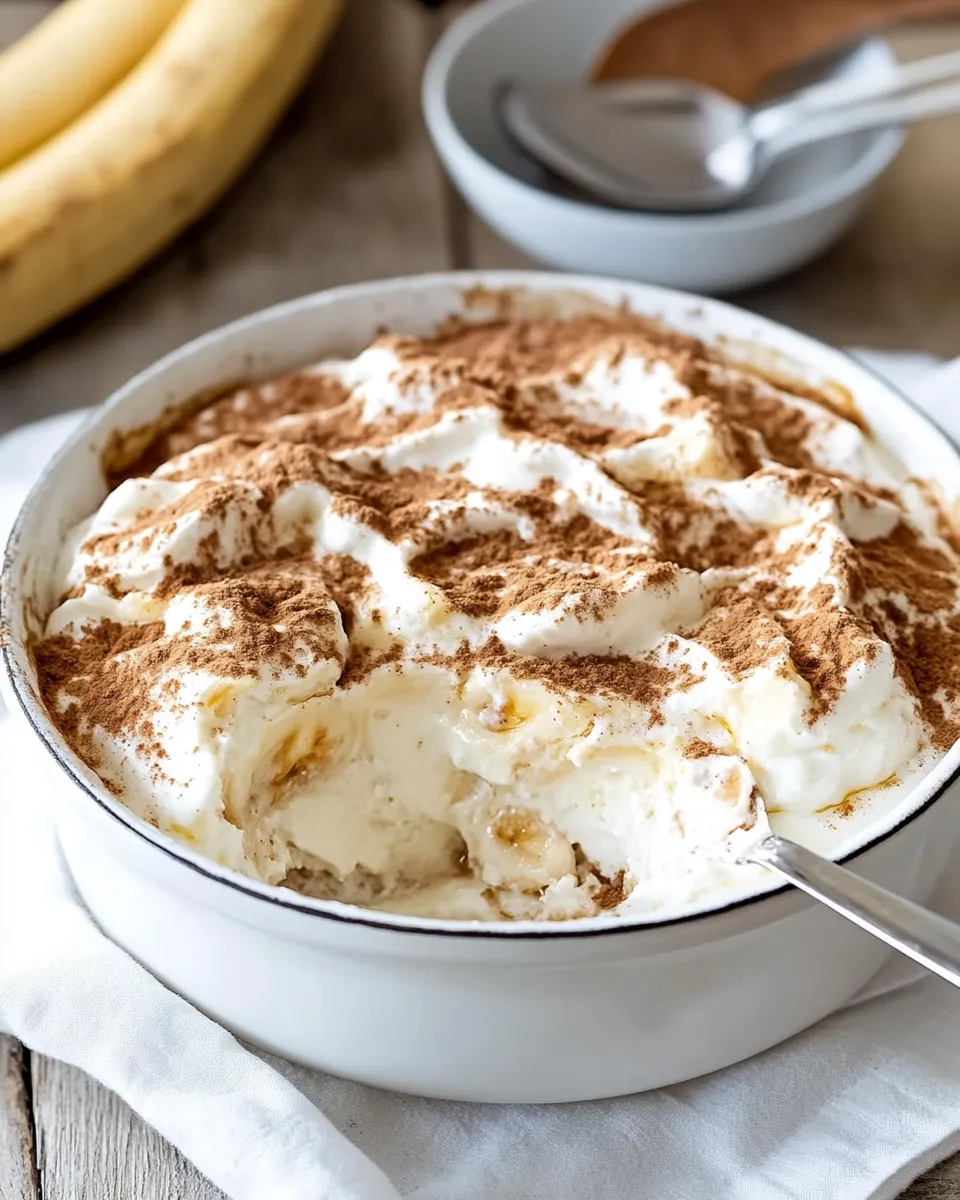
The Best Homemade Banana Pudding Recipe
If you’re looking for a dessert that evokes nostalgia and delights the taste buds, look no further than The Best Homemade Banana Pudding Recipe. This creamy, dreamy pudding layered with bananas and vanilla wafers is a classic that never fails to impress. Whether it’s a family gathering or a casual weeknight treat, this recipe is sure to become a staple in your dessert repertoire. With a perfect blend of flavors and textures, it’s the kind of dessert that brings smiles all around. Let’s dive into the details!
Why It Deserves a Spot
The Best Homemade Banana Pudding Recipe deserves a spot on your dessert table for several reasons. First, it’s incredibly easy to make, requiring simple ingredients that you might already have on hand. Second, the combination of fresh bananas, creamy pudding, and crunchy vanilla wafers creates a delightful contrast that is hard to resist. Finally, it’s a make-ahead dessert, allowing you to prepare it in advance and serve it chilled – perfect for busy hosts!
What to Buy
To create this delicious banana pudding, you’ll need the following ingredients:
- 6 large eggs (yolks and whites separated)
- 1 cup granulated sugar
- 1/3 cup all-purpose flour
- 4 cups whole milk
- A pinch of sea salt
- 1 teaspoon vanilla extract
- 1 box of vanilla wafers
- 4 large ripe bananas, peeled and thinly sliced
For the whipped cream, you can either make your own or use store-bought for convenience.
What’s in the Gear List
To make the process smooth, gather the following kitchen tools:
- Mixing bowls – for separating eggs and mixing ingredients.
- Whisk – to combine ingredients thoroughly and beat egg whites.
- Medium saucepan – for cooking the pudding mixture.
- Spatula – for folding ingredients and transferring the pudding.
- 9×13 inch baking dish or serving bowl – for layering the pudding, bananas, and wafers.
- Electric mixer – for whipping cream, if you choose to make it homemade.
The Best Homemade Banana Pudding Recipe — Do This Next
Now that you have everything you need, let’s get started with the step-by-step process.
Step 1: Prepare the Pudding Base
In a medium saucepan, combine the sugar, flour, and sea salt. Gradually whisk in the milk, ensuring there are no lumps. Place the saucepan over medium heat and cook the mixture, stirring constantly until it thickens and bubbles. This should take about 10 minutes.
Step 2: Temper the Egg Yolks
In a separate bowl, whisk the egg yolks until they are smooth. Once the pudding base is thickened, slowly add about a cup of the hot mixture to the egg yolks, whisking constantly. This process is called tempering, and it prevents the eggs from scrambling.
Step 3: Combine and Cook
Pour the tempered egg yolk mixture back into the saucepan with the remaining pudding. Continue to cook on medium heat, stirring for an additional 2-3 minutes until it is thick and creamy. Remove from heat and stir in the vanilla extract.
Step 4: Prepare the Egg Whites
In a clean bowl, beat the egg whites until stiff peaks form. Gently fold the whipped egg whites into the pudding mixture. This step is crucial as it adds a light, airy texture to the pudding.
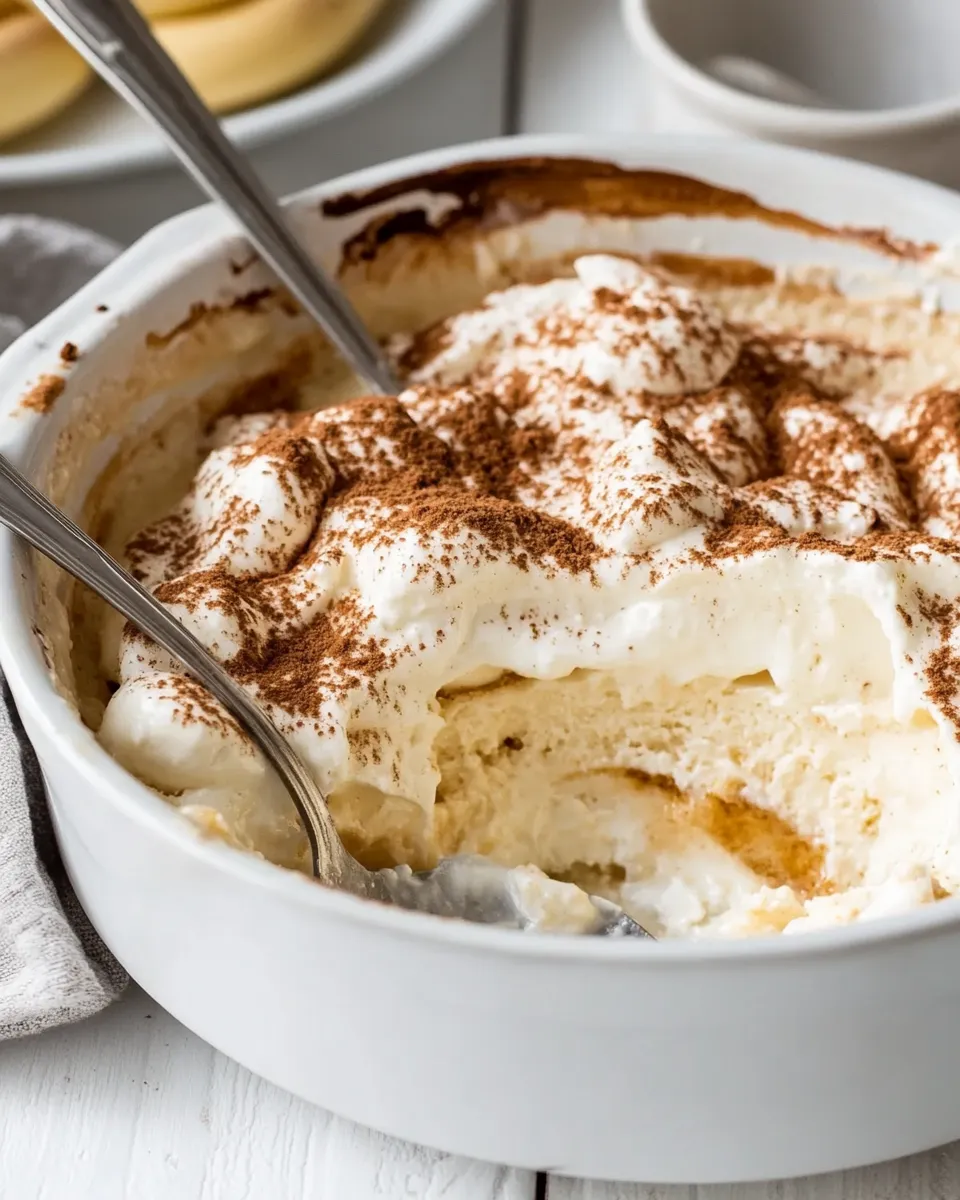
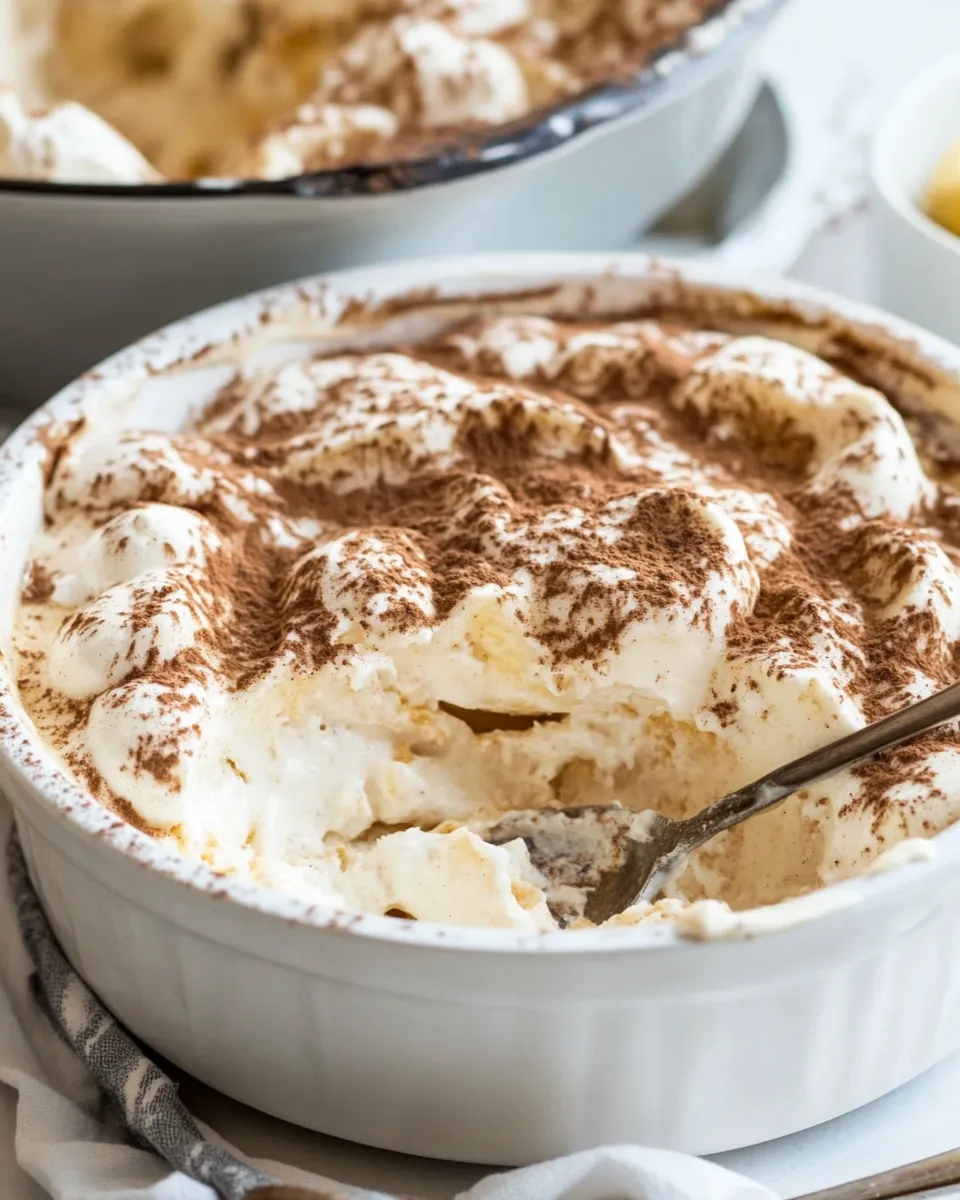
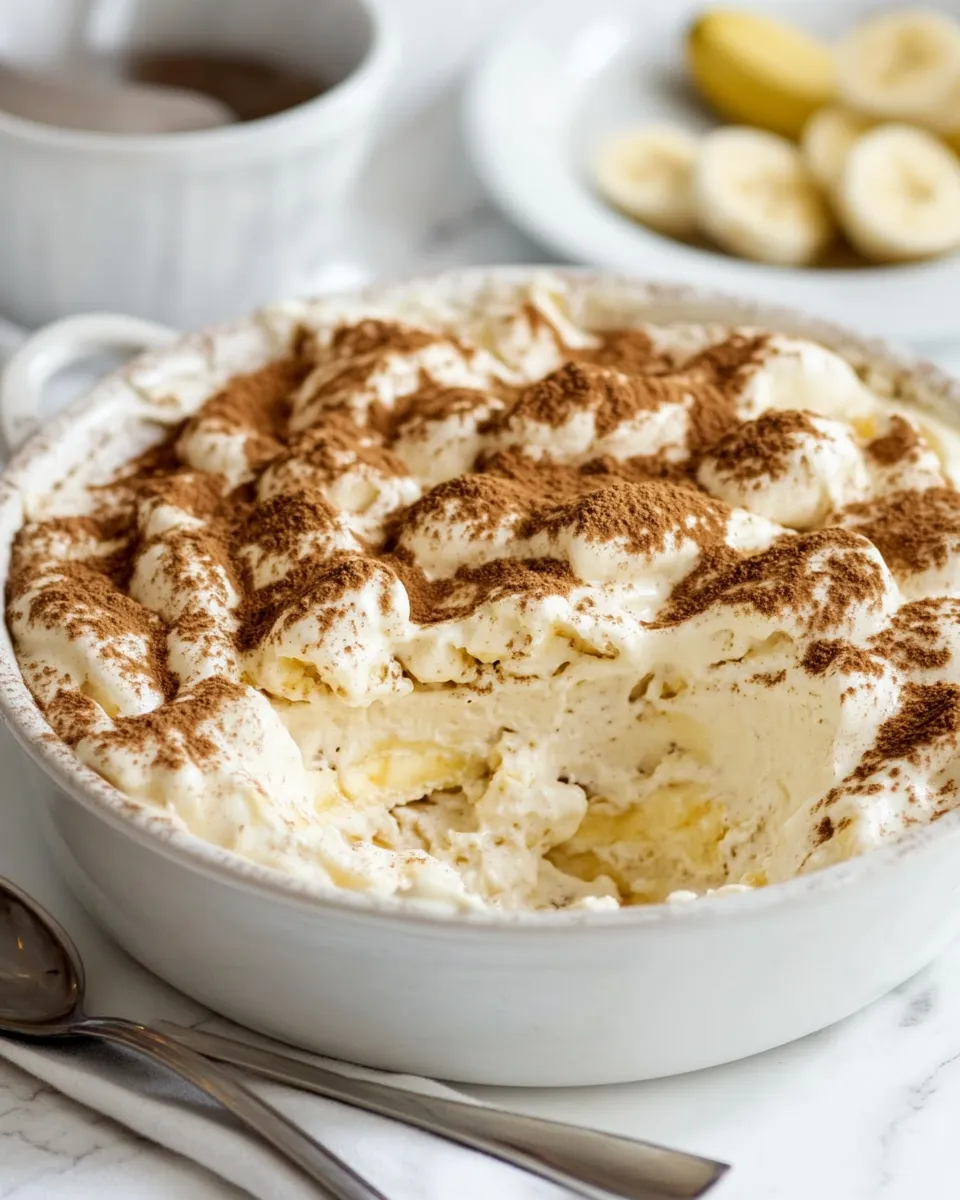
Step 5: Layer the Ingredients
In your baking dish or serving bowl, place a layer of vanilla wafers at the bottom. Follow this with a layer of sliced bananas, then pour some of the pudding over the top. Repeat the layers until all the ingredients are used, finishing with a layer of pudding on top.
Step 6: Chill and Serve
Cover the dish with plastic wrap and refrigerate for at least 4 hours, or overnight for best results. Just before serving, top with a generous dollop of freshly whipped cream.
Allergy-Friendly Substitutes
If you need to make this recipe allergy-friendly, here are some substitutes you can try:
- Eggs: Use a commercial egg replacer or flaxseed meal mixed with water as an alternative for the eggs.
- Milk: Substitute whole milk with almond milk, coconut milk, or oat milk for a dairy-free version.
- Flour: Use a gluten-free all-purpose flour blend for a gluten-free option.
Little Things that Matter
Here are a few tips to keep in mind while making The Best Homemade Banana Pudding Recipe:
- Use ripe bananas for the best flavor and sweetness.
- Do not slice the bananas too far in advance, as they can brown quickly.
- For added flavor, consider adding a layer of crushed pineapple or a sprinkle of cinnamon.
- For an extra indulgent touch, consider drizzling some caramel sauce over the whipped cream before serving.
Best Ways to Store
To keep your banana pudding fresh and delicious:
- Store in the refrigerator for up to 3 days.
- Keep the whipped cream separate until ready to serve for optimal freshness.
- If you anticipate leftovers, consider layering only what you plan to eat right away to avoid soggy wafers.
The Best Homemade Banana Pudding Recipe FAQs
Can I make banana pudding in advance?
Absolutely! In fact, making it a day ahead allows the flavors to meld beautifully. Just make sure to cover it well to keep it fresh.
What can I use instead of vanilla wafers?
If you can’t find vanilla wafers, you can use graham crackers or shortbread cookies as a tasty alternative.
How do I prevent the bananas from browning?
To prevent browning, you can toss the sliced bananas in a little lemon juice before layering them in the pudding.
Can I freeze banana pudding?
While it’s not ideal to freeze banana pudding, you can freeze the pudding base without the bananas and wafers. Just be aware that texture may change upon thawing.
More Recipes You’ll Love
If you enjoyed this recipe, here are some more delicious treats to try:
Let’s Eat
There you have it, the ultimate guide to making The Best Homemade Banana Pudding Recipe. This dessert is sure to be a hit, providing comfort and joy with every spoonful. So gather your ingredients, follow the steps, and prepare to savor the delightful taste of homemade banana pudding that will have everyone coming back for seconds. Happy baking!
The Best Homemade Banana Pudding Recipe
Ingredients
Equipment
Method
- In a medium saucepan, combine the sugar, flour, and sea salt. Gradually whisk in the milk, ensuring there are no lumps. Place the saucepan over medium heat and cook the mixture, stirring constantly until it thickens and bubbles. This should take about 10 minutes.
- In a separate bowl, whisk the egg yolks until they are smooth. Once the pudding base is thickened, slowly add about a cup of the hot mixture to the egg yolks, whisking constantly.
- Pour the tempered egg yolk mixture back into the saucepan with the remaining pudding. Continue to cook on medium heat, stirring for an additional 2-3 minutes until it is thick and creamy. Remove from heat and stir in the vanilla extract.
- In a clean bowl, beat the egg whites until stiff peaks form. Gently fold the whipped egg whites into the pudding mixture.
- In your baking dish or serving bowl, place a layer of vanilla wafers at the bottom. Follow this with a layer of sliced bananas, then pour some of the pudding over the top. Repeat the layers until all the ingredients are used, finishing with a layer of pudding on top.
- Cover the dish with plastic wrap and refrigerate for at least 4 hours, or overnight for best results. Just before serving, top with a generous dollop of freshly whipped cream.
Notes
- Use ripe bananas for the best flavor and sweetness.
- Do not slice the bananas too far in advance to prevent browning.
- Consider adding a layer of crushed pineapple or a sprinkle of cinnamon for added flavor.
- Drizzle caramel sauce over the whipped cream for an indulgent touch.