Sweet and Sour Sticky Thai Boneless Oven Baked Chicken Wings
Imagine sinking your teeth into a batch of Sweet and Sour Sticky Thai Boneless Oven Baked Chicken Wings that are crispy on the outside, tender on the inside, and coated in a luscious sauce that perfectly balances sweet and tangy flavors. This dish is not only a crowd-pleaser but also a healthier alternative to traditional fried wings, as they are baked to golden perfection. Perfect for game day, family gatherings, or a cozy night in, this recipe will have everyone coming back for seconds.
Why It Deserves a Spot
These Sweet and Sour Sticky Thai Boneless Oven Baked Chicken Wings offer an explosion of flavors, thanks to the sweet Thai chili sauce and a hint of lime that adds brightness to every bite. The addition of peanut butter provides a creamy texture, while the panko breadcrumbs ensure that each piece is delightfully crispy. With a quick marinade in buttermilk and a straightforward baking process, this recipe proves that you don’t need to sacrifice flavor for ease. Trust me, these wings will become a staple in your recipe repertoire!
Ingredient List
- 1 pound boneless chicken tenderloins or breasts, cut into nugget-sized pieces
- 3/4 cup buttermilk
- 1 1/2 cups panko breadcrumbs
- 2 tablespoons whole wheat flour or cornmeal
- 1 cup sweet Thai chili sauce
- 1/3 cup soy sauce
- 1/4 cup dark brown sugar
- 1 tablespoon peanut butter
- 1 tablespoon tomato paste
- 1/2 cup apple juice
- 1/4 cup rice vinegar
- 1 lime, juiced
- 1 teaspoon fish sauce (optional, but it adds great flavor)
- 2 cloves garlic, minced or grated
- 1 tablespoon fresh ginger, grated
- 1/4 teaspoon crushed red pepper
- 1/4 teaspoon pepper
- 1 tablespoon cornstarch mixed with 1 tablespoon cold water (optional)
- 1/4 cup fresh cilantro, chopped, plus more for garnish
- Chopped cashews, for garnish
Essential Tools for Success
- Large mixing bowl – for marinating the chicken.
- Sheet pan – to bake the chicken wings evenly.
- Whisk – for mixing the sauce ingredients smoothly.
- Measuring cups and spoons – to ensure accurate measurements.
- Cooking spray or parchment paper – for easy clean-up.
Sweet and Sour Sticky Thai Boneless Oven Baked Chicken Wings: From Prep to Plate
Step 1: Marinate the Chicken
Begin by placing the nugget-sized pieces of chicken into a large mixing bowl. Pour the buttermilk over the chicken, ensuring that each piece is well-coated. Cover the bowl with plastic wrap and let it marinate in the refrigerator for at least 30 minutes. This step is crucial for tenderizing the chicken and infusing it with flavor.
Step 2: Prepare the Coating
While the chicken is marinating, preheat your oven to 400°F (200°C). In a separate bowl, combine the panko breadcrumbs and whole wheat flour (or cornmeal). Mix well to ensure that the coating is evenly distributed.
Step 3: Coat the Chicken
Once the chicken has marinated, remove it from the refrigerator. Using tongs, lift each piece of chicken out of the buttermilk, allowing any excess to drip off. Dredge the chicken pieces in the panko mixture, ensuring they are fully coated. Place the coated chicken nuggets on a sheet pan lined with parchment paper or lightly greased with cooking spray.
Step 4: Bake the Chicken
Place the sheet pan in the preheated oven and bake for 20-25 minutes or until the chicken is golden brown and cooked through. Remember to flip the chicken halfway through the baking time for even cooking.
Step 5: Make the Sauce
While the chicken is baking, prepare the sauce. In a medium saucepan over medium heat, combine the sweet Thai chili sauce, soy sauce, dark brown sugar, peanut butter, tomato paste, apple juice, rice vinegar, lime juice, fish sauce (if using), garlic, ginger, crushed red pepper, and pepper. Stir the mixture until the sugar and peanut butter have dissolved and the sauce is smooth. If you prefer a thicker sauce, mix the cornstarch with cold water and add it to the sauce, stirring until it thickens.
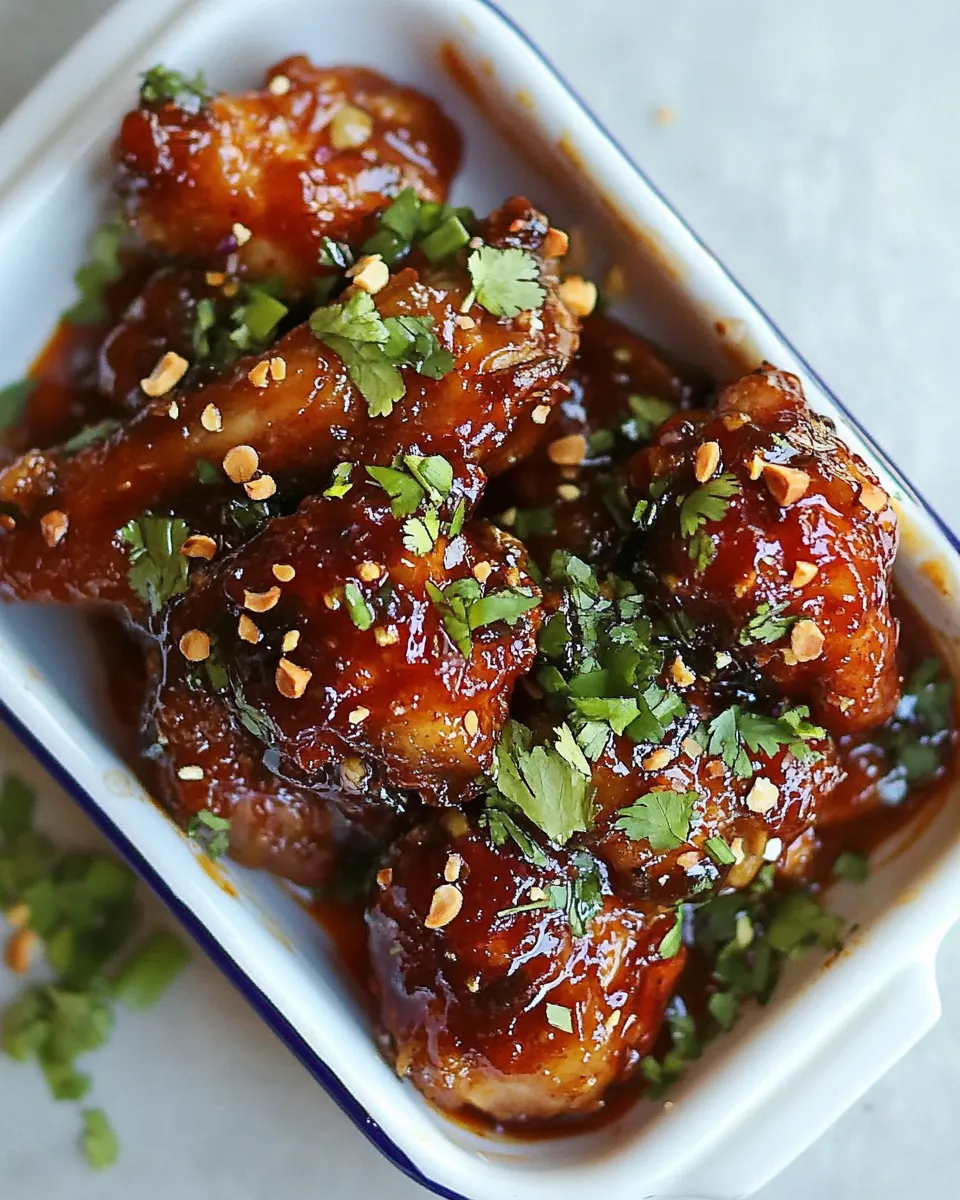
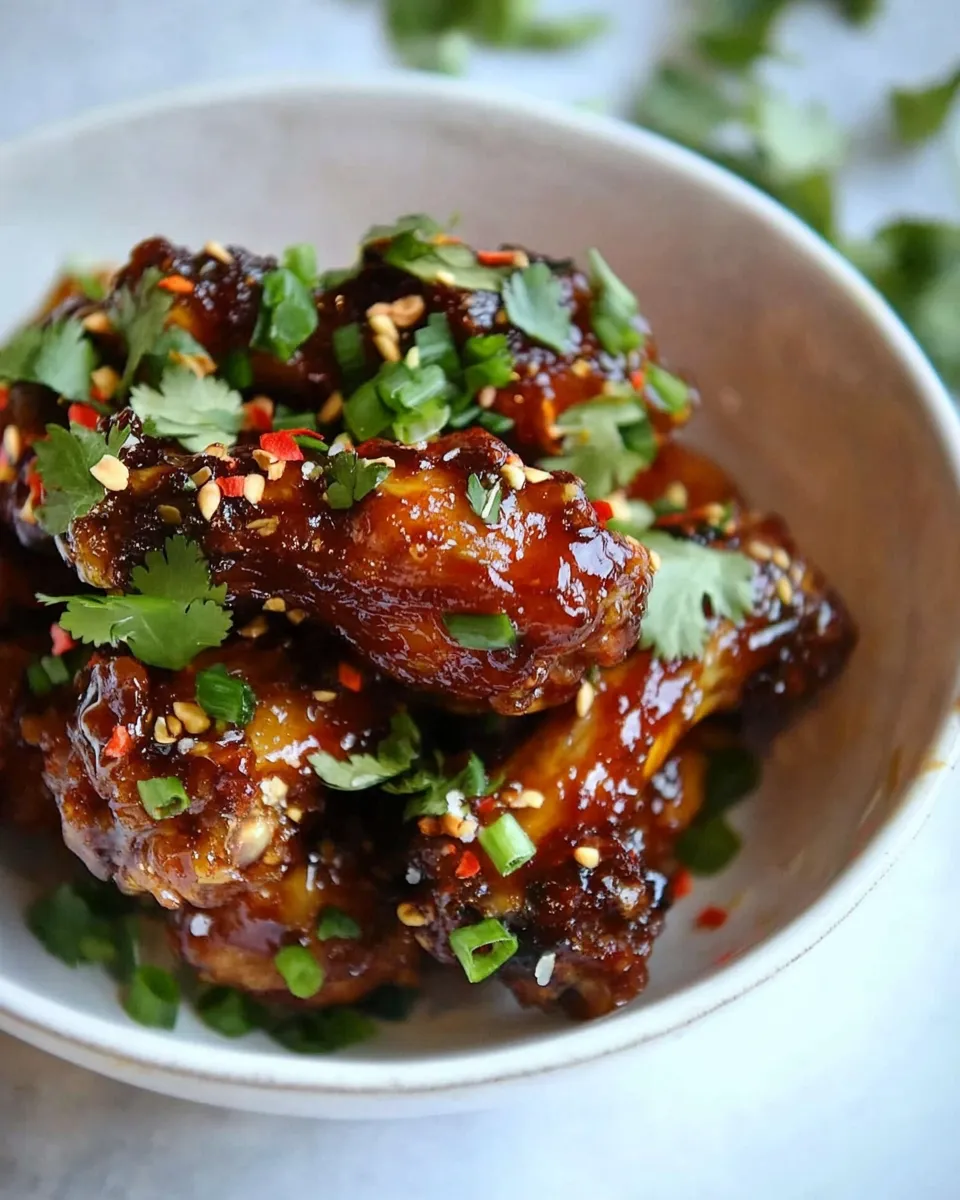
Step 6: Glaze the Chicken
Once the chicken wings are done baking, remove them from the oven and drizzle the sauce over the wings while they are still hot. Toss gently to ensure each piece is coated in that irresistible sweet and sour goodness.
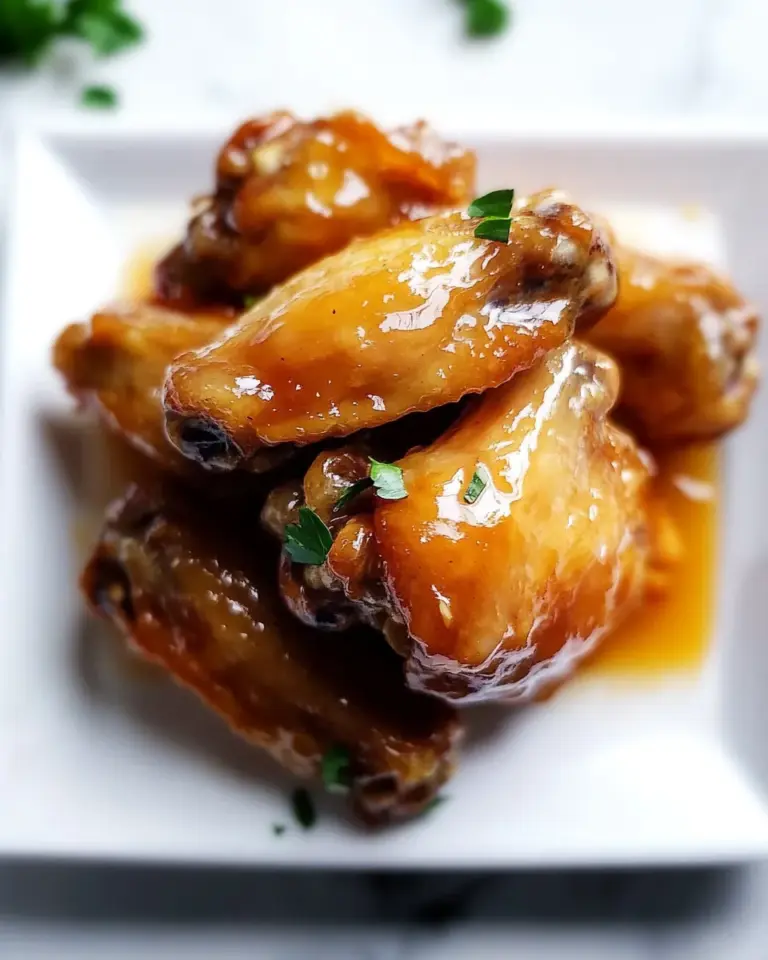
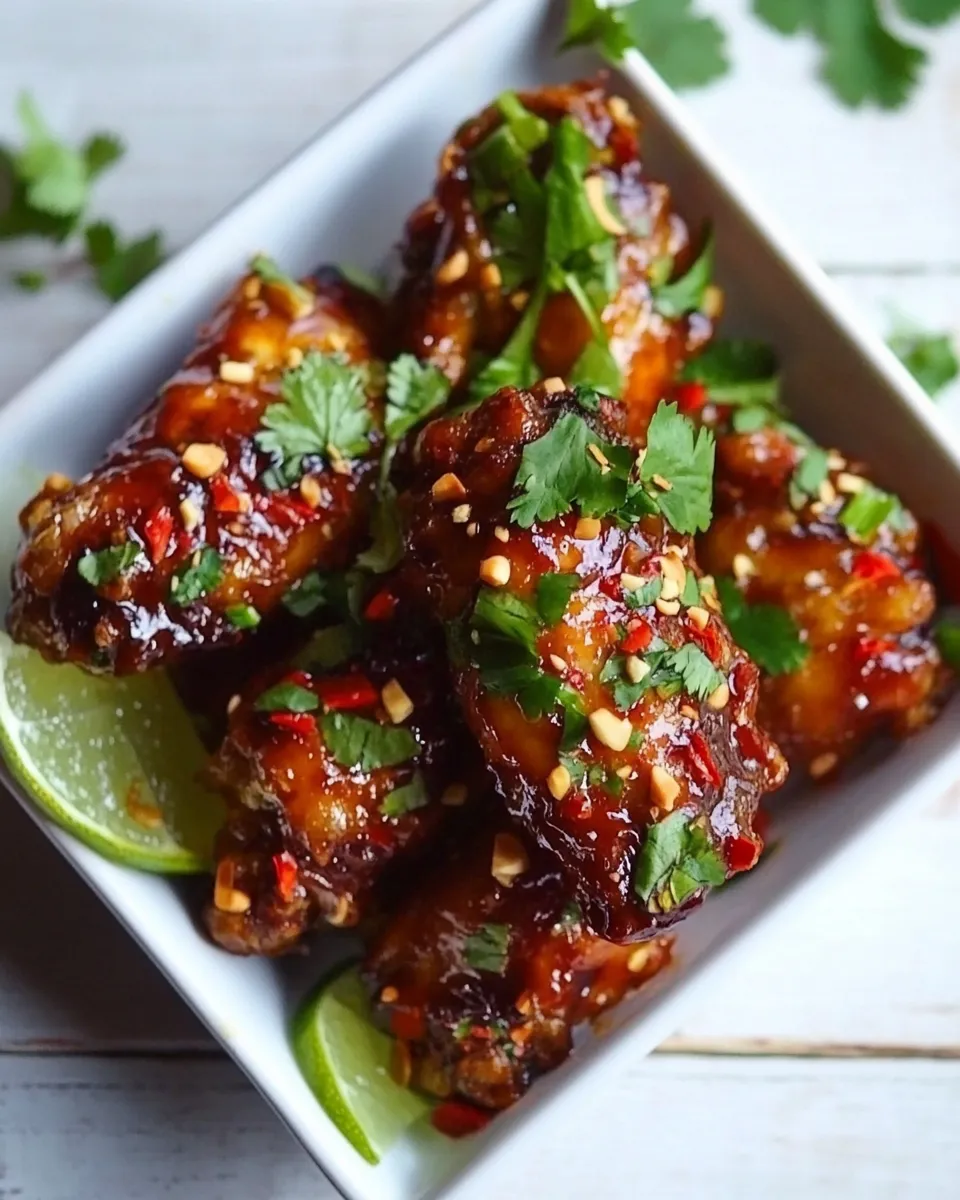
Step 7: Serve and Garnish
Transfer the glazed chicken wings to a serving platter. Sprinkle chopped cilantro and cashews on top for a burst of color and crunch. Serve immediately and watch them disappear!
Make It Year-Round

- Serve as an appetizer during holiday gatherings or parties.
- Pair with a fresh salad for a light summer meal.
- Make them for game day and impress your friends.
- Enjoy as a comforting dinner option any night of the week.
Mistakes That Ruin Sweet and Sour Sticky Thai Boneless Oven Baked Chicken Wings
To ensure your Sweet and Sour Sticky Thai Boneless Oven Baked Chicken Wings turn out perfectly, avoid these common mistakes:
- Skipping the marination step can lead to dry chicken. Take the time to let it soak in buttermilk.
- Not preheating the oven may result in uneven cooking.
- Overcrowding the baking sheet can cause steaming instead of crisping.
- Neglecting to flip the chicken halfway through baking can lead to uneven browning.
Storing Tips & Timelines
If you have any leftovers (though I doubt you will!), here’s how to store them:
- Allow the chicken wings to cool completely.
- Store them in an airtight container in the refrigerator for up to 3 days.
- Reheat in the oven at 350°F (175°C) for about 10-15 minutes to restore their crispiness.
Common Questions
Can I use regular chicken wings instead of boneless chicken?
Absolutely! Just adjust the cooking time accordingly, as bone-in wings may take longer to cook through.
Can I make the sauce ahead of time?
Yes! You can prepare the sauce in advance and store it in an airtight container in the refrigerator for up to one week.
What can I serve with these chicken wings?
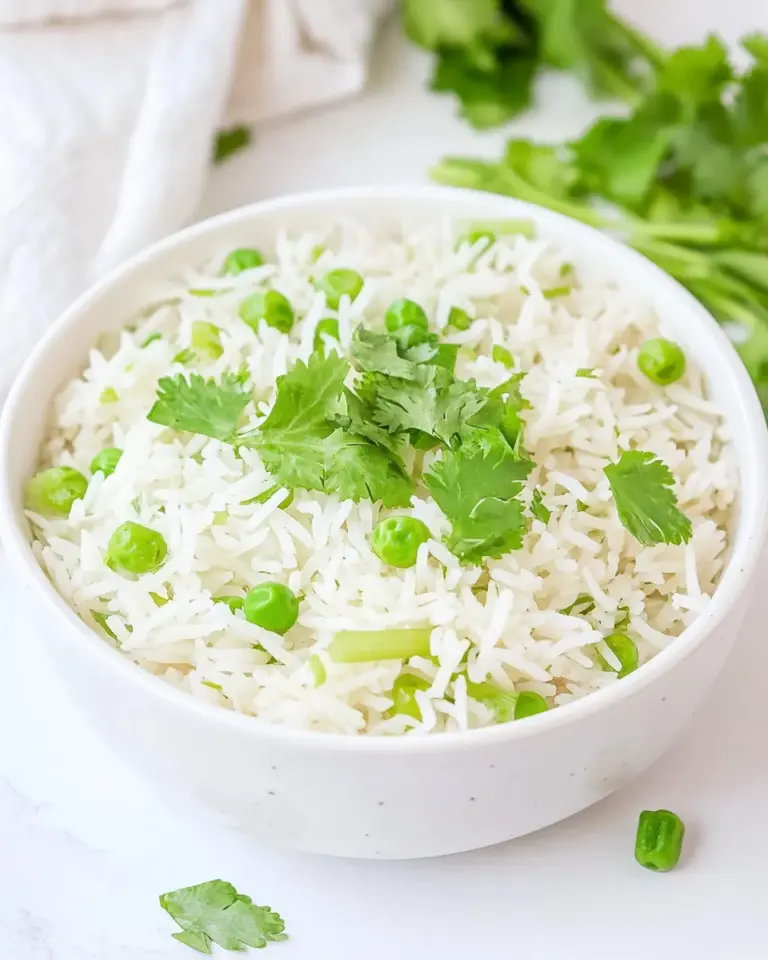
These wings pair beautifully with steamed rice, a fresh green salad, or even some crunchy veggies and dip for a complete meal.
Can I freeze the cooked wings?
Yes, you can freeze the cooked wings for up to 3 months. Just be sure to store them in a freezer-safe container. Reheat them in the oven directly from the freezer, adding a few extra minutes to the baking time.
Weekend Projects
- Sally’s Baking Addiction for dessert ideas
- Pinch of Yum for more savory dishes
- Minimalist Baker for quick and easy meals
Ready to Cook?
There you have it! Your guide to creating the ultimate Sweet and Sour Sticky Thai Boneless Oven Baked Chicken Wings. With simple ingredients, a quick prep time, and a baking method that keeps things healthy yet delicious, you will love making this dish for any occasion. Gather your ingredients, gather your loved ones, and get ready to enjoy a meal that bursts with flavor and joy!
Sweet and Sour Sticky Thai Boneless Oven Baked Chicken Wings
Ingredients
Equipment
Method
- Begin by placing the nugget-sized pieces of chicken into a large mixing bowl. Pour the buttermilk over the chicken, ensuring that each piece is well-coated. Cover the bowl with plastic wrap and let it marinate in the refrigerator for at least 30 minutes.
- While the chicken is marinating, preheat your oven to 400°F (200°C). In a separate bowl, combine the panko breadcrumbs and whole wheat flour (or cornmeal). Mix well to ensure that the coating is evenly distributed.
- Once the chicken has marinated, remove it from the refrigerator. Using tongs, lift each piece of chicken out of the buttermilk, allowing any excess to drip off. Dredge the chicken pieces in the panko mixture, ensuring they are fully coated.
- Place the coated chicken nuggets on a sheet pan lined with parchment paper or lightly greased with cooking spray. Bake for 20-25 minutes or until the chicken is golden brown and cooked through, flipping halfway through the baking time.
- While the chicken is baking, prepare the sauce. In a medium saucepan over medium heat, combine the sweet Thai chili sauce, soy sauce, dark brown sugar, peanut butter, tomato paste, apple juice, rice vinegar, lime juice, fish sauce (if using), garlic, ginger, crushed red pepper, and pepper. Stir until smooth.
- If you prefer a thicker sauce, mix the cornstarch with cold water and add it to the sauce, stirring until it thickens.
- Once the chicken wings are done baking, remove them from the oven and drizzle the sauce over the wings while they are still hot. Toss gently to ensure each piece is coated.
- Transfer the glazed chicken wings to a serving platter. Sprinkle chopped cilantro and cashews on top for garnish. Serve immediately and enjoy!
Notes
- Marinate the chicken for the best flavor and tenderness.
- Do not skip preheating the oven for even cooking.
- Use parchment paper for easy clean-up after baking.