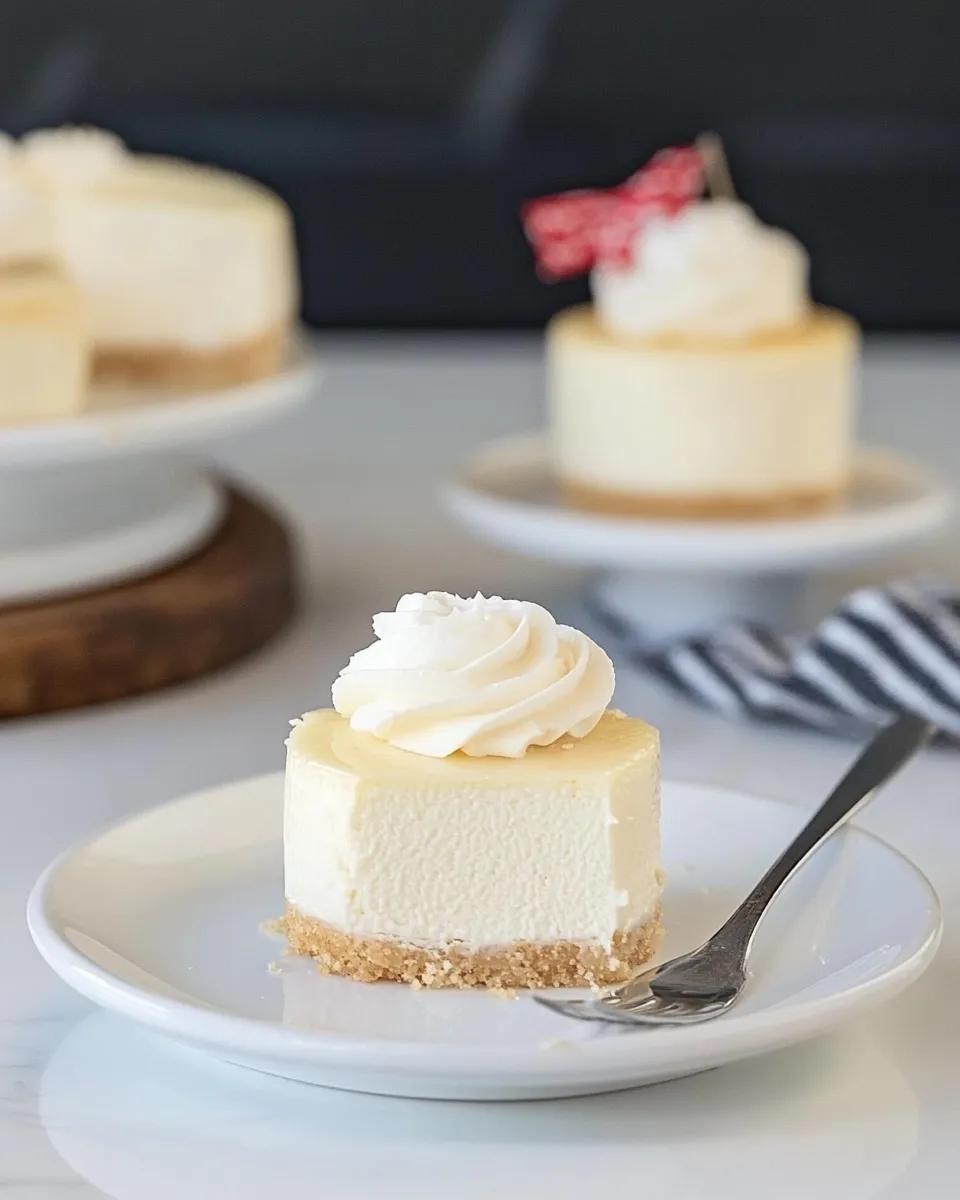
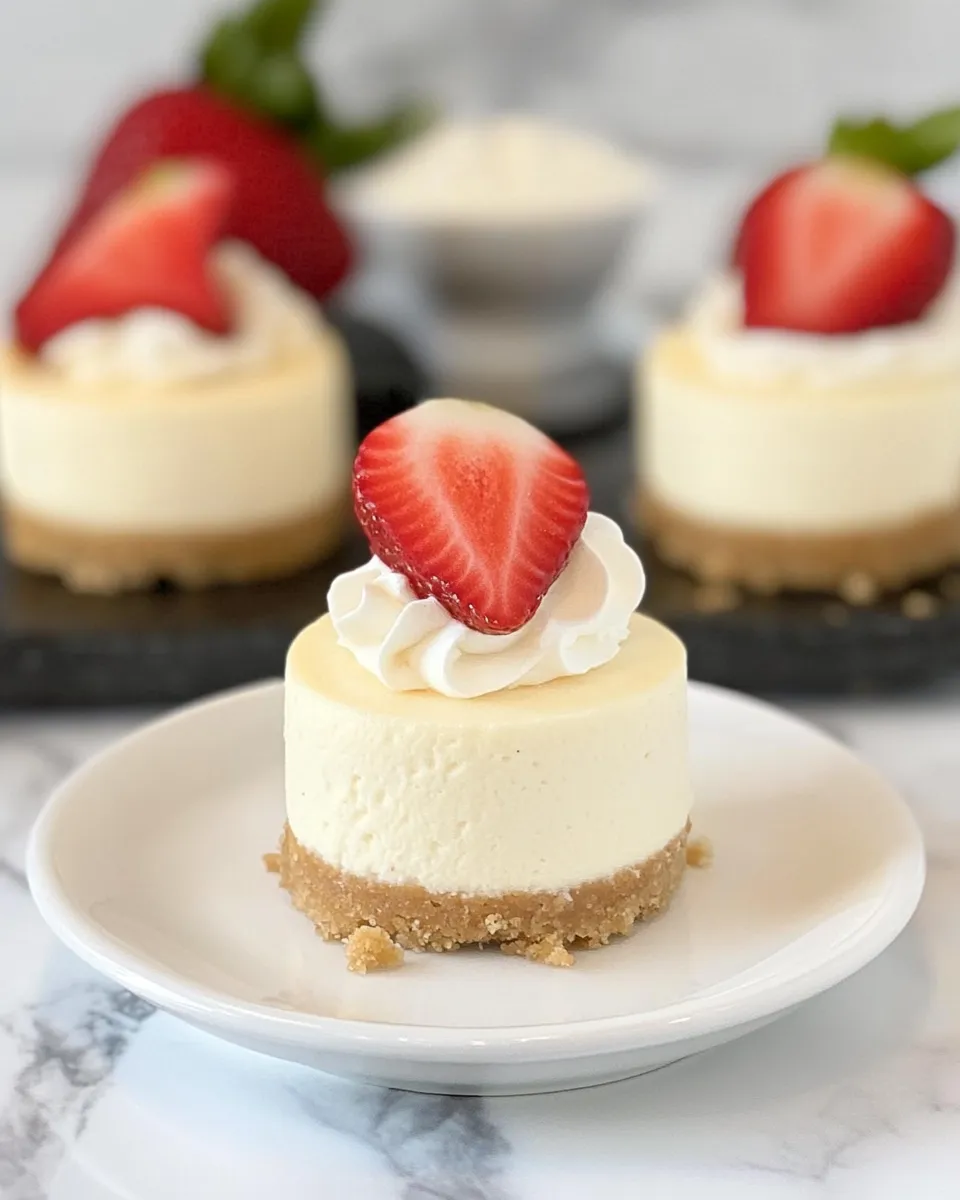
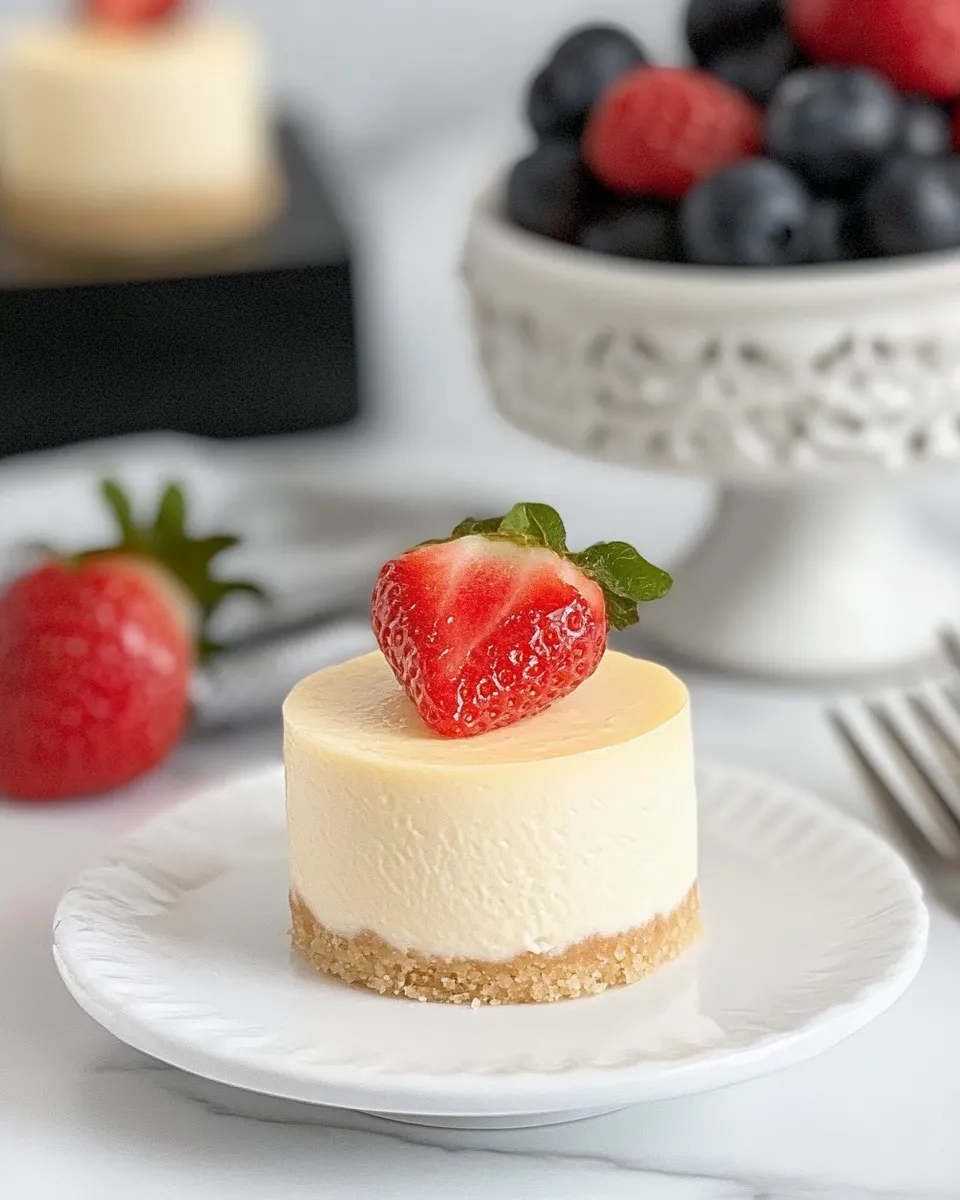
Mini Vanilla Bean Cheesecakes
If you’re in the mood for a delightful dessert that’s both elegant and indulgent, look no further than these Mini Vanilla Bean Cheesecakes. Perfectly portioned, these cheesecakes are rich and creamy, with a subtle hint of vanilla bean that elevates their flavor profile. Whether you’re hosting a dinner party, celebrating a special occasion, or simply treating yourself, these mini cheesecakes are sure to impress. Plus, they’re incredibly easy to make! So roll up your sleeves and let’s dive into this scrumptious recipe.
What Makes This Recipe Special
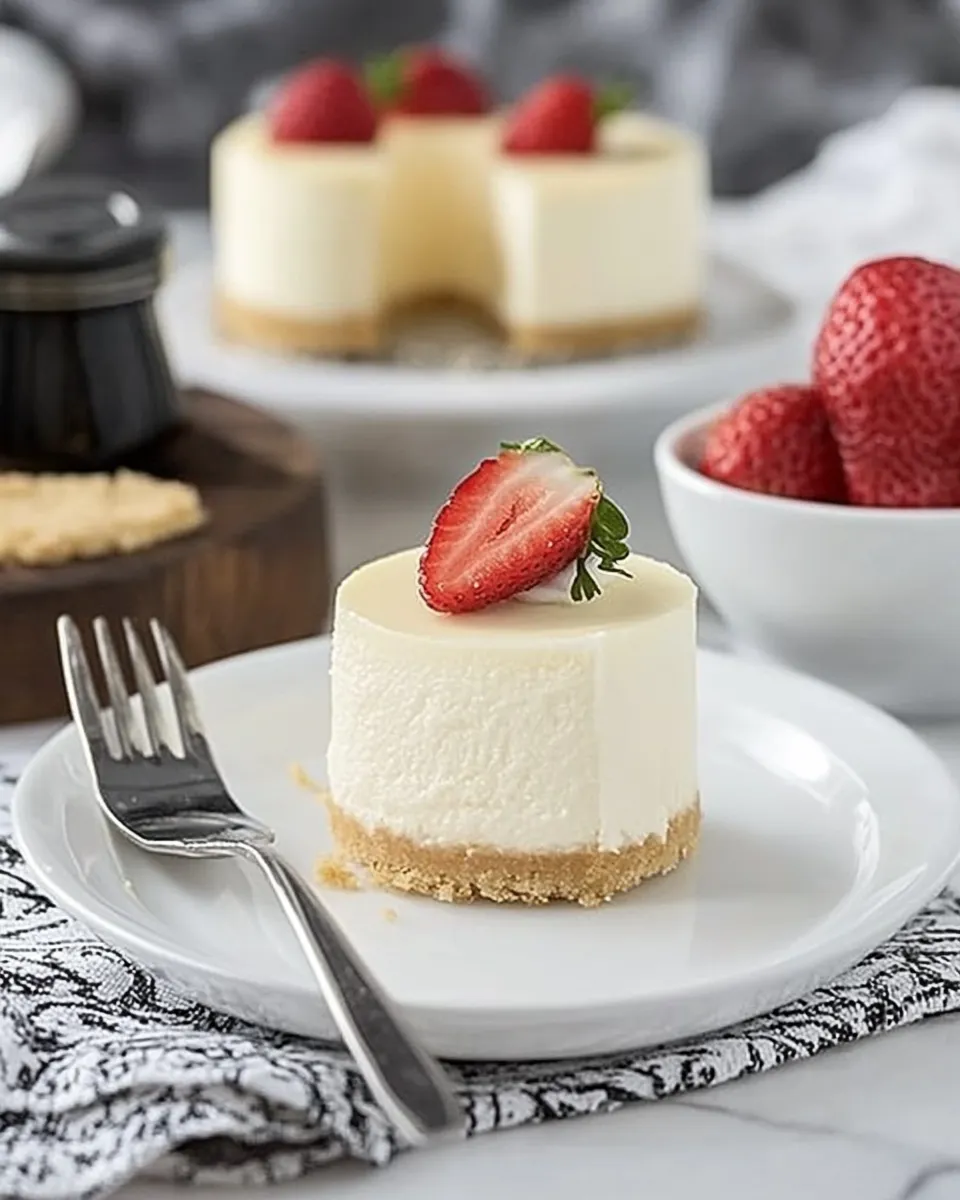
These Mini Vanilla Bean Cheesecakes stand out from the crowd due to their use of real vanilla beans, which impart a depth of flavor that vanilla extract just can’t match. The balance of the creamy filling against the crunchy graham cracker crust creates a textural delight with every bite. Not only are they visually appealing, but their individual size also makes them a perfect treat for any gathering. Plus, they can be made ahead of time, allowing you to enjoy your event without the stress of last-minute baking.
Shopping List
- Graham cracker crumbs: 1 cup (for the crust)
- Sugar: 1 tablespoon (for the crust)
- Melted butter: 2 tablespoons (for the crust)
- Cream cheese: 8 ounces (softened, for the filling)
- Sour cream: 1/2 cup (adds creaminess)
- Granulated sugar: 1/2 cup (for sweetness)
- Vanilla beans: 2 (for that special flavor)
- Eggs: 2 (to bind everything together)
- Vanilla extract: 1 teaspoon (for extra vanilla flavor)
Cook’s Kit
- Mixing bowls: For combining the crust and filling ingredients.
- Electric mixer: Ensures a smooth cheesecake mixture.
- Measuring cups and spoons: Precision is key in baking!
- Muffin tin: Use a standard muffin tin for baking the mini cheesecakes.
- Parchment paper: To line the muffin tin for easy removal.
Cooking Mini Vanilla Bean Cheesecakes: The Process
Step 1: Prepare the Muffin Tin
Start by preheating your oven to 325°F (160°C). Line a standard muffin tin with parchment paper liners or spray them lightly with non-stick cooking spray. This ensures that your mini cheesecakes will come out easily once baked.
Step 2: Make the Graham Cracker Crust
In a mixing bowl, combine the graham cracker crumbs, 1 tablespoon of sugar, and melted butter. Mix until the crumbs are well-coated and resemble wet sand. Spoon about 1 tablespoon of the mixture into each muffin cup and press it down firmly with the back of a spoon to create an even crust.
Step 3: Prepare the Cheesecake Filling
In another bowl, beat the softened cream cheese until smooth using an electric mixer. Add the sour cream, 1/2 cup of granulated sugar, the seeds scraped from the vanilla beans, and vanilla extract. Mix until fully combined and creamy. Be sure to scrape down the sides of the bowl to incorporate all ingredients.
Step 4: Add the Eggs
Add the eggs, one at a time, mixing well after each addition. This will help to keep the filling light and fluffy. Avoid overmixing, as this can lead to cracks in your cheesecakes.
Step 5: Bake the Cheesecakes
Pour the cheesecake filling over the prepared crusts in the muffin tin, filling each cup about 3/4 full. Bake in the preheated oven for 18-20 minutes, or until the edges are set but the center is still slightly jiggly. Remove from the oven and allow to cool in the pan for about 10 minutes.
Step 6: Chill the Cheesecakes
Once cooled, transfer the mini cheesecakes to the refrigerator and chill for at least 2 hours or until fully set. This step is crucial for achieving the right texture.
Spring–Summer–Fall–Winter Ideas
- Spring: Top with fresh berries for a burst of color and flavor.
- Summer: Add a layer of lemon curd for a zesty twist.
- Fall: Incorporate pumpkin spice in the filling for a seasonal favorite.
- Winter: Drizzle with melted chocolate and sprinkle with crushed peppermint for a festive touch.
Method to the Madness
Creating these Mini Vanilla Bean Cheesecakes is a straightforward process that yields impressive results. The key to success lies in using high-quality ingredients, especially when it comes to the vanilla beans. The natural oils in the beans will infuse the cheesecake with a rich, aromatic flavor that cannot be replicated. Additionally, letting them chill properly allows the flavors to meld beautifully, creating a decadent dessert that everyone will rave about.
Leftovers & Meal Prep
These Mini Vanilla Bean Cheesecakes are perfect for making ahead of time. They can be stored in an airtight container in the refrigerator for up to 5 days. If you want to freeze them, place them on a baking sheet until they firm up, then transfer them to a freezer-safe container. They can be frozen for up to 2 months. When you’re ready to enjoy, simply thaw in the refrigerator overnight and serve chilled.
Your Top Questions
Can I use a different type of crust?
Absolutely! You can substitute the graham cracker crust with Oreo crumbs, digestive biscuits, or even a nut-based crust for a gluten-free option.
How can I make these cheesecakes dairy-free?
To make these Mini Vanilla Bean Cheesecakes dairy-free, use a dairy-free cream cheese alternative and coconut cream in place of sour cream. The flavor will still be delicious!
What can I do if I don’t have vanilla beans?
If you’re out of vanilla beans, you can use 1 teaspoon of high-quality vanilla extract instead. While it won’t have the same depth, it will still provide a lovely vanilla flavor.
Can I make these cheesecakes in a different pan?
Yes! You can use a springform pan or a standard 9-inch pie dish. Just adjust the baking time as necessary, as larger pans will require a longer bake.
One Pan, More Ideas
The Takeaway
In summary, these Mini Vanilla Bean Cheesecakes are not only easy to make but are also a delightful treat that everyone will love. With their creamy texture and rich vanilla flavor, they are the perfect dessert for any occasion. Whether you choose to top them with fresh fruit or enjoy them plain, these little cheesecakes are bound to become a favorite in your dessert repertoire. So gather your ingredients, roll up your sleeves, and get ready to indulge in these heavenly bites of bliss!
Mini Vanilla Bean Cheesecakes
Ingredients
Equipment
Method
- Step 1: Prepare the Muffin Tin. Preheat your oven to 325°F (160°C). Line a standard muffin tin with parchment paper liners or spray them lightly with non-stick cooking spray.
- Step 2: Make the Graham Cracker Crust. In a mixing bowl, combine the graham cracker crumbs, 1 tablespoon of sugar, and melted butter. Mix until the crumbs resemble wet sand. Spoon about 1 tablespoon into each muffin cup and press down to create an even crust.
- Step 3: Prepare the Cheesecake Filling. Beat the softened cream cheese until smooth. Add sour cream, 1/2 cup of granulated sugar, seeds from the vanilla beans, and vanilla extract. Mix until creamy.
- Step 4: Add the Eggs. Incorporate the eggs, one at a time, mixing well after each. Avoid overmixing to prevent cracks.
- Step 5: Bake the Cheesecakes. Pour the filling over the crusts, filling each cup about 3/4 full. Bake for 18-20 minutes, or until the edges are set but the center is slightly jiggly.
- Step 6: Chill the Cheesecakes. Cool in the pan for 10 minutes, then transfer to the refrigerator to chill for at least 2 hours or until fully set.
Notes
- Use high-quality vanilla beans for the best flavor.
- These cheesecakes can be stored in the refrigerator for up to 5 days.
- For freezing, place them on a baking sheet until firm, then transfer to a freezer-safe container.