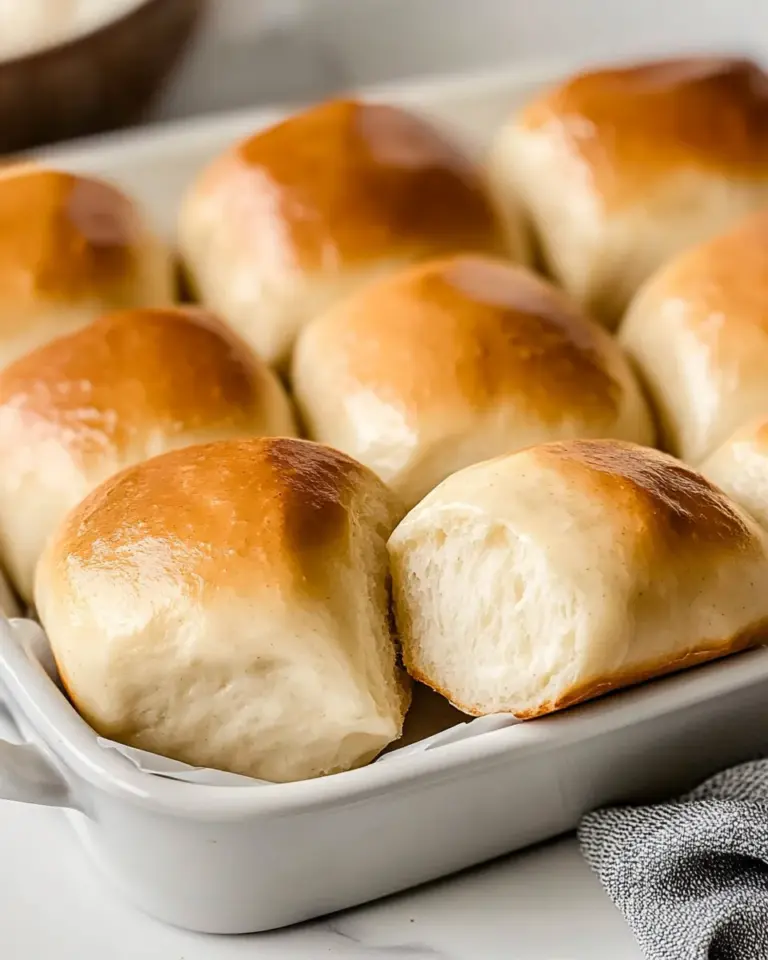
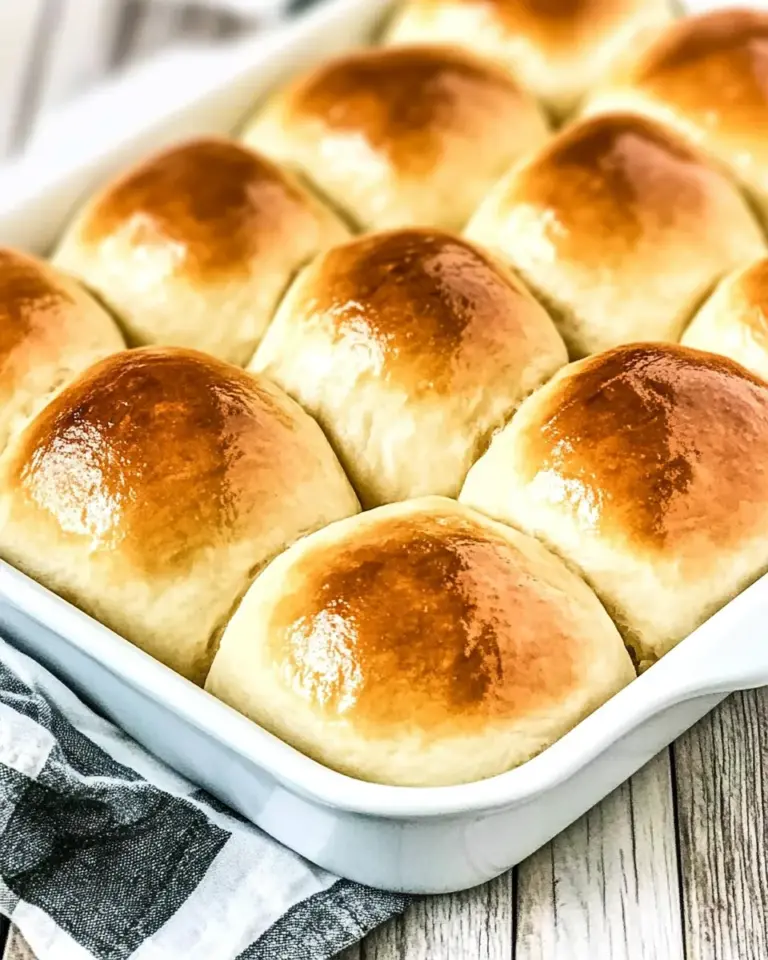
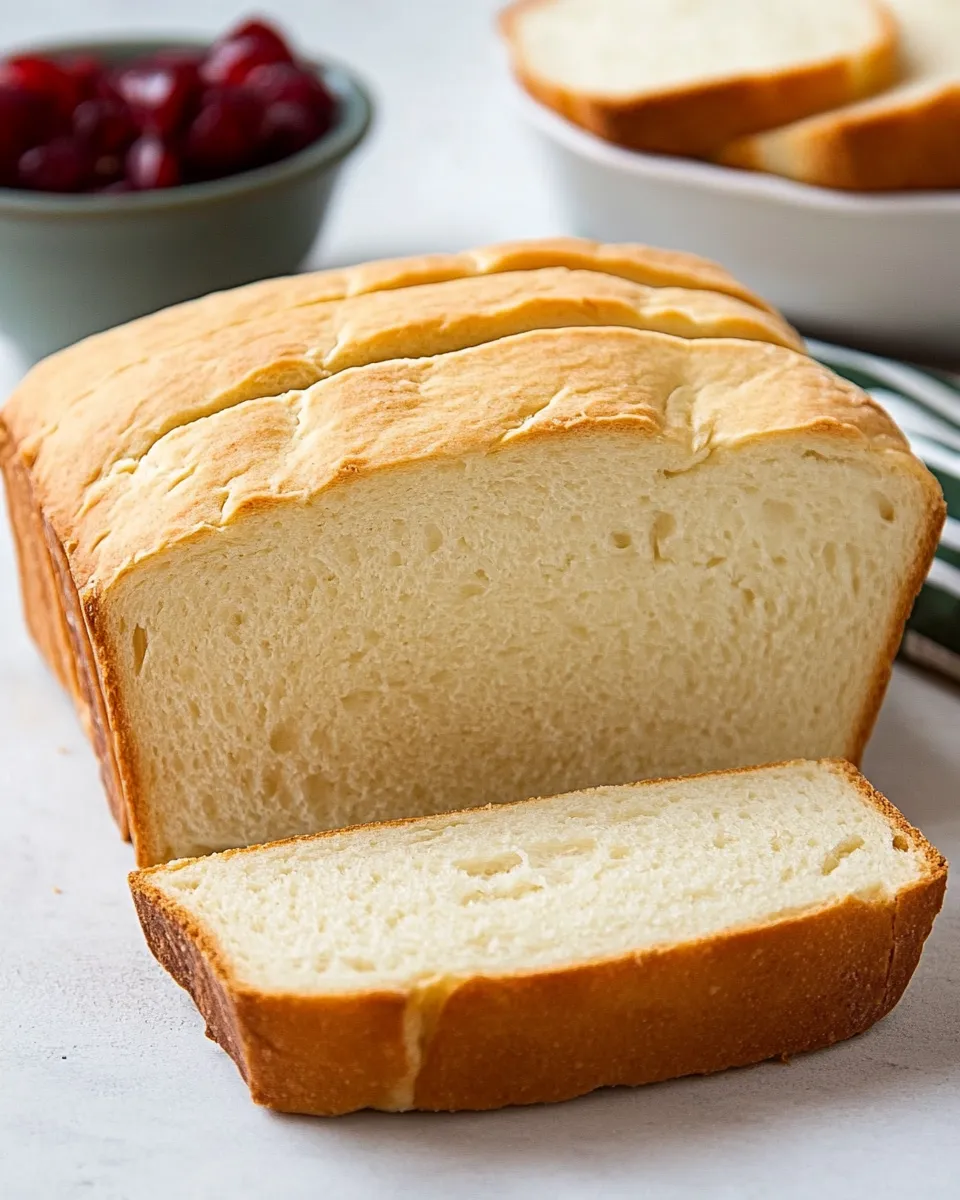
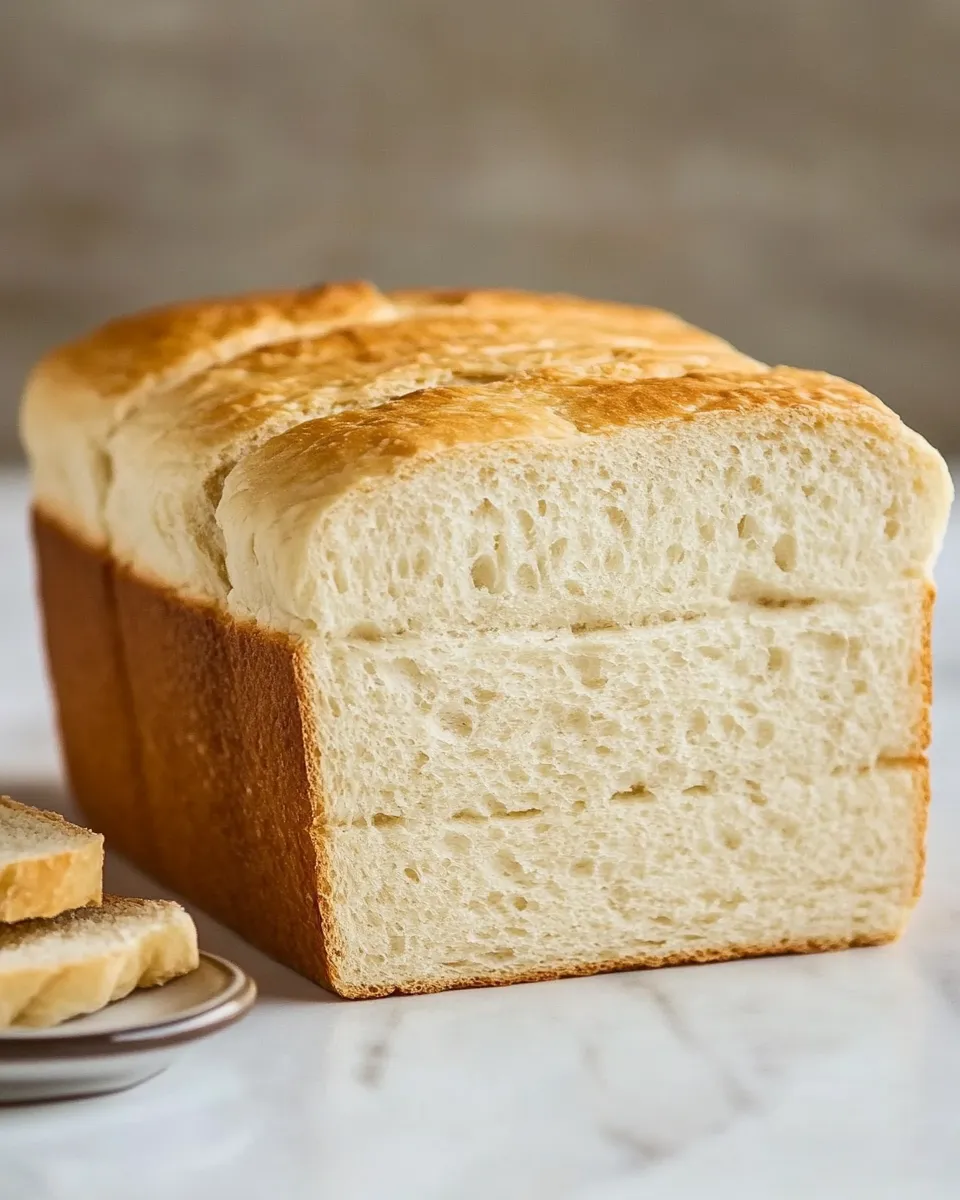
Gluten-Free Bread
If you’ve been missing the warm, comforting aroma of freshly baked bread wafting through your kitchen, I have good news. This gluten-free bread recipe is here to fill that void, proving that gluten-free doesn’t have to mean flavor-free. With a perfect balance of textures and flavors, this bread is soft, airy, and perfect for sandwiches, toasting, or simply enjoying with a pat of butter. Let’s dive into how to create this delightful loaf that’ll have everyone asking for seconds!
Reasons to Love Gluten-Free Bread

Gluten-free bread is a game-changer for those with gluten sensitivities or celiac disease. Here are just a few reasons to love this recipe:
- Healthier Option: Made with wholesome ingredients, this bread is free from gluten and packed with nutrients.
- Versatile: Perfect for sandwiches, toast, or served alongside soups and salads.
- Easy to Make: With just a few simple steps, you can create bakery-quality bread in your own kitchen.
- Free from Common Allergens: Suitable for various dietary restrictions, making it a great option for gatherings.
Ingredient Checklist
To make this delicious gluten-free bread, gather the following ingredients:
- 2 ½ tsp active dry yeast: The rising agent that gives the bread its light texture.
- 3 ½ tbsp sugar, divided: Sweetens the bread and helps activate the yeast.
- ¼ cup warm water (110°F): Activates the yeast.
- 1 ¼ cups milk (warmed to 110°F): Adds moisture and richness.
- 2 tbsp canola oil: Keeps the bread moist and tender.
- 2 tbsp butter, softened: Enhances flavor and texture.
- 3 large eggs: Provides structure and stability.
- 1 tbsp lemon juice: Adds a hint of tang and helps improve texture.
- 2 cups (320g) white rice flour: The primary flour that forms the base of this bread.
- ½ cup (66g) tapioca flour: Adds chewiness and helps with binding.
- ½ cup (81g) potato starch: Contributes to the lightness of the bread.
- ⅓ cup (46g) cornstarch: Helps in creating a soft texture.
- 1 tbsp xanthan gum: Essential for mimicking the elasticity of gluten.
- 1 ¾ tsp salt: Enhances the flavor of the bread.
- 1 tsp baking powder: Adds a bit of extra lift.
Tools of the Trade
Before you start baking, make sure you have the following tools on hand:
- Mixing Bowl: For combining your ingredients.
- Whisk: To mix dry ingredients and ensure even distribution.
- Loaf Pan: For shaping the bread as it bakes.
- Measuring Cups and Spoons: Precision is key in baking!
- Kitchen Thermometer: To check the temperatures of water and milk.
- Electric Mixer: Optional, but helpful for beating the eggs and mixing the dough.
Make Gluten-Free Bread: A Simple Method
Follow these easy steps to create your gluten-free bread:
Step 1: Activate the Yeast
In a small bowl, combine the warm water and 1 tablespoon of sugar. Sprinkle the active dry yeast over the top and let it sit for about 5-10 minutes until it becomes frothy.
Step 2: Combine Wet Ingredients
In a large mixing bowl, whisk together the warm milk, canola oil, softened butter, eggs, lemon juice, and the remaining sugar. Once well combined, add the activated yeast mixture.
Step 3: Mix Dry Ingredients
In another bowl, mix together the white rice flour, tapioca flour, potato starch, cornstarch, xanthan gum, salt, and baking powder.
Step 4: Combine Wet and Dry Ingredients
Gradually add the dry ingredients to the wet mixture. Stir until the dough is well combined. The mixture will be thicker than traditional bread dough but should still be spreadable.
Step 5: Prepare the Pan
Grease your loaf pan generously with butter. This helps the bread come out easily after baking.
Step 6: Let It Rise
Transfer the dough into the prepared loaf pan. Cover it with a clean kitchen towel and let it rise in a warm place for about 30-45 minutes, or until it has doubled in size.
Step 7: Bake the Bread
Preheat your oven to 350°F (175°C). Once the dough has risen, bake it for 30-35 minutes or until the top is golden brown and a toothpick inserted in the center comes out clean.
Step 8: Cool and Enjoy
Remove the bread from the oven and allow it to cool in the pan for about 10 minutes. Then, transfer it to a wire rack to cool completely before slicing. Enjoy your homemade gluten-free bread!
Warm & Cool Weather Spins

Depending on the temperature and humidity, the dough may behave differently. Here are some tips to adjust:
- Warm Weather: If it’s a hot day, keep an eye on the dough as it may rise faster. You might need to reduce the rising time.
- Cool Weather: If your kitchen is chilly, place the dough in a slightly warmed oven (turned off) to encourage rising.
Troubleshooting Tips
If things don’t go as planned, don’t worry! Here are some common issues and solutions:
- Dense Bread: This can happen if the dough didn’t rise enough. Ensure the yeast is fresh and the water temperature is correct.
- Crumbly Texture: Adding a bit more xanthan gum can help improve the structure.
- Too Sweet: Adjust the sugar to your taste preferences in future bakes.
Shelf Life & Storage
To keep your gluten-free bread fresh:
- Room Temperature: Store in a sealed container for up to 3 days.
- Refrigerator: Can be kept for up to a week, but may dry out faster.
- Freezer: Wrap slices in plastic wrap and store in an airtight bag for up to 3 months. Thaw at room temperature when ready to enjoy.
Common Qs About Gluten-Free Bread
Can I use different flours in this recipe?
While this recipe is designed for specific flours, you can experiment with other gluten-free flours. However, results may vary, so it’s best to stick to the recommended flours for optimal texture.
Why is xanthan gum necessary?
Xanthan gum acts as a binding agent, mimicking the elasticity and chewiness that gluten provides in traditional bread. It’s essential for achieving the right texture in gluten-free baking.
Can I make this bread dairy-free?
Yes! You can substitute the milk with a dairy-free alternative like almond milk or oat milk, and replace the butter with a non-dairy version to make it dairy-free.
How can I enhance the flavor of my gluten-free bread?
Consider adding herbs, spices, or seeds to the dough for an extra burst of flavor. Ingredients like garlic powder, onion powder, or even sunflower seeds can elevate your bread.
Similar Recipes
If you love this gluten-free bread, you might also enjoy:
- Gluten-Free Banana Bread
- Gluten-Free Pancakes
- Simple Gluten-Free Pizza Crust
- Gluten-Free Chocolate Chip Cookies
See You at the Table
Baking gluten-free bread may seem intimidating at first, but with this simple recipe, you’ll be amazed at how easy and rewarding it is. Whether you’re sharing it with family, friends, or simply enjoying it for yourself, this bread will surely become a staple in your kitchen. So, roll up your sleeves, preheat that oven, and let the delightful aroma of gluten-free bread fill your home. Happy baking!
Gluten-Free Bread
Ingredients
Equipment
Method
- In a small bowl, combine the warm water and 1 tablespoon of sugar. Sprinkle the active dry yeast over the top and let it sit for about 5-10 minutes until it becomes frothy.
- In a large mixing bowl, whisk together the warm milk, canola oil, softened butter, eggs, lemon juice, and the remaining sugar. Once well combined, add the activated yeast mixture.
- In another bowl, mix together the white rice flour, tapioca flour, potato starch, cornstarch, xanthan gum, salt, and baking powder.
- Gradually add the dry ingredients to the wet mixture. Stir until the dough is well combined. The mixture will be thicker than traditional bread dough but should still be spreadable.
- Grease your loaf pan generously with butter. This helps the bread come out easily after baking.
- Transfer the dough into the prepared loaf pan. Cover it with a clean kitchen towel and let it rise in a warm place for about 30-45 minutes, or until it has doubled in size.
- Preheat your oven to 350°F (175°C). Once the dough has risen, bake it for 30-35 minutes or until the top is golden brown and a toothpick inserted in the center comes out clean.
- Remove the bread from the oven and allow it to cool in the pan for about 10 minutes. Then, transfer it to a wire rack to cool completely before slicing. Enjoy your homemade gluten-free bread!
Notes
- Experiment with different gluten-free flours for unique flavors.
- Ensure the yeast is fresh for optimal rising.
- Store in a sealed container to keep the bread soft.