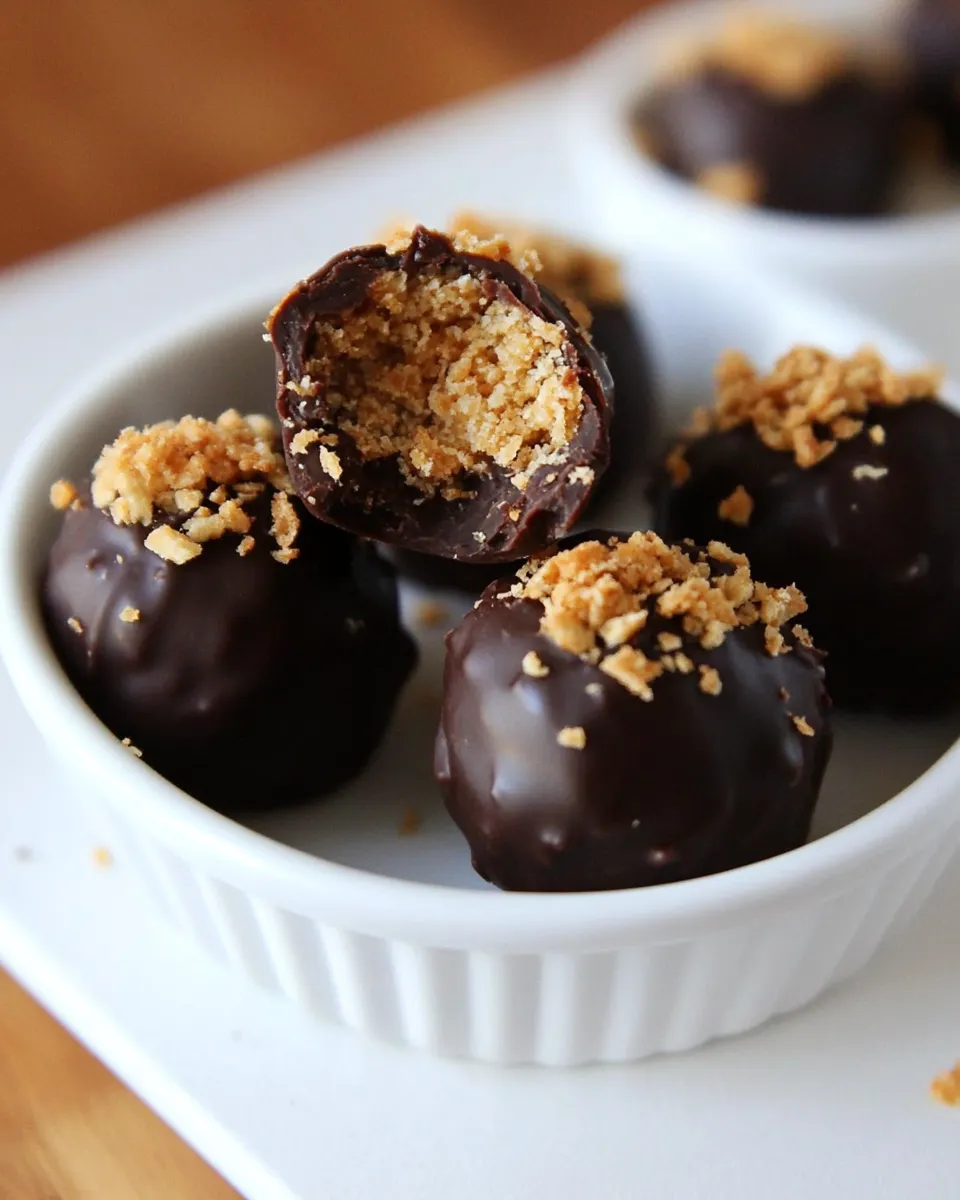
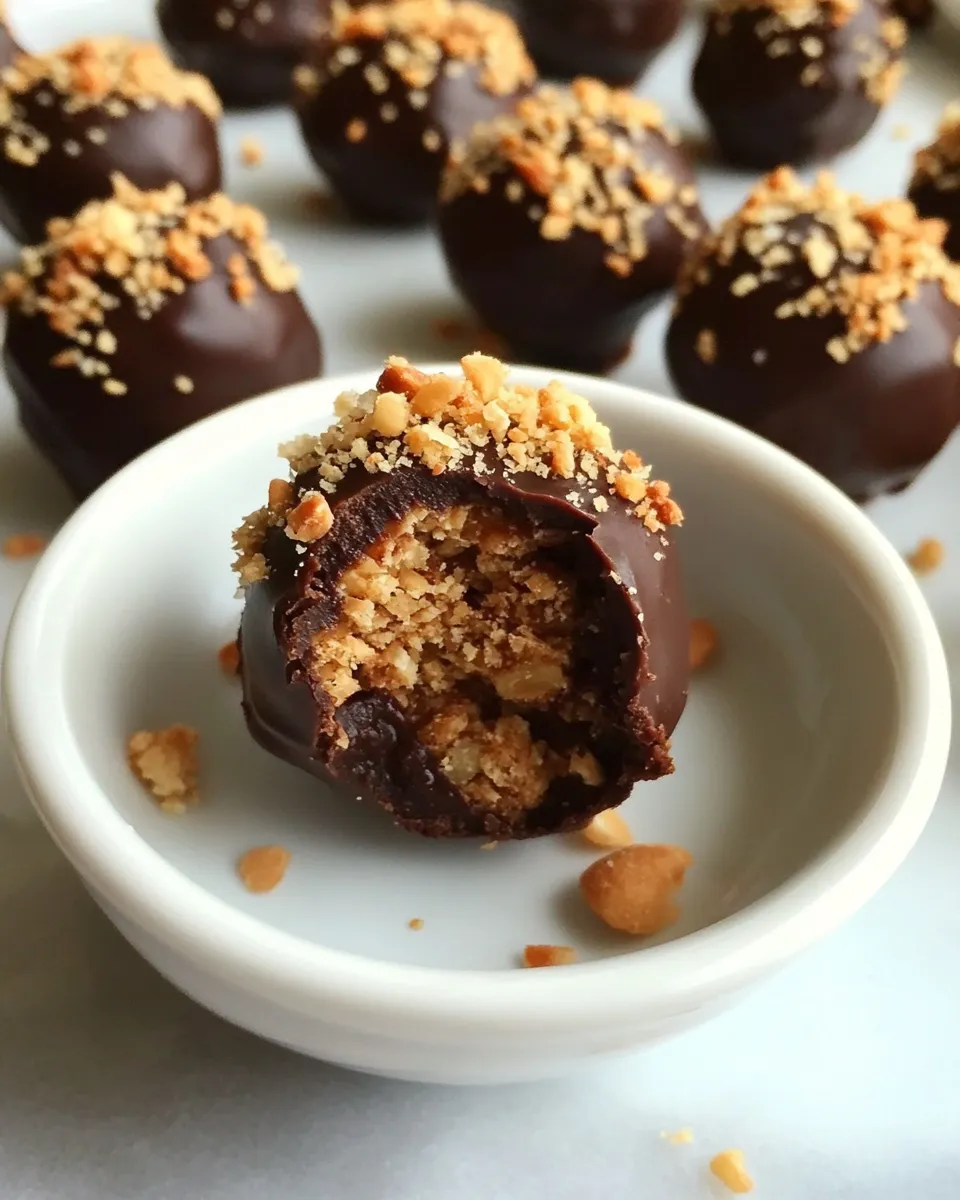
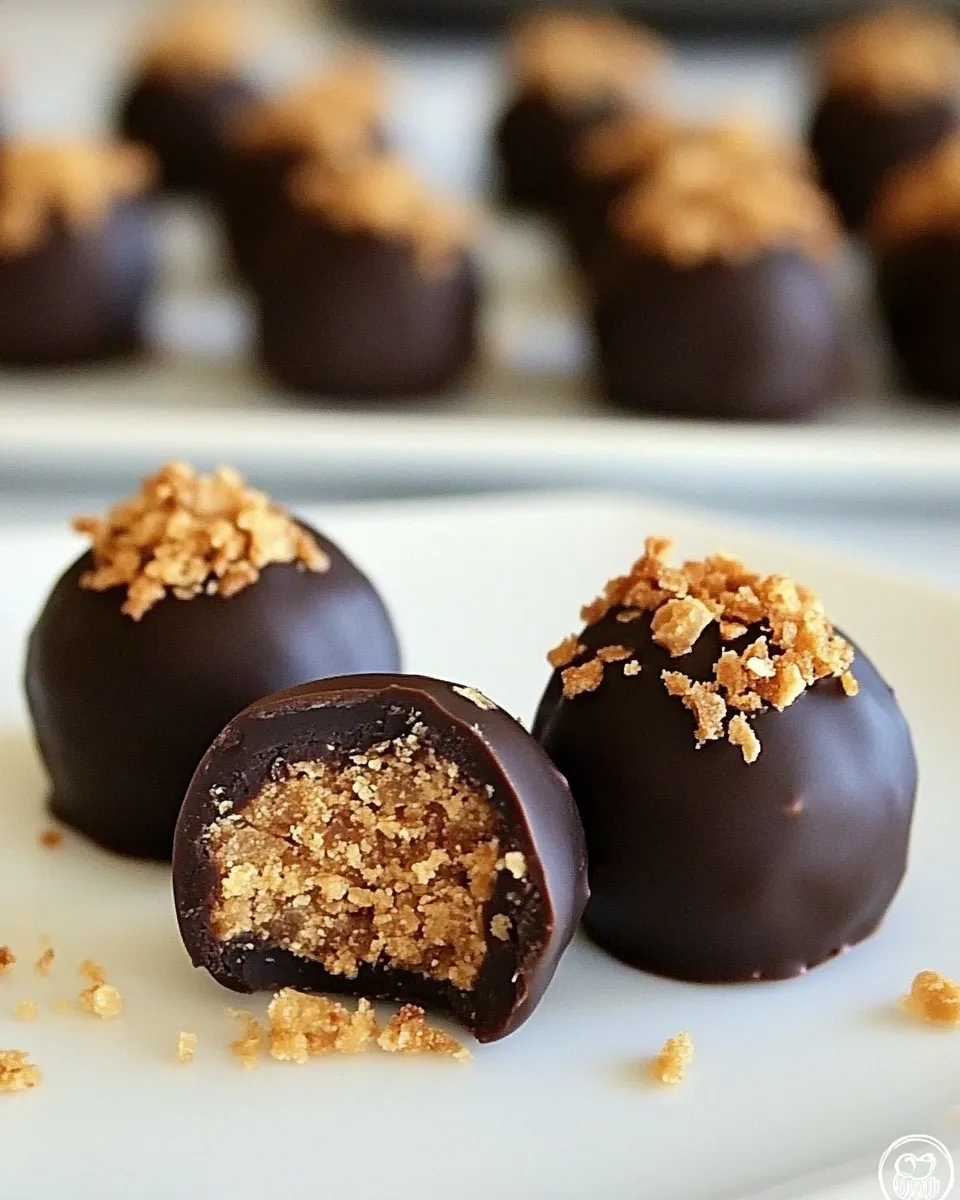
Butterfinger Truffles
Indulging in a rich, chocolatey treat that combines the crunchy goodness of Butterfinger candy bars with a smooth truffle center is a delight that few can resist. Butterfinger Truffles are the perfect blend of creamy and crunchy, making them an irresistible dessert for any occasion. Whether you’re hosting a gathering or simply treating yourself, these truffles are sure to impress with their delightful texture and decadent flavor. Let’s dive into the world of Butterfinger Truffles, where every bite is a celebration of sweetness!
The Upside of Butterfinger Truffles
Butterfinger Truffles are not just delicious; they are also fun to make! They provide a wonderful opportunity to get creative in the kitchen. The combination of flavors and textures makes these truffles a standout treat that can easily be customized. Plus, they are perfect for sharing! Imagine serving these delightful bites at a party or gifting them to friends and family. The joy they bring is as delightful as their taste.
Shopping List
Before we start crafting these delectable truffles, let’s gather our ingredients. Here’s what you’ll need:
- 5 ounces semisweet chocolate, chopped
- 1/2 tablespoon unsalted butter
- 1/2 cup heavy whipping cream
- 3/4 cup (about 4 ounces) chopped Butterfinger candy bars
- Additional chocolate for dipping/coating
- Additional chopped Butterfinger or sprinkles, for topping
Make sure to check your pantry for any ingredients you may already have on hand!
Setup & Equipment
To make these Butterfinger Truffles, you will need a few essential tools:
- Mixing bowl – for combining ingredients.
- Double boiler or microwave-safe bowl – for melting chocolate.
- Whisk or spatula – for mixing.
- Cookie scoop or spoon – for portioning truffles.
- Parchment paper – for cooling truffles.
- Small baking sheet – to place truffles while they set.
Having these items ready will ensure a smooth truffle-making experience!
Butterfinger Truffles Cooking Guide
Now, let’s get to the fun part! Follow these steps to create your own batch of Butterfinger Truffles.
Step 1: Prepare the Chocolate Ganache
In a double boiler or microwave-safe bowl, combine the chopped semisweet chocolate and unsalted butter. If using a microwave, heat in 30-second intervals, stirring until smooth. Add the heavy whipping cream and whisk until the mixture is well combined and glossy. This rich ganache will form the base of your truffles.
Step 2: Add the Butterfinger
Once your ganache is smooth, fold in the chopped Butterfinger candy bars. This adds a delightful crunch and flavor that is quintessential to Butterfinger Truffles. Stir gently to ensure the candy is evenly distributed throughout the ganache.
Step 3: Chill the Mixture
Transfer the ganache mixture into a bowl and cover it with plastic wrap. Refrigerate for about 1-2 hours, or until the mixture is firm enough to scoop. This step is crucial for shaping the truffles.
Step 4: Shape the Truffles
Once chilled, use a cookie scoop or spoon to portion out the ganache. Roll each portion into a ball between your hands. Place the shaped truffles onto a parchment-lined baking sheet.
Step 5: Dip the Truffles
Melt additional chocolate in a double boiler or microwave for coating the truffles. Dip each truffle into the melted chocolate, ensuring an even coat. Use a fork to lift the truffle out, allowing any excess chocolate to drip off before placing it back onto the parchment paper.
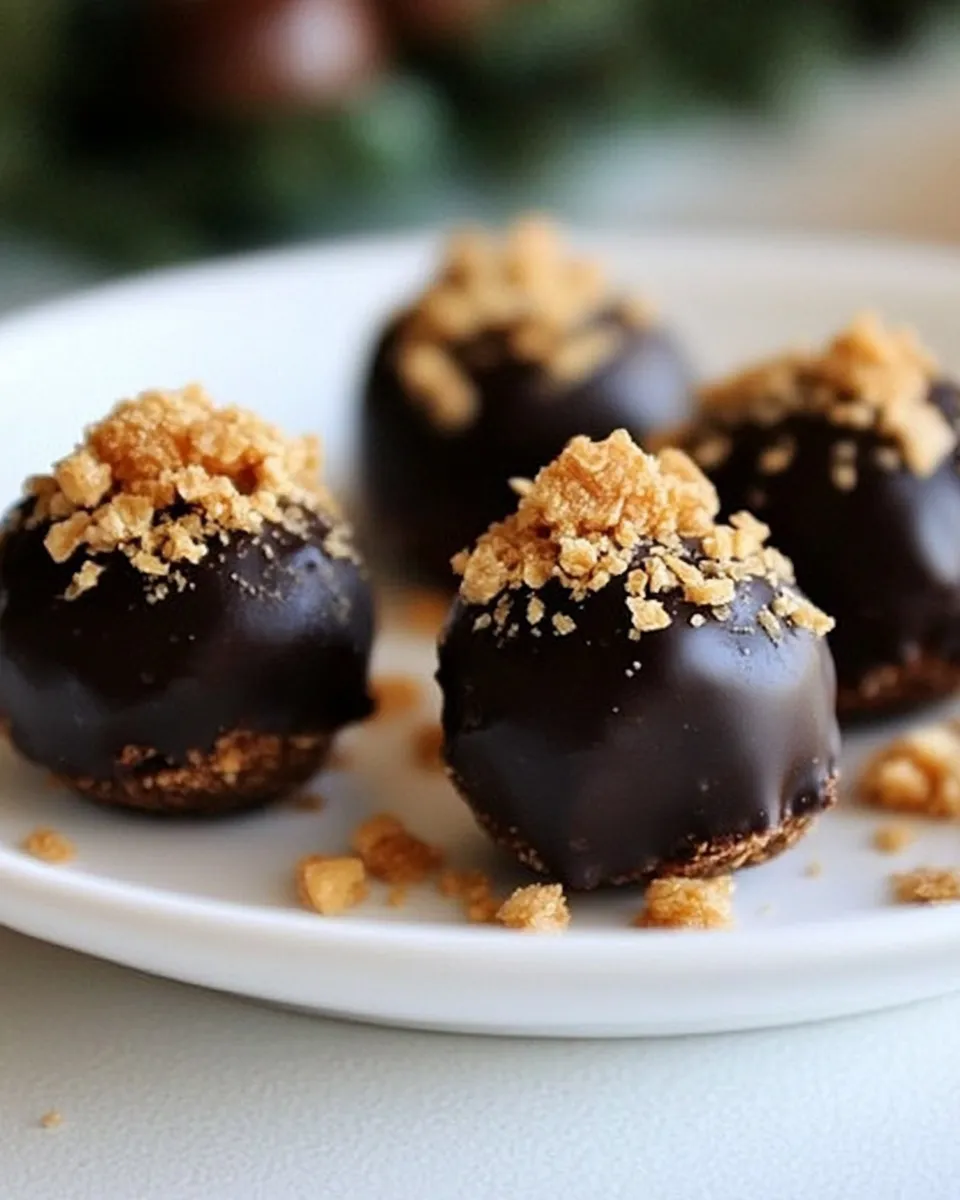
Step 6: Add Toppings
While the chocolate coating is still wet, sprinkle additional chopped Butterfinger or colorful sprinkles on top for a festive touch. This not only enhances the visual appeal but also adds an extra layer of crunch.
Step 7: Let Them Set
Allow the truffles to set at room temperature or place them in the refrigerator for quicker results. Once the chocolate coating is firm, they are ready to be enjoyed!
Nutrition-Minded Tweaks
If you’re looking to make some adjustments for a healthier version, consider these tips:
- Use dark chocolate instead of semisweet for a richer flavor and less sugar.
- Swap heavy whipping cream for coconut cream for a dairy-free option.
- Try using sugar-free Butterfinger bars for a lower-sugar alternative.
- Incorporate nut butter into the ganache for added protein and healthy fats.
These tweaks not only cater to different dietary needs but also allow you to experiment with flavors!
Mistakes That Ruin Butterfinger Truffles
Creating the perfect Butterfinger Truffles can be easy, but a few common mistakes can lead to disappointing results. Here’s what to avoid:
- Skipping the chilling step – If the ganache isn’t firm enough, shaping the truffles will be a messy challenge.
- Overheating the chocolate – Be sure to melt chocolate slowly to prevent it from burning or seizing.
- Not using enough Butterfinger – The crunchiness of the candy is key to achieving that signature flavor!
- Coating with too little chocolate – A thin layer may lead to a less satisfying texture and taste.
Being aware of these pitfalls will help you create the best Butterfinger Truffles possible!
Save It for Later
If you find yourself with extra Butterfinger Truffles, or simply want to make a batch in advance, here are some storage tips:
- Store truffles in an airtight container in the refrigerator for up to a week.
- For longer storage, freeze the truffles in a single layer on a baking sheet, then transfer to a freezer-safe container. They can last up to 3 months when frozen.
- Thaw frozen truffles in the refrigerator before enjoying them again.
Having these sweet treats on hand is a great way to satisfy your cravings anytime!
Reader Q&A
Can I use milk chocolate instead of semisweet chocolate?
Absolutely! Milk chocolate will give your Butterfinger Truffles a sweeter flavor. Just keep in mind that it may alter the overall taste profile.
What can I use instead of Butterfinger candy bars?
You can substitute with other crunchy candy bars, like Heath bars or Twix, to create a different flavor combination. Just make sure to chop them up similarly!
How do I know when the chocolate coating is set?
The chocolate coating will become firm to the touch and lose its shine. If you lightly press on the truffle, it should feel solid.
Can I make these truffles vegan?
Yes! You can use dark chocolate that is dairy-free, coconut cream instead of heavy cream, and a vegan butter alternative to keep them plant-based.
You Might Also Like
If you enjoyed making these Butterfinger Truffles, you might also love these recipes:
- Dark Chocolate Truffles
- Coconut Chocolate Truffles
- Cashew Cookie Dough Truffles
- Peanut Butter Chocolate Truffles
In Closing
Butterfinger Truffles are a delightful treat that combines the best of chocolate and candy. They are easy to make, fun to customize, and perfect for sharing. With a few simple ingredients and straightforward steps, you can create a dessert that is sure to impress everyone. Whether you’re a seasoned baker or a novice in the kitchen, these truffles are an accessible and exciting way to satisfy your sweet tooth. So grab your ingredients, gather your equipment, and let’s create some magical Butterfinger Truffles today! Enjoy every bite of this sweet indulgence, and don’t forget to share the joy with those you love.
Butterfinger Truffles
Ingredients
Equipment
Method
- In a double boiler or microwave-safe bowl, combine the chopped semisweet chocolate and unsalted butter. Heat in 30-second intervals, stirring until smooth. Add the heavy whipping cream and whisk until combined and glossy.
- Fold in the chopped Butterfinger candy bars until evenly distributed.
- Cover the bowl with plastic wrap and refrigerate for about 1-2 hours, until firm enough to scoop.
- Use a cookie scoop or spoon to portion out the ganache, rolling each portion into a ball between your hands. Place onto a parchment-lined baking sheet.
- Melt additional chocolate for coating. Dip each truffle into the melted chocolate and place back onto parchment paper.
- While the coating is wet, sprinkle with additional chopped Butterfinger or colorful sprinkles.
- Allow the truffles to set at room temperature or refrigerate until the coating is firm.
Notes
- Store truffles in an airtight container in the refrigerator for up to a week.
- For longer storage, freeze truffles in a single layer, then transfer to a freezer-safe container for up to 3 months.
- Thaw frozen truffles in the refrigerator before enjoying.