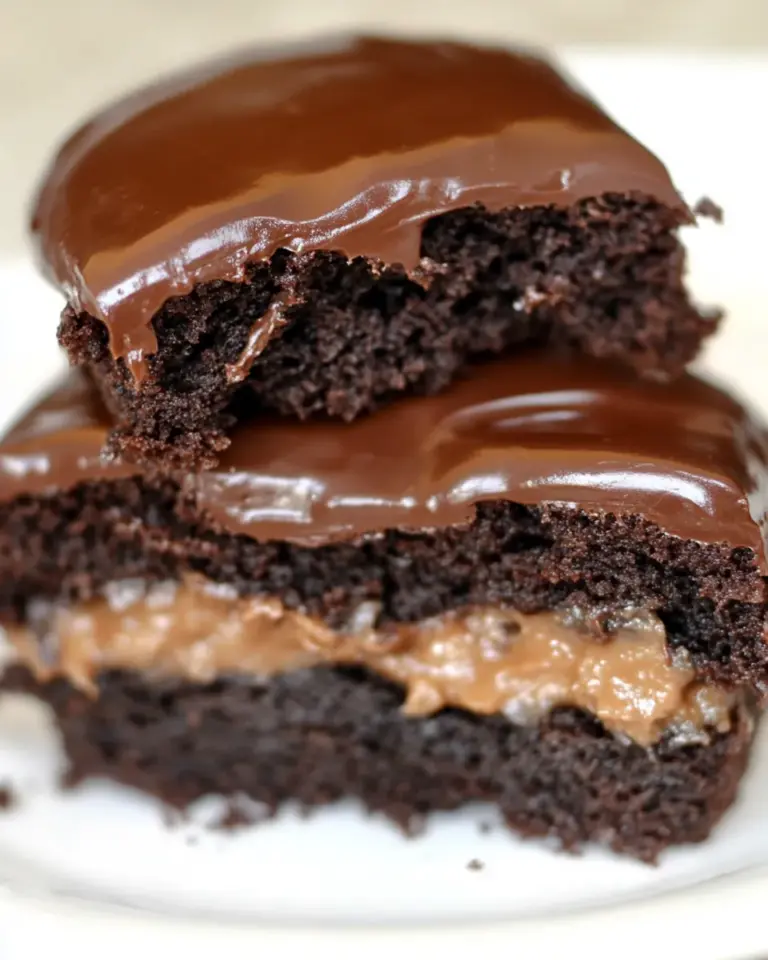
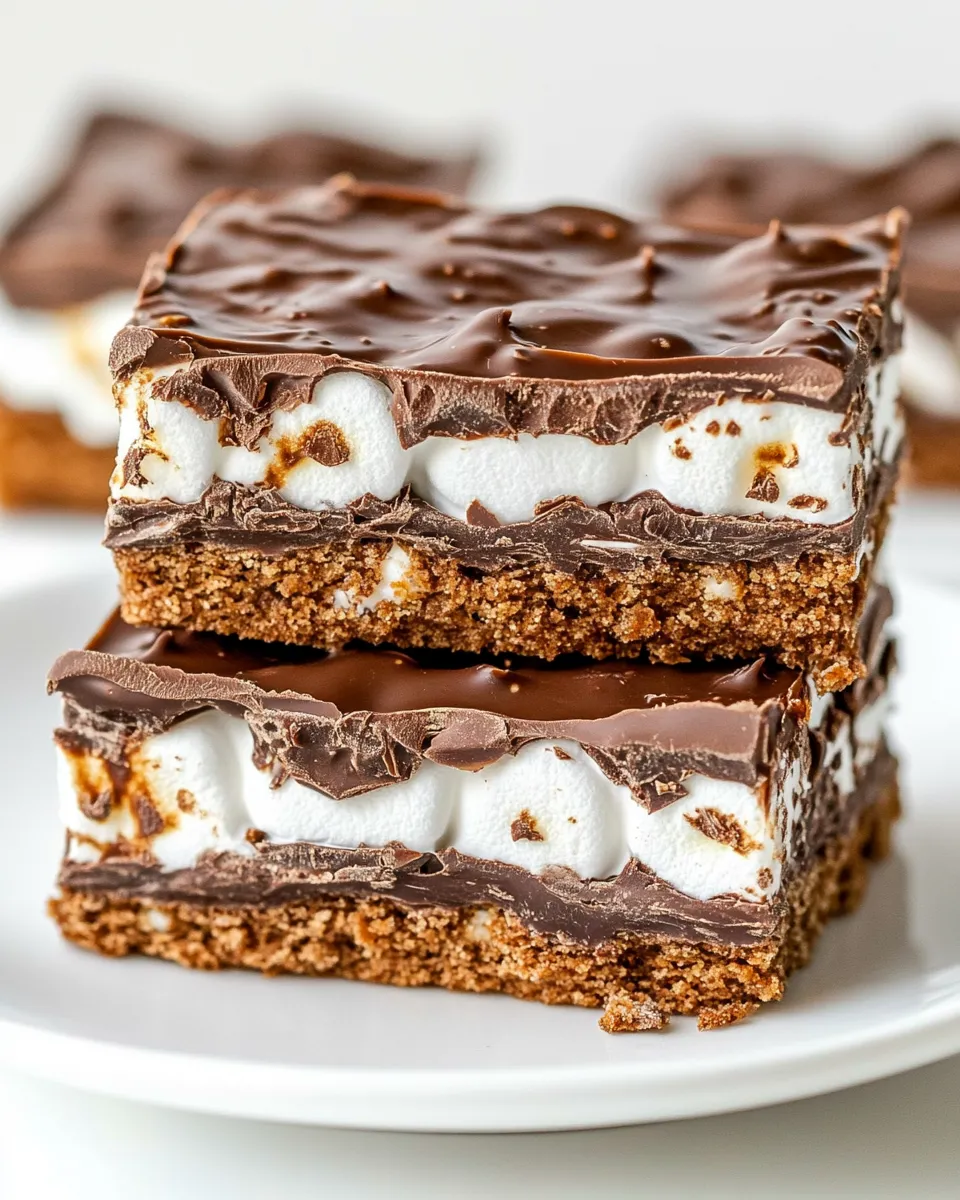
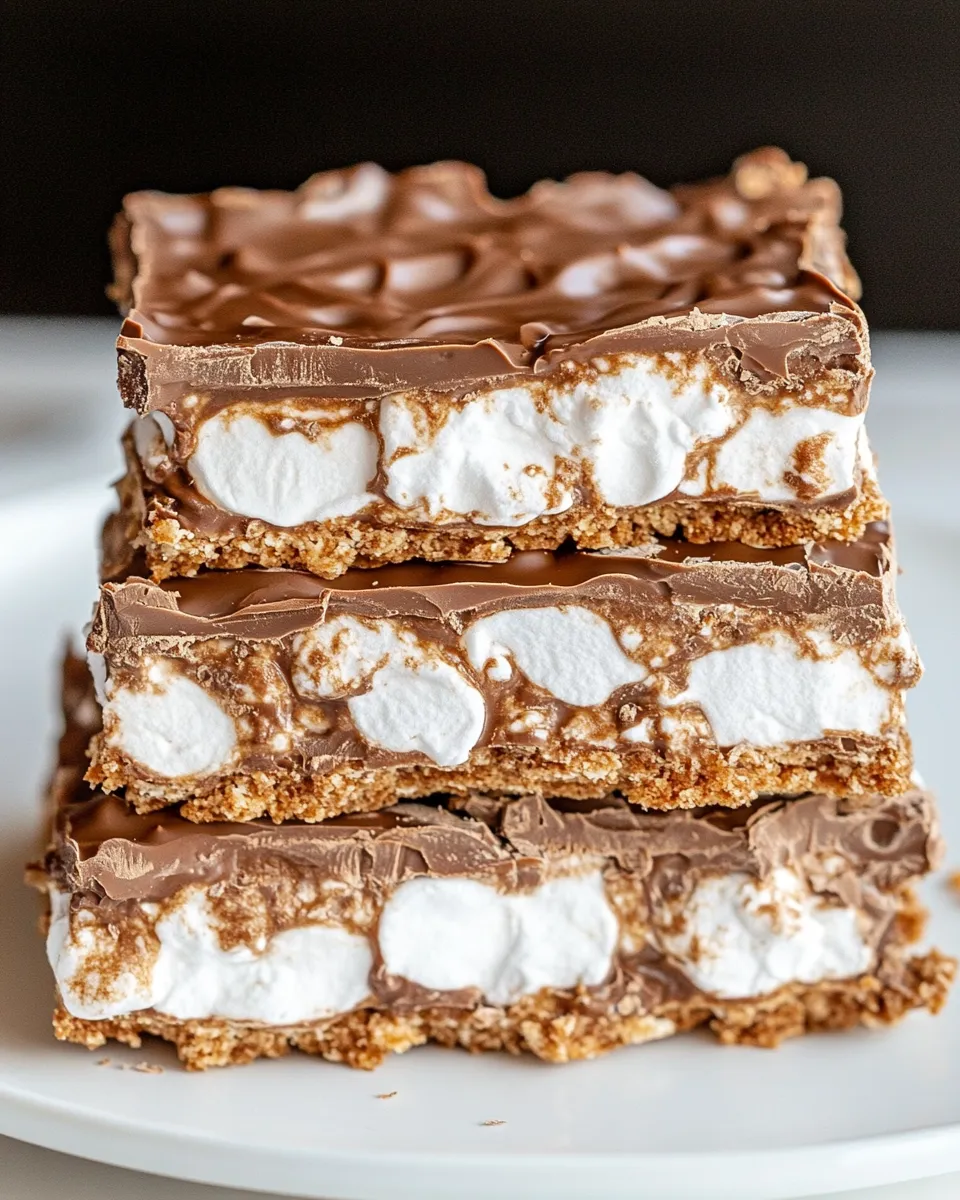
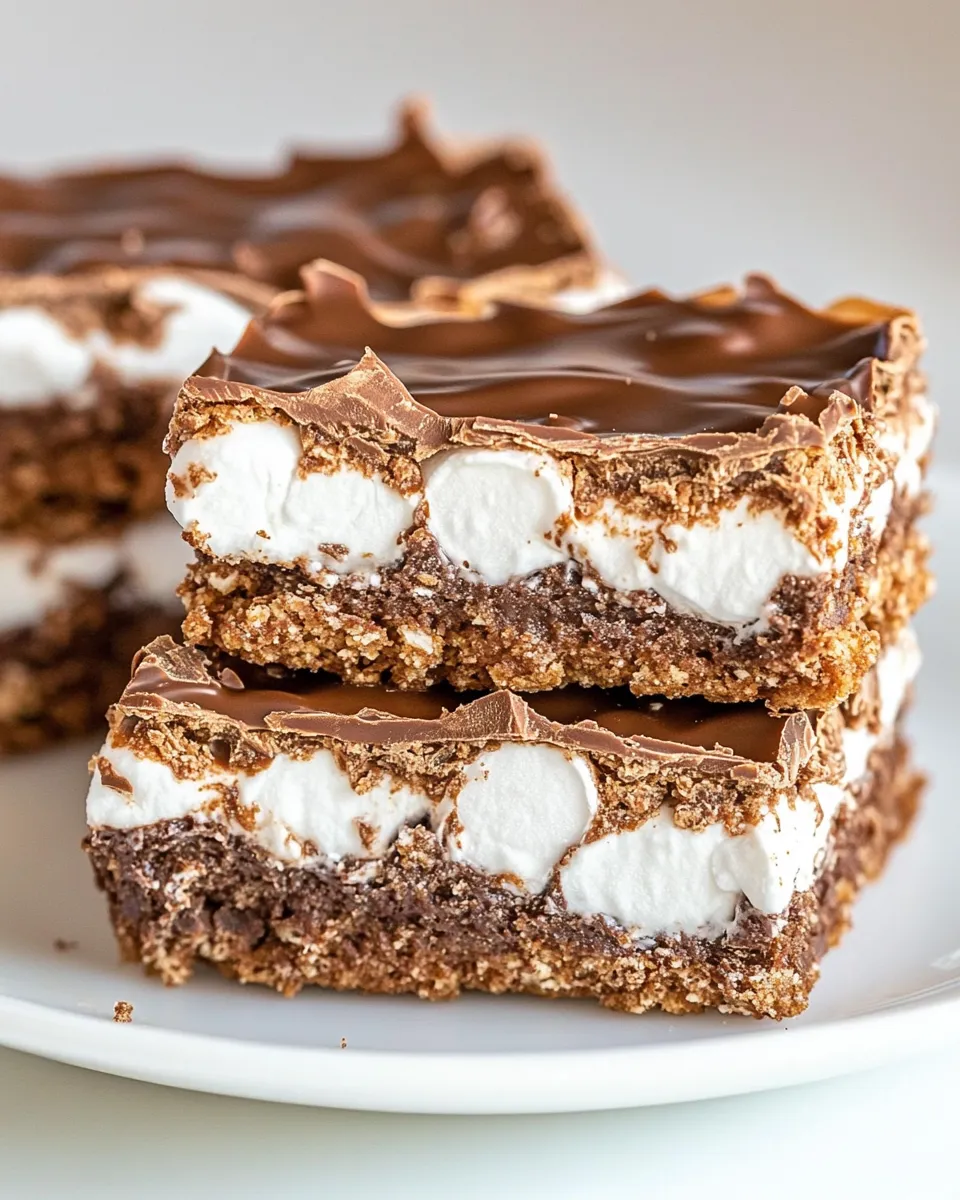
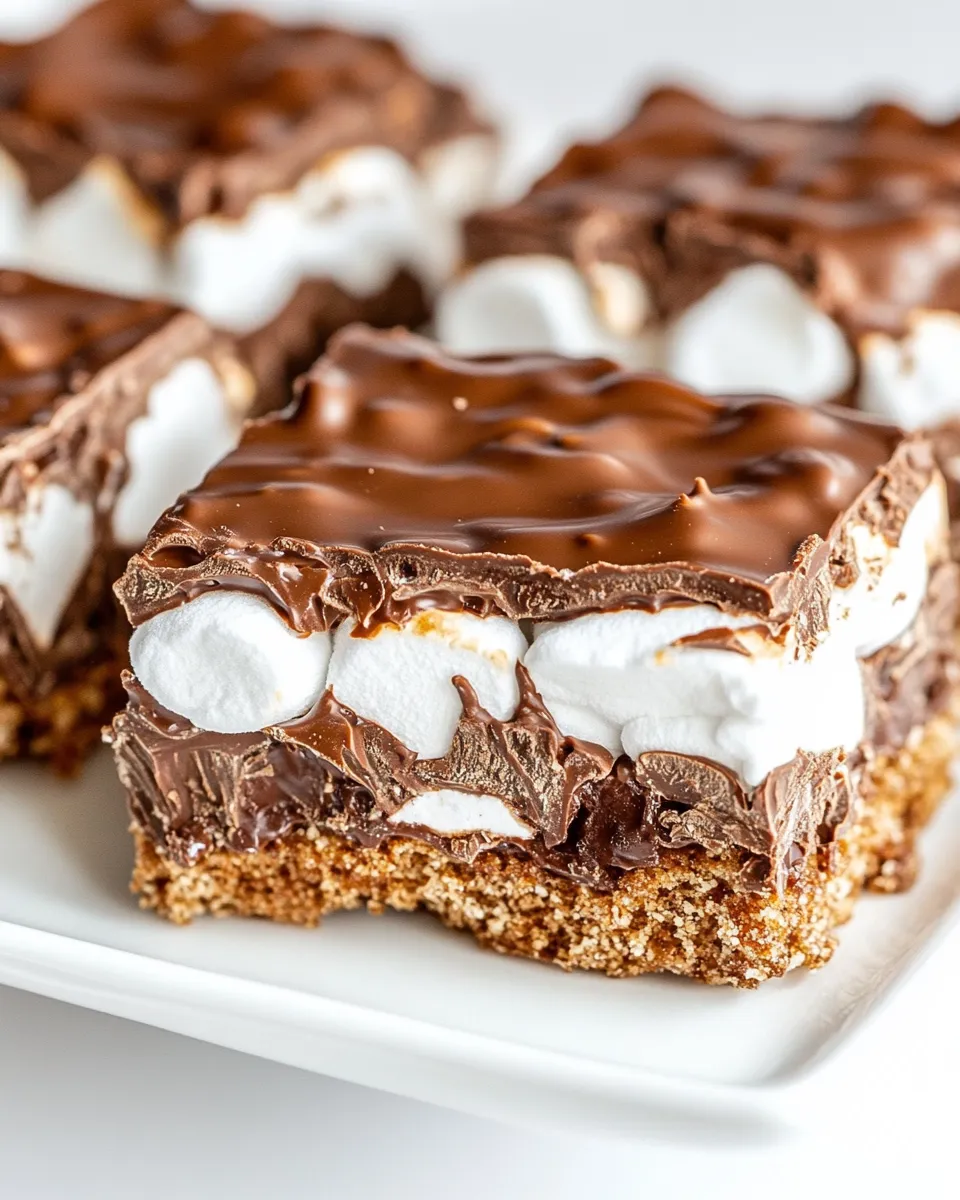
Royal Chocolate Marshmallow Bars
When you think of a dessert that combines rich chocolate, chewy marshmallows, and a delightful crunch, what comes to mind? If you’re like me, you’re probably dreaming of the luscious Royal Chocolate Marshmallow Bars. These bars are not just a treat; they’re an experience that captures the essence of indulgence in every bite. Whether you’re hosting a gathering or simply looking to satisfy your sweet tooth, these bars are sure to become a favorite.
Top Reasons to Make Royal Chocolate Marshmallow Bars
- Decadent Flavor: The combination of chocolate, peanut butter, and marshmallows creates a divine flavor profile that is hard to resist.
- Easy to Make: With a simple method and minimal ingredients, anyone can whip up these bars in no time!
- Perfect for Any Occasion: Whether it’s a birthday party, a bake sale, or just a cozy night in, these bars fit the bill.
- Kid-Friendly: Kids love marshmallows, and these bars are sure to be a hit with the little ones.
- Customizable: Feel free to add your own twist with different mix-ins or toppings!
What You’ll Need
- 1 cup granulated white sugar
- 3/4 cup (1 1/2 sticks) butter, at room temperature
- 3 large eggs
- 1 teaspoon vanilla extract
- 1 1/3 cups all-purpose flour
- 3 tablespoons unsweetened cocoa powder
- 1/2 teaspoon baking powder
- 1/2 teaspoon salt
- 4 cups mini marshmallows
- 8 ounces milk chocolate chips
- 3 tablespoons butter
- 1 cup peanut butter
- 2 cups Rice Krispies
Equipment Breakdown
- Mixing Bowls: You’ll need a couple of sizes for mixing wet and dry ingredients.
- 9×13-inch Baking Pan: This is the perfect size for your bars to bake evenly.
- Spatula: A good spatula will help you mix and spread your batter.
- Measuring Cups and Spoons: Accurate measurements are key to perfect results.
- Whisk: Essential for combining ingredients smoothly.
Royal Chocolate Marshmallow Bars: How It’s Done
Step 1: Preheat the Oven
Preheat your oven to 350°F (175°C). This ensures that your bars bake evenly and turn out perfectly.
Step 2: Prepare the Baking Pan
Grease your 9×13-inch baking pan with butter or line it with parchment paper for easy removal later.
Step 3: Cream the Butter and Sugar
In a large mixing bowl, cream together the granulated sugar and softened butter until the mixture is light and fluffy. This usually takes about 3-5 minutes.
Step 4: Add the Eggs and Vanilla
Beat in the eggs, one at a time, making sure to mix well after each addition. Then, add the vanilla extract and mix until combined.
Step 5: Combine Dry Ingredients
In a separate bowl, whisk together the all-purpose flour, cocoa powder, baking powder, and salt. Gradually add this dry mixture to the wet ingredients, stirring until just combined.
Step 6: Fold in the Marshmallows
Gently fold in the mini marshmallows until they’re evenly distributed throughout the batter.
Step 7: Spread the Batter
Spread the batter evenly in the prepared baking pan using your spatula.
Step 8: Bake
Bake in the preheated oven for 25-30 minutes, or until a toothpick inserted comes out clean. The bars should be set but still soft in the center.
Step 9: Prepare the Topping
While the bars are baking, melt the chocolate chips and 3 tablespoons of butter in a microwave-safe bowl or over a double boiler. Stir until smooth and creamy, then mix in the peanut butter until well combined.
Step 10: Add the Topping
Once the bars are done baking, remove them from the oven and immediately pour the chocolate peanut butter mixture over the top. Use a spatula to spread it evenly.
Step 11: Add Rice Krispies
Sprinkle the Rice Krispies over the chocolate layer, pressing down slightly to help them adhere.
Step 12: Cool and Slice
Allow the bars to cool in the pan for at least an hour before slicing into squares. This cooling time will help set the chocolate topping.
Seasonal Spins
- Fall Delight: Add a pinch of cinnamon and nutmeg to the batter for a seasonal twist.
- Winter Wonderland: Sprinkle crushed peppermint candies on top of the chocolate layer for a festive touch.
- Spring Fling: Fold in colorful sprinkles or mini chocolate eggs for a cheerful vibe.
- Summer Treat: Substitute some of the chocolate chips with white chocolate chips for a lighter flavor.
Pro Perspective
These Royal Chocolate Marshmallow Bars are a fantastic base recipe that can be easily adapted to suit your taste. Consider mixing in nuts for added crunch or using different types of chocolate for a unique flavor profile. Experimenting with flavors is part of the fun, and you might just stumble upon your new favorite version!
Freezer-Friendly Notes
These bars can be frozen for up to three months! After cutting them into squares, place them in an airtight container with parchment paper between layers to prevent sticking. Thaw in the refrigerator or at room temperature before enjoying.
FAQ
Can I use dark chocolate instead of milk chocolate?
Absolutely! Dark chocolate will give your bars a richer flavor. Just adjust the sweetness to your taste, as dark chocolate is less sweet than milk chocolate.
What if I don’t have Rice Krispies?
You can substitute with any other crispy cereal, such as Cornflakes or even crushed graham crackers, for a different texture.
How do I store leftover bars?
Store any leftover bars in an airtight container at room temperature for up to a week. They are best enjoyed fresh but will still be tasty for several days!
Can I make these bars gluten-free?
Yes! Substitute the all-purpose flour with a gluten-free flour blend to make these bars gluten-free. Ensure that your other ingredients are also certified gluten-free.
One Pan, More Ideas
Bring It Home
As you prepare to make these Royal Chocolate Marshmallow Bars, remember that the joy of baking lies not only in the end product but also in the process itself. Gather your ingredients, invite a friend or family member to join you, and enjoy the delightful experience of creating something sweet together. Whether you indulge yourself or share with loved ones, these bars are sure to delight and satisfy.
These Royal Chocolate Marshmallow Bars are not just another dessert; they are a celebration of flavor and fun. So, roll up your sleeves, get your baking gear ready, and treat yourself to a batch of these irresistible bars today. You won’t regret it!
Royal Chocolate Marshmallow Bars
Ingredients
Equipment
Method
- Preheat your oven to 350°F (175°C) to ensure even baking.
- Grease your 9x13-inch baking pan with butter or line with parchment paper.
- Cream together the granulated sugar and softened butter until light and fluffy, about 3-5 minutes.
- Beat in the eggs one at a time, then add the vanilla extract and mix until combined.
- In a separate bowl, whisk together the all-purpose flour, cocoa powder, baking powder, and salt. Gradually add this to the wet ingredients, stirring until just combined.
- Gently fold in the mini marshmallows until evenly distributed.
- Spread the batter evenly in the prepared baking pan.
- Bake in the preheated oven for 25-30 minutes, or until a toothpick comes out clean.
- Melt the chocolate chips and 3 tablespoons of butter, then mix in the peanut butter until smooth.
- Once the bars are baked, pour the chocolate peanut butter mixture over the top and spread evenly.
- Sprinkle the Rice Krispies over the chocolate layer, pressing down slightly.
- Allow the bars to cool in the pan for at least an hour before slicing into squares.
Notes
- These bars can be frozen for up to three months; layer with parchment to prevent sticking.
- Substitute dark chocolate for a richer flavor.
- Store leftovers in an airtight container at room temperature for up to a week.