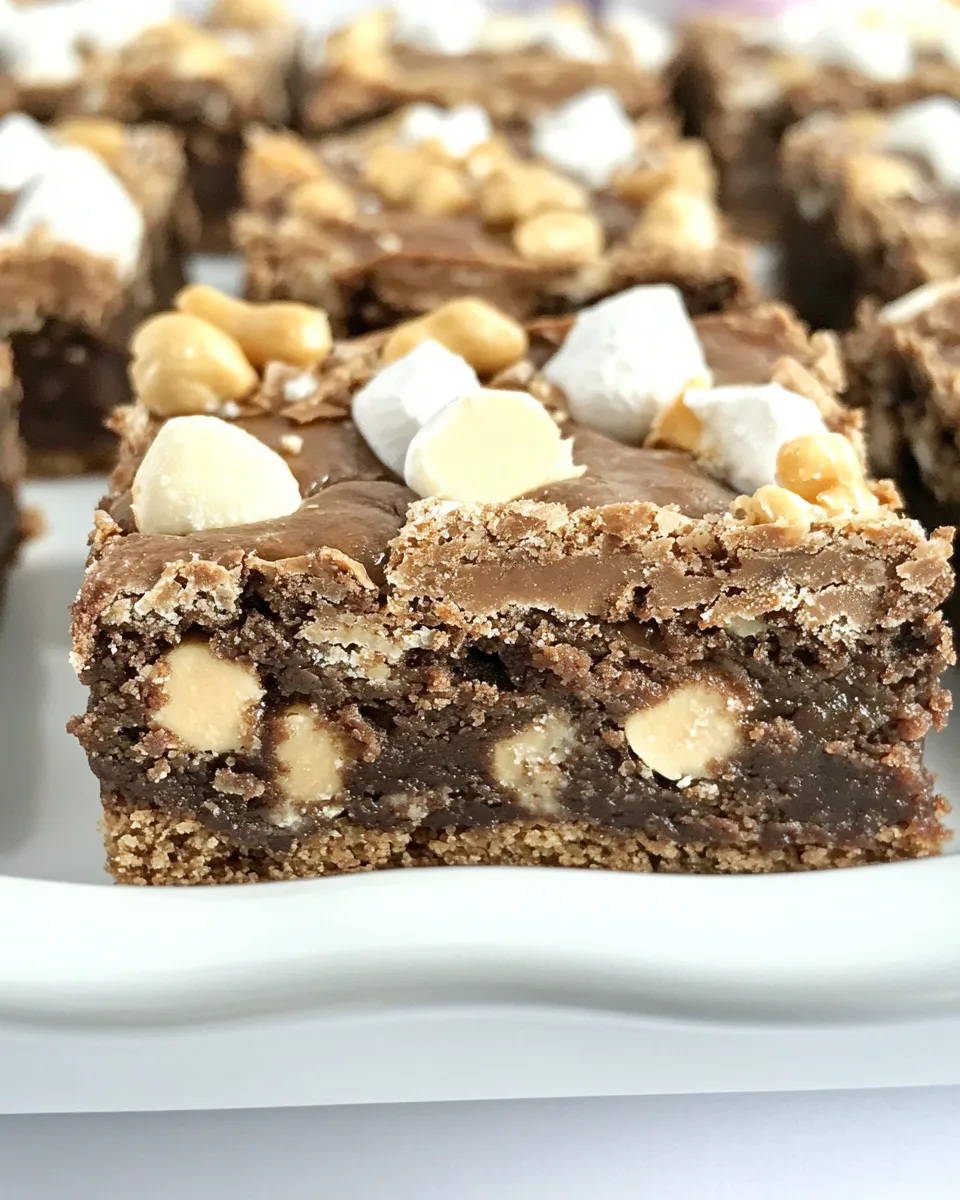
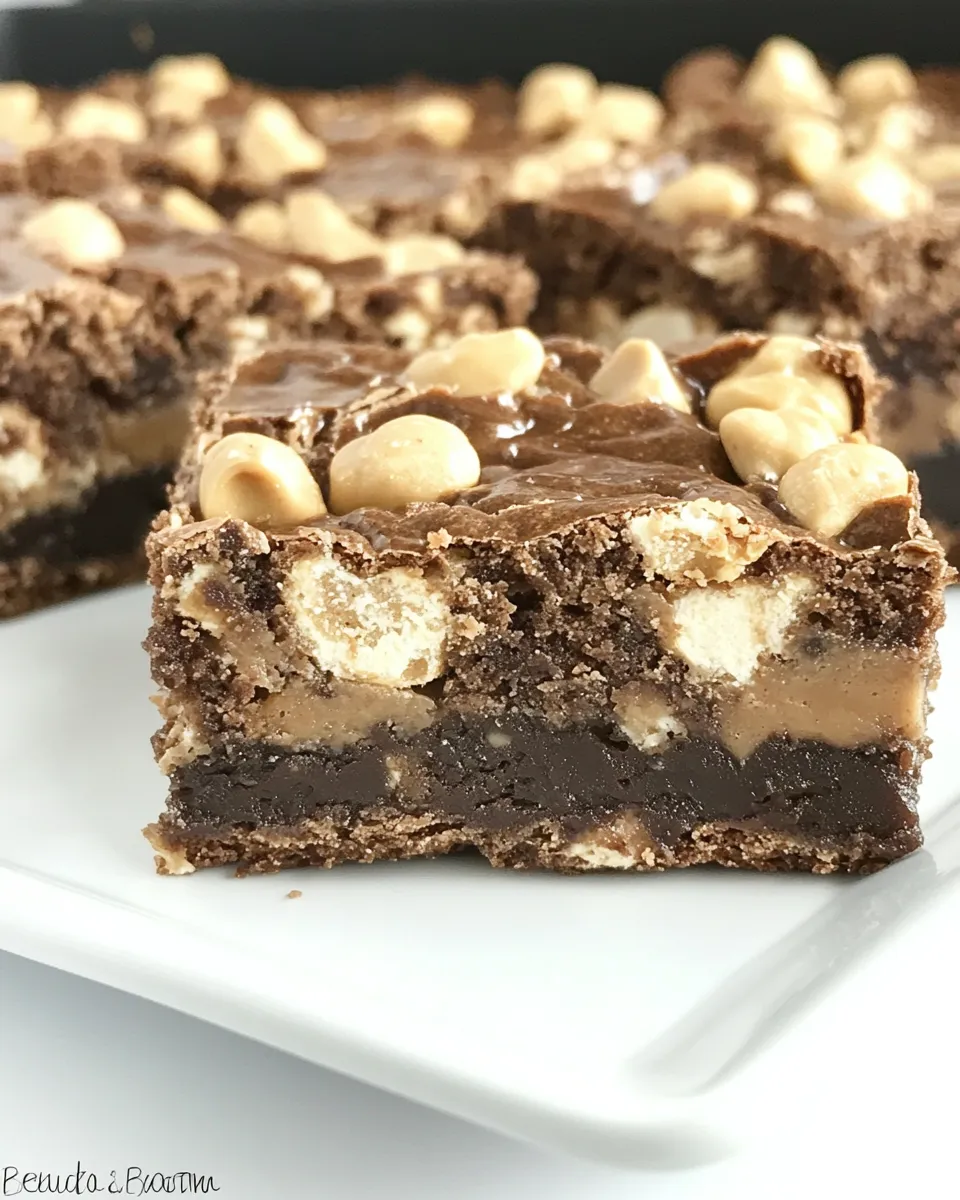
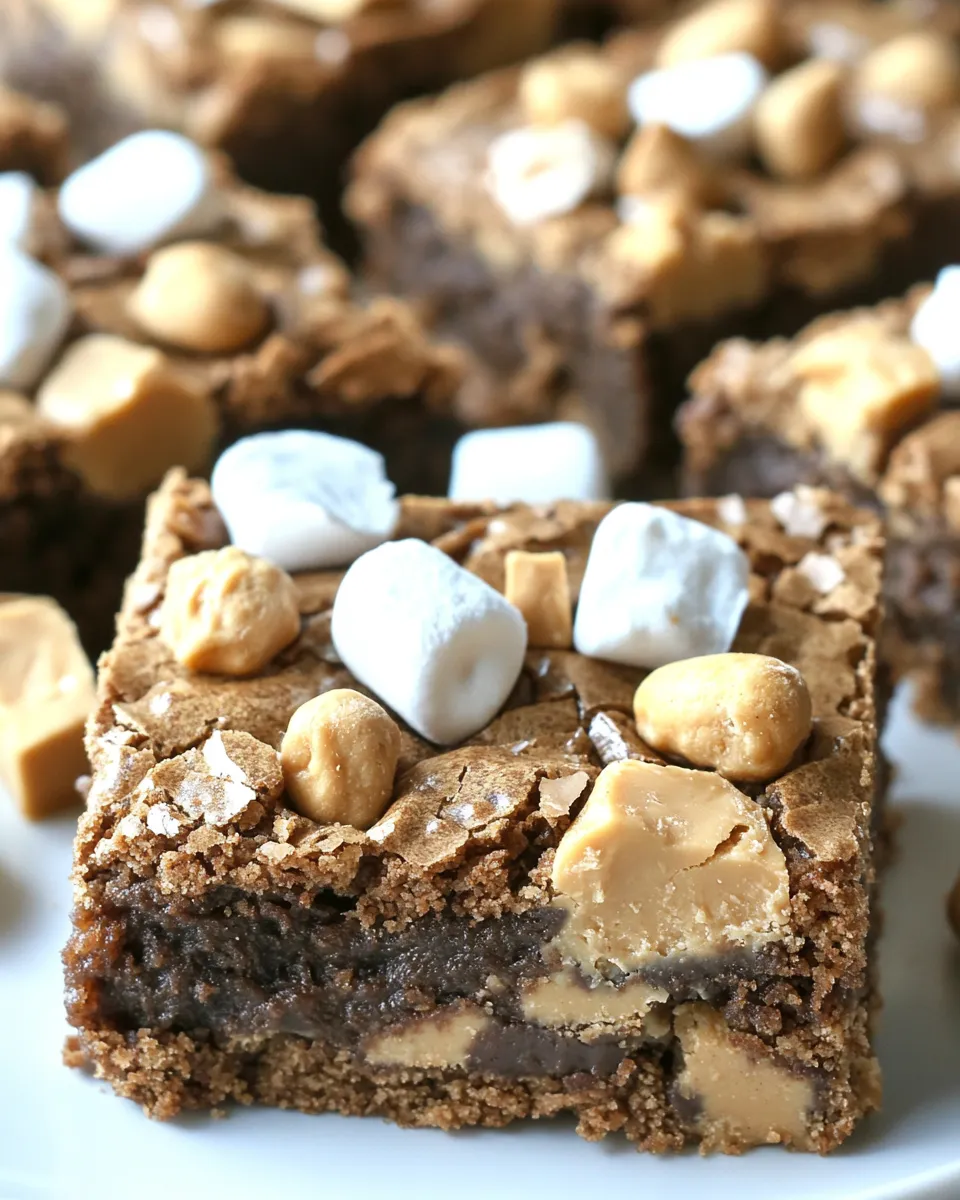
Brownie Peanut Butter Magic Bars
If you’re looking for a dessert that combines the rich, fudgy goodness of brownies with the creamy, nutty flavor of peanut butter, then look no further than these Brownie Peanut Butter Magic Bars. They’re a delightful treat that’s perfect for any occasion, whether it’s a family gathering, a potluck, or just a cozy night in. The best part? They come together in no time at all, thanks to a simple brownie mix as the base. Get ready to indulge in layers of chocolate and peanut butter goodness that will leave you craving more!
Why It’s My Go-To
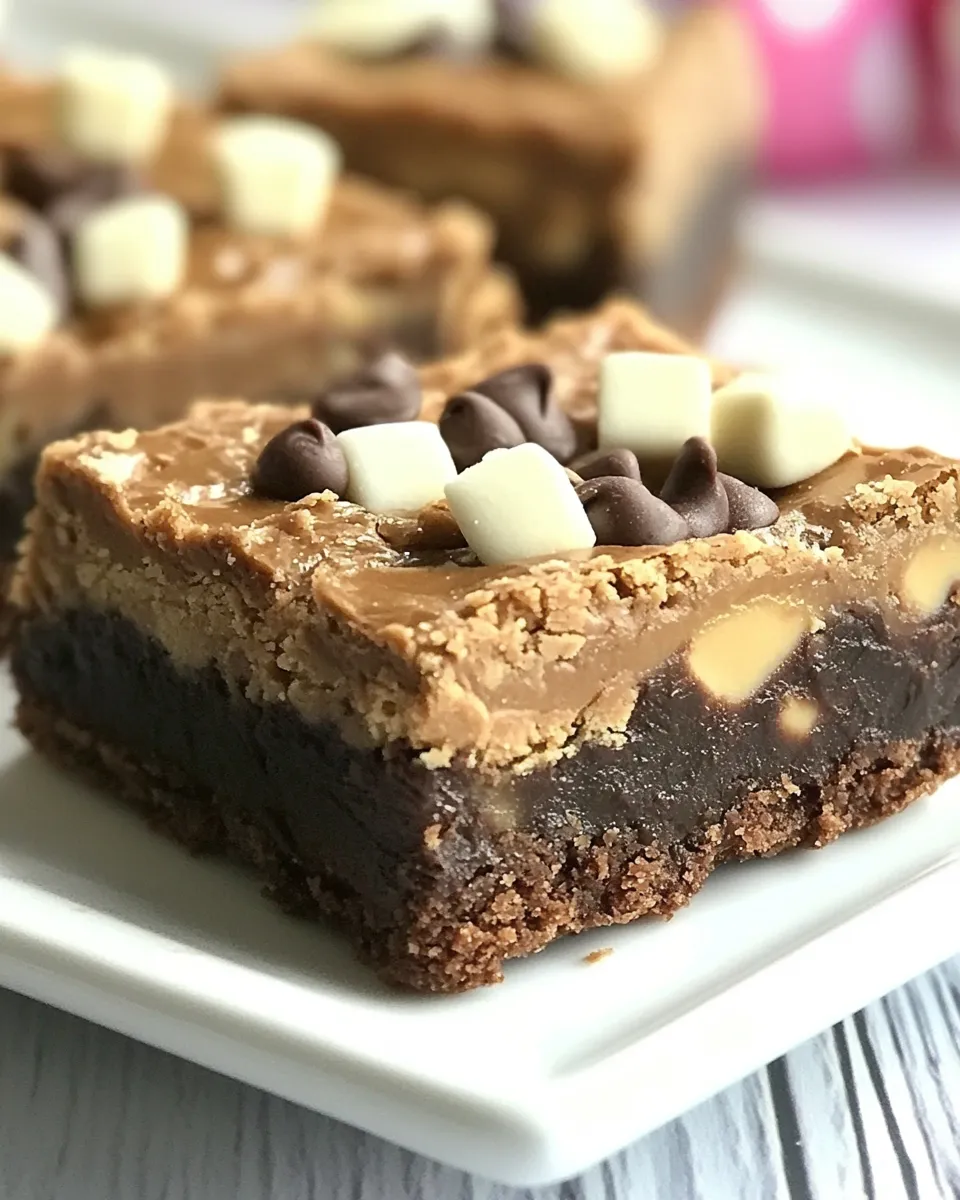
These Brownie Peanut Butter Magic Bars have quickly become one of my favorite go-to desserts. The combination of brownie and peanut butter is a match made in heaven, and the addition of sweetened condensed milk takes it to the next level. They’re incredibly easy to make, requiring minimal prep time, and the result is a crowd-pleaser that disappears faster than you can say “magic bars.” Plus, they are versatile enough to satisfy both chocolate lovers and peanut butter enthusiasts.
Gather These Ingredients
Before you start baking, make sure you have all the necessary ingredients on hand. Here’s what you’ll need:
- 1 box Brownie Mix (19.5 ounces) – This is the base for your bars, providing that decadent brownie flavor.
- 1 stick butter (softened) – Adds richness and helps bind the ingredients together.
- 1 egg – Essential for the structure of the brownies.
- 8 Reese’s Peanut Butter Cups (chopped) – For that irresistible peanut butter flavor.
- 1/2 cup peanut butter chips – Adds an extra layer of creamy peanut butter goodness.
- 1 cup milk chocolate chips – Because you can never have too much chocolate!
- 1 can (14 oz) sweetened condensed milk – This magical ingredient brings everything together.
Recommended Tools
To make your Brownie Peanut Butter Magic Bars, you’ll need a few essential tools:
- Mixing bowl – For combining your brownie mix, butter, and egg.
- Spatula – To mix and spread your ingredients evenly.
- 9×13-inch baking pan – The perfect size for your magic bars.
- Oven mitts – Safety first! Always use these when handling hot pans.
- Knife – For cutting your bars into delicious squares.
Cooking Brownie Peanut Butter Magic Bars: The Process
Ready to get started? Follow these simple steps to create your Brownie Peanut Butter Magic Bars.
Step 1: Preheat Your Oven
Preheat your oven to 350°F (175°C). This ensures that your bars bake evenly and come out perfectly.
Step 2: Prepare the Baking Pan
Grease your 9×13-inch baking pan with non-stick spray or line it with parchment paper for easy removal.
Step 3: Mix the Brownie Base
In a mixing bowl, combine the brownie mix, softened butter, and egg. Stir until the ingredients are well combined and form a thick batter.
Step 4: Spread the Brownie Mixture
Pour the brownie batter into the prepared baking pan. Use a spatula to spread it evenly across the bottom of the pan.
Step 5: Add the Peanut Butter Cups
Sprinkle the chopped Reese’s Peanut Butter Cups evenly over the brownie layer. Make sure they’re distributed well for that delightful peanut butter flavor in every bite.
Step 6: Sprinkle the Chips
Next, sprinkle the peanut butter chips and milk chocolate chips over the top of the peanut butter cups, creating a delicious layer of chocolatey goodness.
Step 7: Pour the Sweetened Condensed Milk
Finally, pour the sweetened condensed milk over the entire mixture. This will help bind everything together and add a creamy texture.
Step 8: Bake the Bars
Place the baking pan in the preheated oven and bake for 25-30 minutes, or until the edges are set and the center is slightly gooey. Keep an eye on them to avoid overbaking.
Step 9: Cool and Cut
Once baked, remove the bars from the oven and allow them to cool in the pan for about 10-15 minutes. Then, transfer them to a wire rack to cool completely before cutting them into squares.
Allergy-Friendly Swaps
If you have dietary restrictions or allergies, here are some easy swaps to consider:
- Use gluten-free brownie mix for a gluten-free version.
- Substitute dairy-free butter and chocolate chips for a dairy-free treat.
- Replace peanut butter with sun butter for a nut-free option.
- Use a flax egg (1 tablespoon ground flaxseed + 2.5 tablespoons water) as an egg substitute for a vegan version.
Little Things that Matter
When making your Brownie Peanut Butter Magic Bars, keep these small tips in mind for the best results:
- Make sure your butter is softened, not melted, for the right texture.
- Don’t overmix the brownie batter; a few lumps are okay!
- Let the bars cool completely before cutting to ensure clean edges.
- Experiment with different chocolate chips or add nuts for extra crunch.
Best Ways to Store
To keep your Brownie Peanut Butter Magic Bars fresh and delicious, follow these storage tips:
- Store them in an airtight container at room temperature for up to 3 days.
- For longer storage, refrigerate them, which can extend their freshness up to a week.
- You can also freeze the bars. Cut them into squares, wrap them individually in plastic wrap, and store them in a freezer-safe container for up to 3 months.
Top Questions & Answers
Can I use a different type of brownie mix?
Absolutely! You can use any brand of brownie mix you prefer, or even make your own from scratch if you’re feeling adventurous.
What can I substitute for Reese’s Peanut Butter Cups?
If you don’t have Reese’s on hand, try using chopped chocolate-covered peanut butter candies or even homemade peanut butter cups for a more personalized touch.
Can I add nuts to the bars?
Yes! Chopped walnuts or pecans can add a delightful crunch and flavor contrast to the bars.
How do I know when the bars are done baking?
The edges should be set, and the center should still be a bit gooey. A toothpick inserted in the center should come out with a few moist crumbs, not wet batter.
Next Up in Your Queue
If you loved these Brownie Peanut Butter Magic Bars, here are some other delicious treats to try next:
That’s a Wrap
In conclusion, these Brownie Peanut Butter Magic Bars are not just a dessert; they’re an experience that brings joy to every bite. With their rich layers of brownies, creamy peanut butter, and sweet chocolate, they are sure to be a hit with anyone who tries them. Whether you’re baking for a special occasion or simply indulging in a sweet treat at home, these bars are the perfect addition to your dessert repertoire. So gather your ingredients, preheat that oven, and get ready to enjoy a slice of heaven with these Brownie Peanut Butter Magic Bars!
Brownie Peanut Butter Magic Bars
Ingredients
Equipment
Method
- Preheat your oven to 350°F (175°C).
- Grease your 9x13-inch baking pan with non-stick spray or line it with parchment paper.
- In a mixing bowl, combine the brownie mix, softened butter, and egg. Stir until well combined.
- Pour the brownie batter into the prepared baking pan and spread it evenly.
- Sprinkle the chopped Reese’s Peanut Butter Cups evenly over the brownie layer.
- Sprinkle the peanut butter chips and milk chocolate chips over the top.
- Pour the sweetened condensed milk over the entire mixture.
- Bake for 25-30 minutes, or until the edges are set and the center is slightly gooey.
- Allow to cool in the pan for about 10-15 minutes before transferring to a wire rack to cool completely.
Notes
- Ensure butter is softened, not melted, for the right texture.
- Avoid overmixing the brownie batter; a few lumps are fine!
- Let the bars cool completely before cutting for clean edges.
- Experiment with different chocolate chips or add nuts for extra crunch.