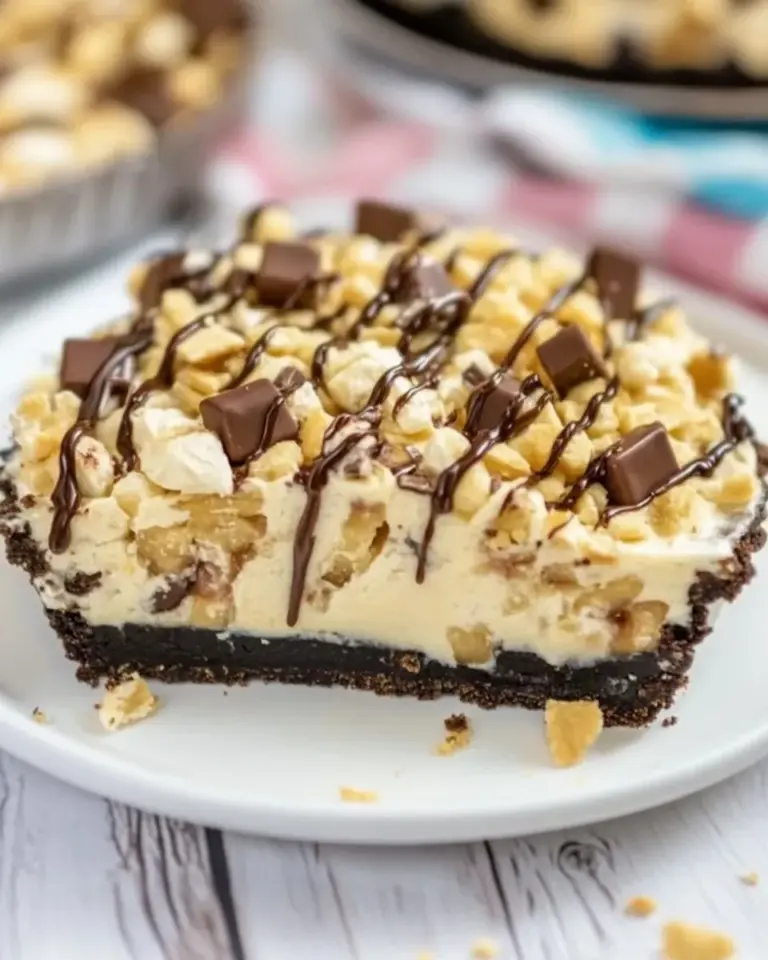
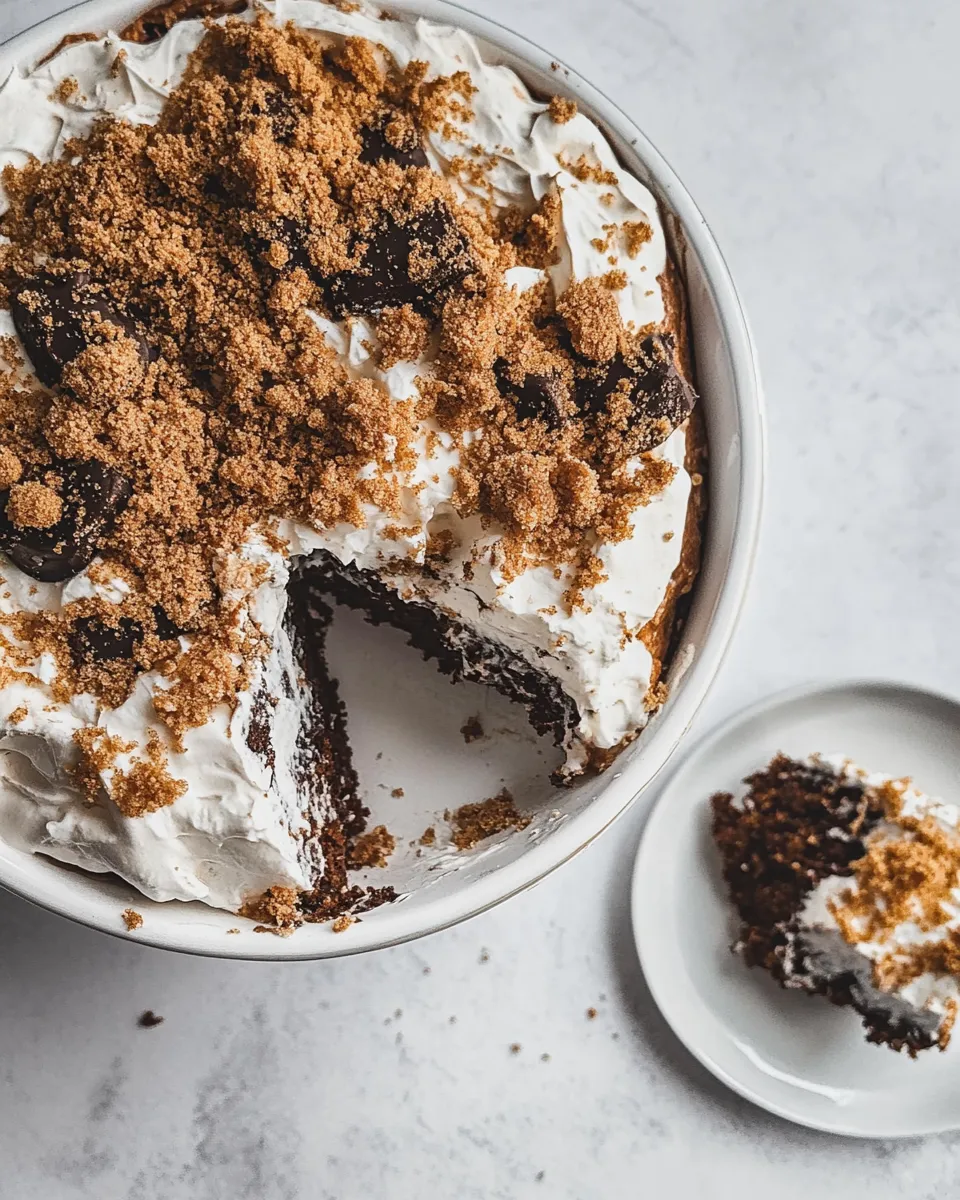
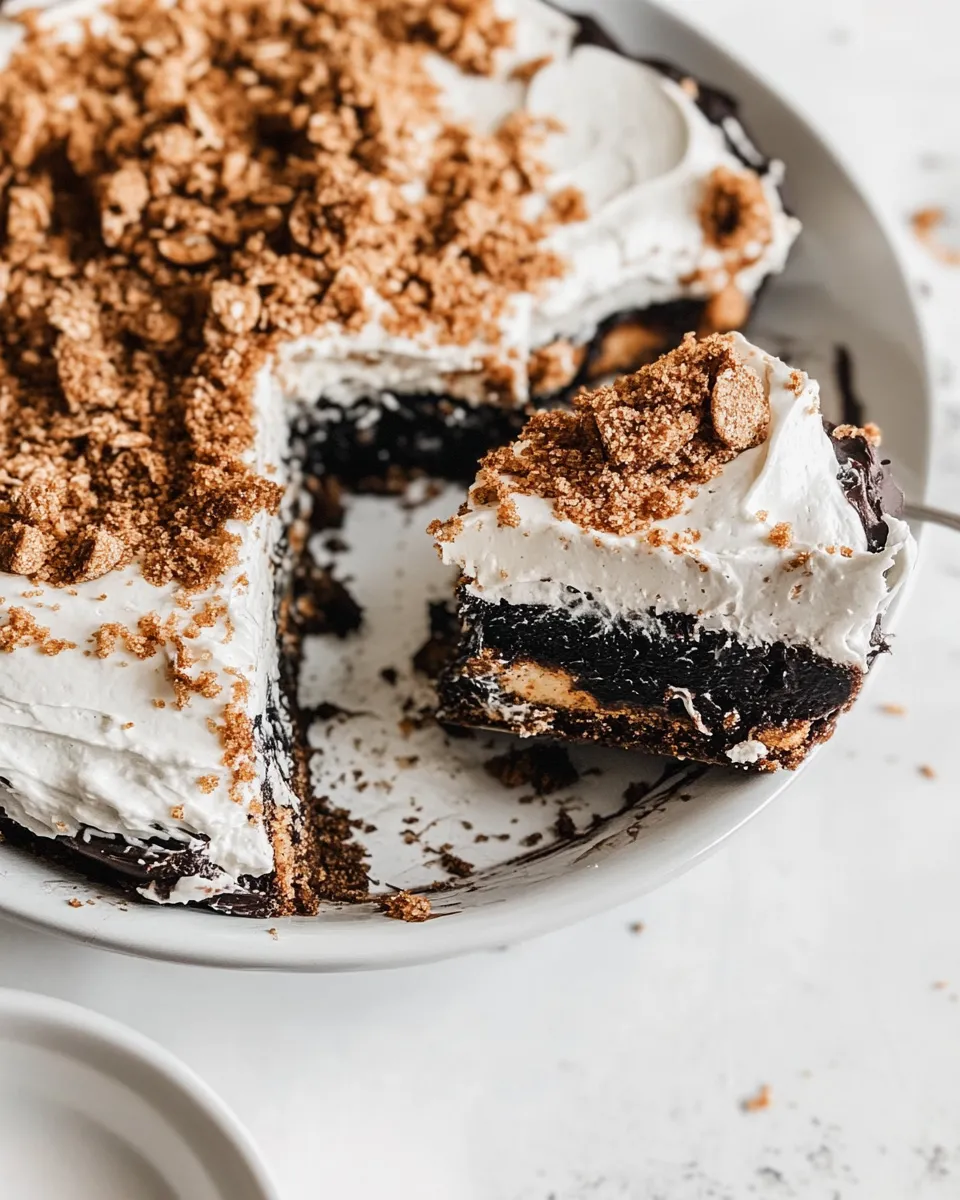
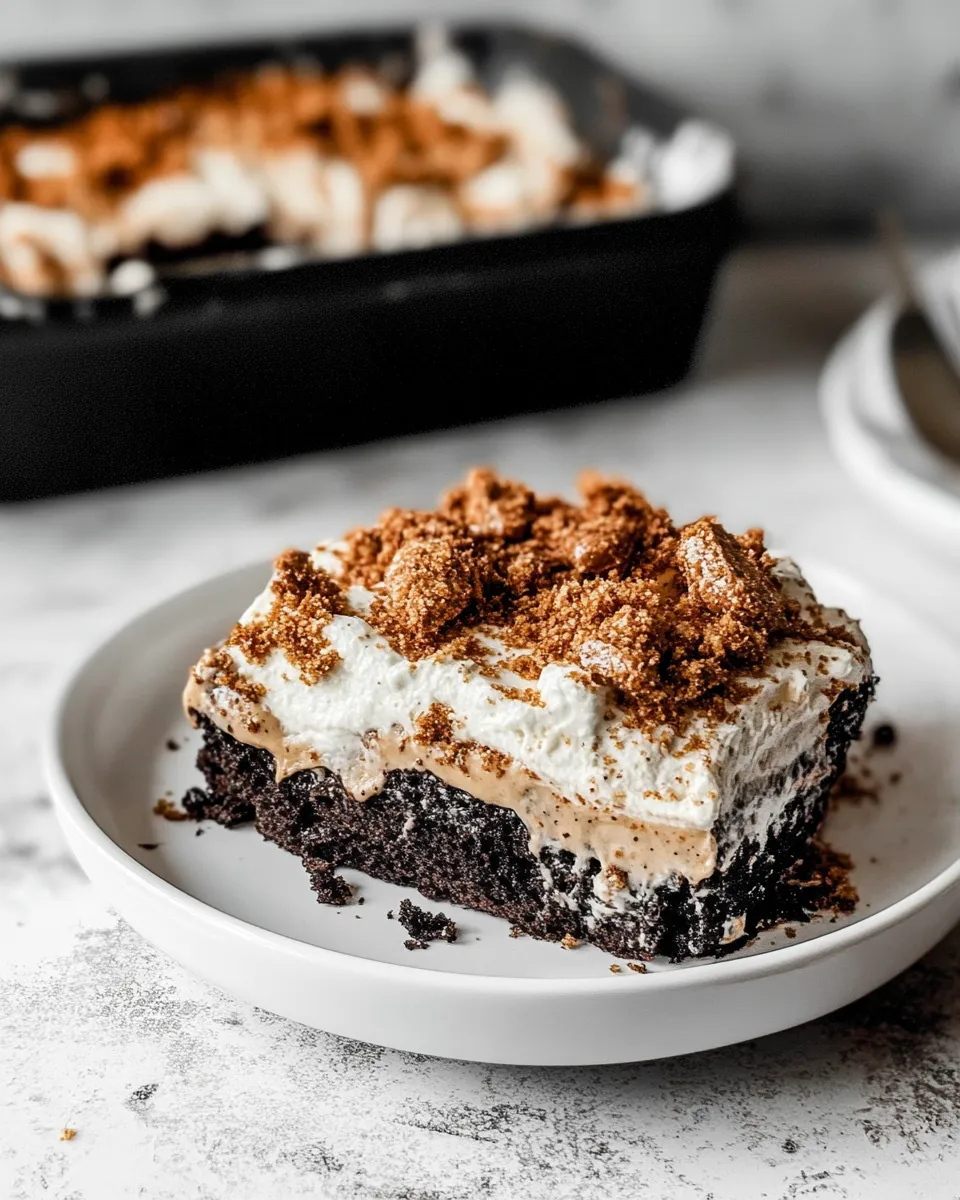
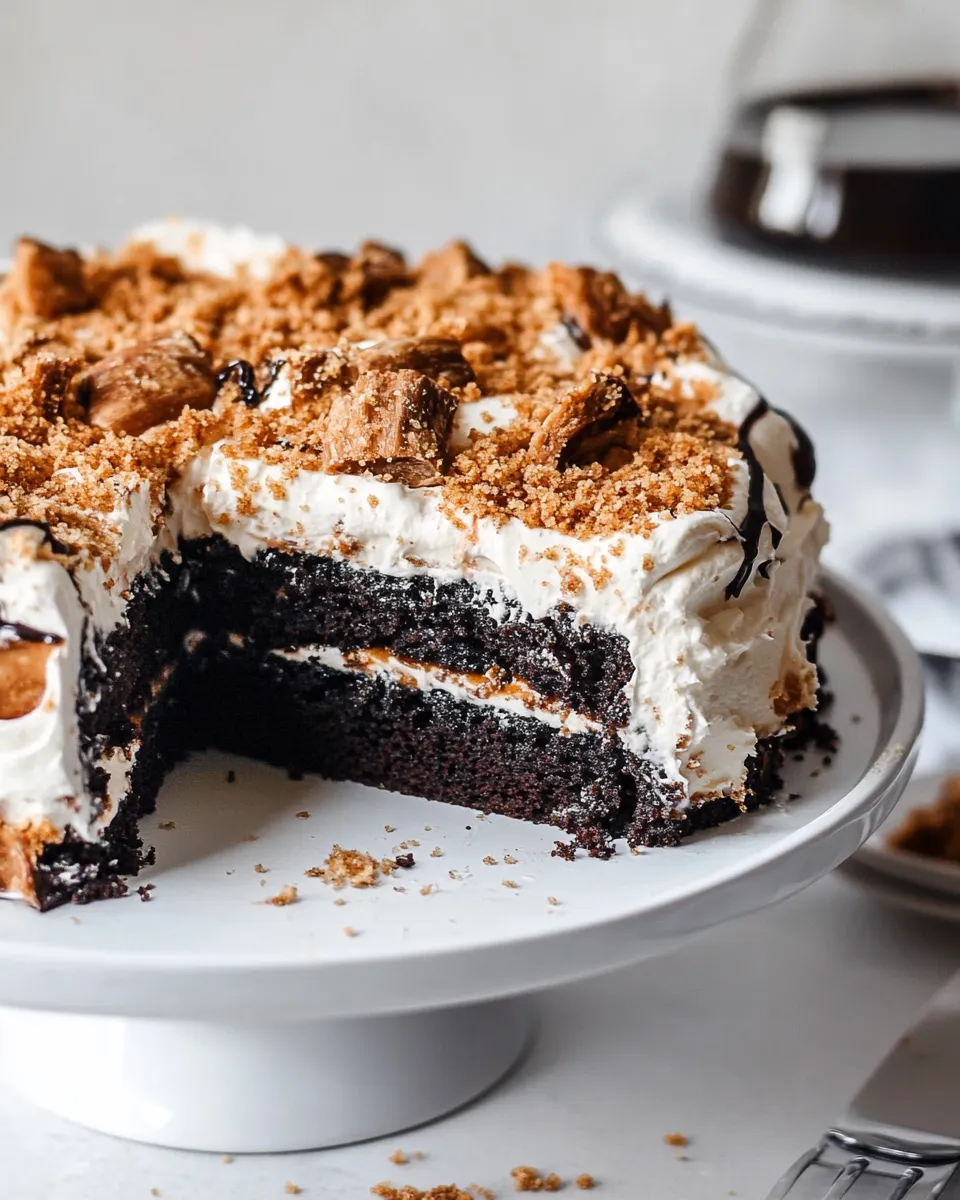
Butterfinger Cake
If you’re a fan of chocolate, caramel, and peanut butter, then you are in for a real treat with this Butterfinger Cake. This dessert is a delightful combination of rich chocolate cake, gooey caramel, and crunchy Butterfinger bars that will have everyone coming back for seconds. Perfect for birthdays, potlucks, or just a sweet indulgence at home, this Butterfinger Cake is sure to impress your family and friends.
Reasons to Love Butterfinger Cake
The Butterfinger Cake is not just a dessert; it’s a celebration of flavors and textures. Here are a few reasons why you will adore this cake:
- Decadent Layers: Each bite offers a rich chocolate base complemented by sweet caramel and creamy peanut butter.
- Easy to Make: Baked in a 9×13 pan, this cake simplifies the process, making it perfect for novice bakers and seasoned pros alike.
- Customizable: You can easily adjust the toppings or even try different flavors of cake to match your preferences.
- Sharing is Caring: With its generous serving size, this cake is ideal for gatherings, ensuring there’s enough to go around.
Ingredient Breakdown
To make this delightful Butterfinger Cake, you will need the following ingredients:
- 1 chocolate cake: Baked in a 9×13 pan, this will be the cake base.
- 1 jar caramel sauce: You can use a store-bought 16oz jar of caramel topping for convenience.
- 7 ounces sweetened condensed milk: This adds a creamy richness to the cake.
- 1 1/2 cups heavy whipping cream: Essential for that light and airy topping.
- 1 tablespoon creamy peanut butter: This provides the signature peanut butter flavor.
- 1/4 cup powdered sugar: For sweetness and to help stabilize the whipped cream.
- 3 Butterfinger bars: Chopped, for that irresistible crunch and flavor.
Kitchen Gear Checklist
Before you dive into making your Butterfinger Cake, ensure you have the following kitchen tools ready:
- 9×13 baking pan: The perfect size for baking and serving your cake.
- Mixing bowls: For combining your ingredients efficiently.
- Electric mixer: To whip the cream and mix the batter seamlessly.
- Spatula: For spreading and smoothing out the layers.
- Measuring cups and spoons: To ensure accurate ingredient measurements.
Butterfinger Cake in Steps
Follow these easy steps to create your Butterfinger Cake:
Step 1: Bake the Chocolate Cake
Preheat your oven according to the instructions for your chocolate cake mix. Prepare the batter as directed, then pour it into a greased 9×13 pan. Bake until a toothpick inserted in the center comes out clean. Allow the cake to cool completely.
Step 2: Prepare the Caramel Layer
Once the cake is cool, pour the caramel sauce over the top, spreading it evenly. Drizzle the sweetened condensed milk over the caramel to create a luscious layer.
Step 3: Make the Whipped Cream Topping
In a mixing bowl, combine the heavy whipping cream, creamy peanut butter, and powdered sugar. Using an electric mixer, whip until soft peaks form. This will create a light and fluffy topping for your cake.
Step 4: Assemble the Cake
Spread the whipped cream mixture evenly over the caramel layer. Be gentle to keep the layers intact.
Step 5: Add Butterfinger Crunch
Sprinkle the chopped Butterfinger bars over the whipped cream topping. This adds a delightful crunch and extra flavor.
Step 6: Chill and Serve
Cover the cake and refrigerate for at least 2 hours to allow the flavors to meld. Cut into squares and serve chilled for the best experience.
Make It Diet-Friendly
If you want to make some adjustments to fit dietary preferences, consider these alternatives:
- Use a gluten-free chocolate cake mix for a gluten-free option.
- Replace heavy whipping cream with coconut cream for a dairy-free version.
- Opt for a sugar-free caramel sauce to reduce sugar content.
- Use natural peanut butter for a healthier fat option.
Watch Outs & How to Fix
While making your Butterfinger Cake, keep these tips in mind:
- Overmixing the Cake Batter: This can lead to a dense cake. Mix just until combined.
- Whipped Cream Not Stiffening: Ensure your mixing bowl and beaters are cold before whipping the cream.
- Caramel Sauce Seeping Through: Allow the cake to cool completely before adding layers to prevent sogginess.
- Chopping Butterfingers: Use a sharp knife or a food processor for even-sized pieces.
Meal Prep & Storage Notes
To keep your Butterfinger Cake fresh and delicious:
Store any leftovers in an airtight container in the refrigerator for up to 3 days. The flavors will continue to meld, making each bite even more enjoyable. If you plan to make this cake ahead of time, it can be assembled a day in advance, but wait to add the chopped Butterfinger bars until just before serving to maintain their crunch.
Quick Questions
Can I use a different type of cake mix for Butterfinger Cake?
Absolutely! Feel free to experiment with vanilla or even red velvet cake mixes for a fun twist on flavors.
What can I use instead of Butterfinger bars?
You can substitute with other chocolate or peanut butter candy bars like Reese’s or Snickers for a different flavor profile.
How can I make this cake more chocolatey?
Consider adding chocolate chips to the cake batter or drizzling chocolate sauce over the top before serving.
Is it necessary to refrigerate the Butterfinger Cake?
Yes, refrigerating the cake helps set the layers and enhances the flavors. It’s best served chilled.
More from the Kitchen
If you enjoyed this Butterfinger Cake, check out these other delightful recipes:
- Chocolate Chip Cookie Dough Brownies
- Peanut Butter Banana Bread
- Classic Vanilla Cupcakes with Buttercream Frosting
- No-Bake Oreo Cheesecake
Serve & Enjoy
Your Butterfinger Cake is now ready to be served! Gather your loved ones around the table, slice into the luscious layers, and watch their faces light up with delight. This cake is perfect for any occasion, and you’ll surely become the star baker of the family. It’s time to dig in and enjoy every sweet, creamy, and crunchy bite of your amazing Butterfinger Cake!
Butterfinger Cake
Ingredients
Equipment
Method
- Step 1: Preheat your oven according to the instructions for your chocolate cake mix. Prepare the batter as directed, then pour it into a greased 9x13 pan. Bake until a toothpick inserted in the center comes out clean. Allow the cake to cool completely.
- Step 2: Once the cake is cool, pour the caramel sauce over the top, spreading it evenly. Drizzle the sweetened condensed milk over the caramel to create a luscious layer.
- Step 3: In a mixing bowl, combine the heavy whipping cream, creamy peanut butter, and powdered sugar. Using an electric mixer, whip until soft peaks form.
- Step 4: Spread the whipped cream mixture evenly over the caramel layer. Be gentle to keep the layers intact.
- Step 5: Sprinkle the chopped Butterfinger bars over the whipped cream topping.
- Step 6: Cover the cake and refrigerate for at least 2 hours before serving.
Notes
- Store leftovers in an airtight container in the refrigerator for up to 3 days.
- Assemble a day in advance, but add Butterfinger bars just before serving.
- Use a sharp knife or food processor for even-sized Butterfinger pieces.