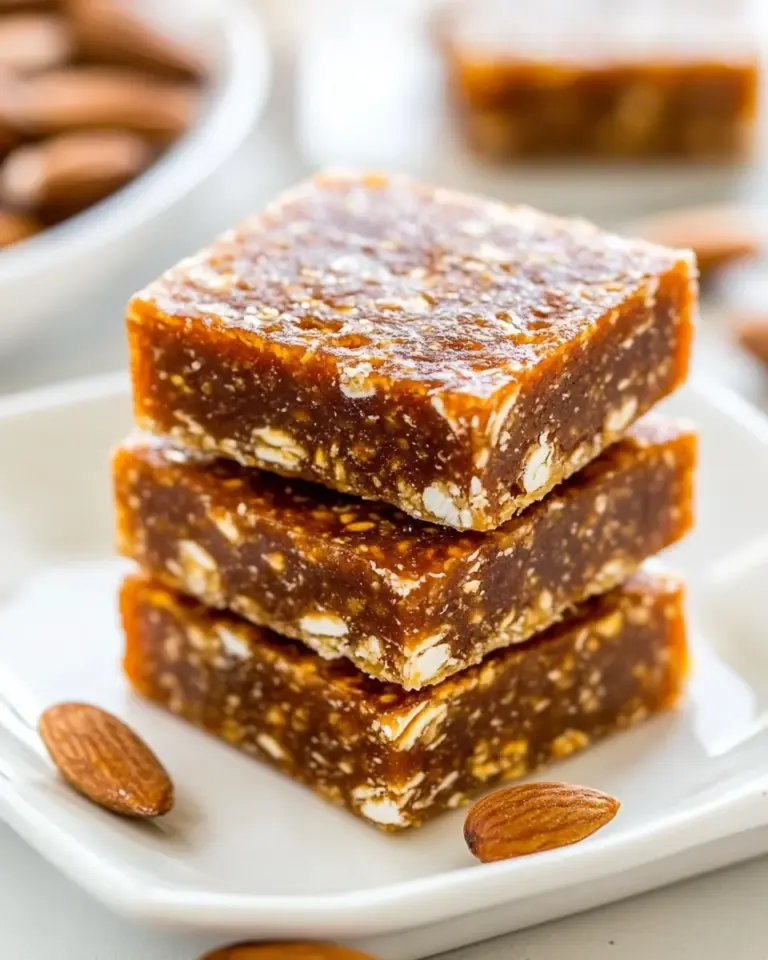
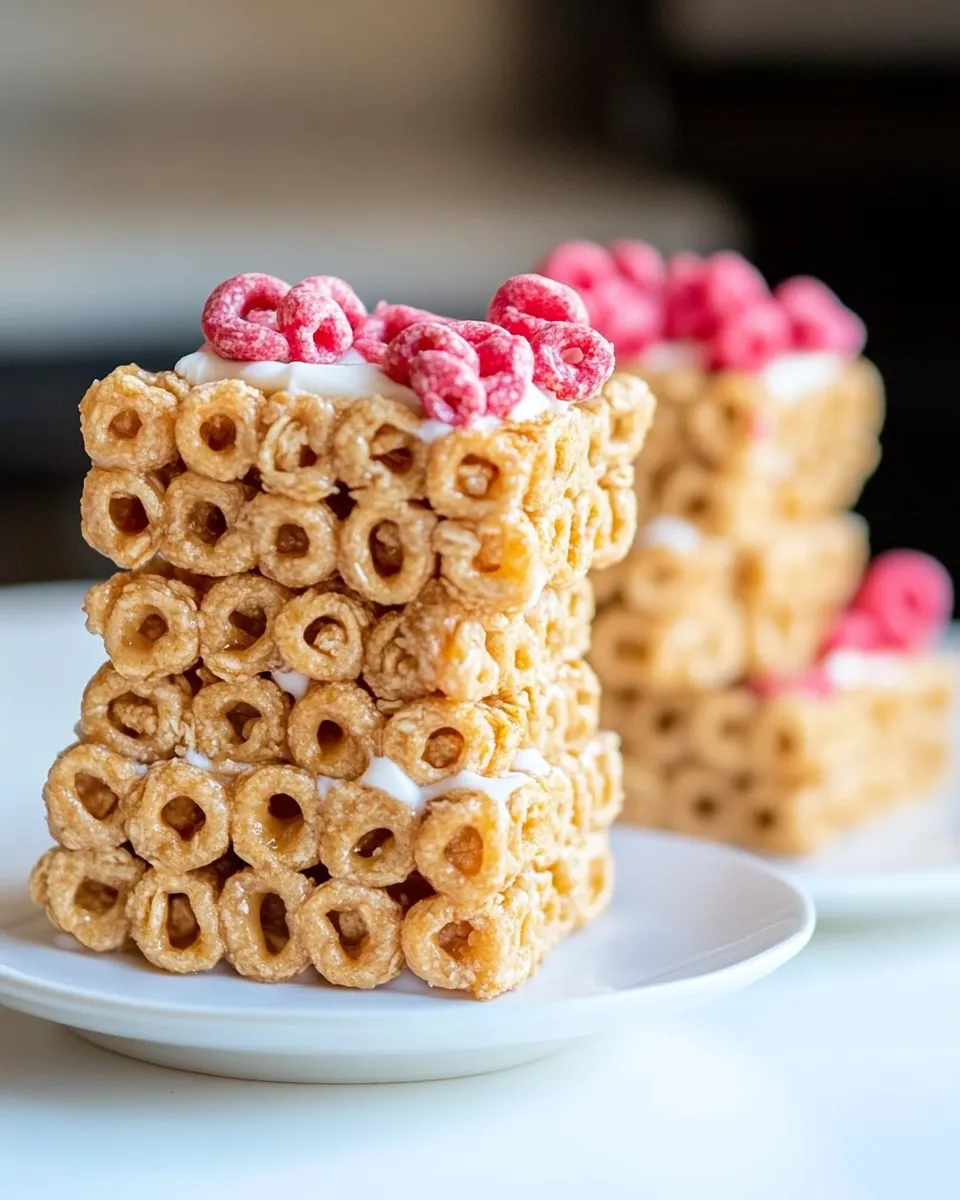
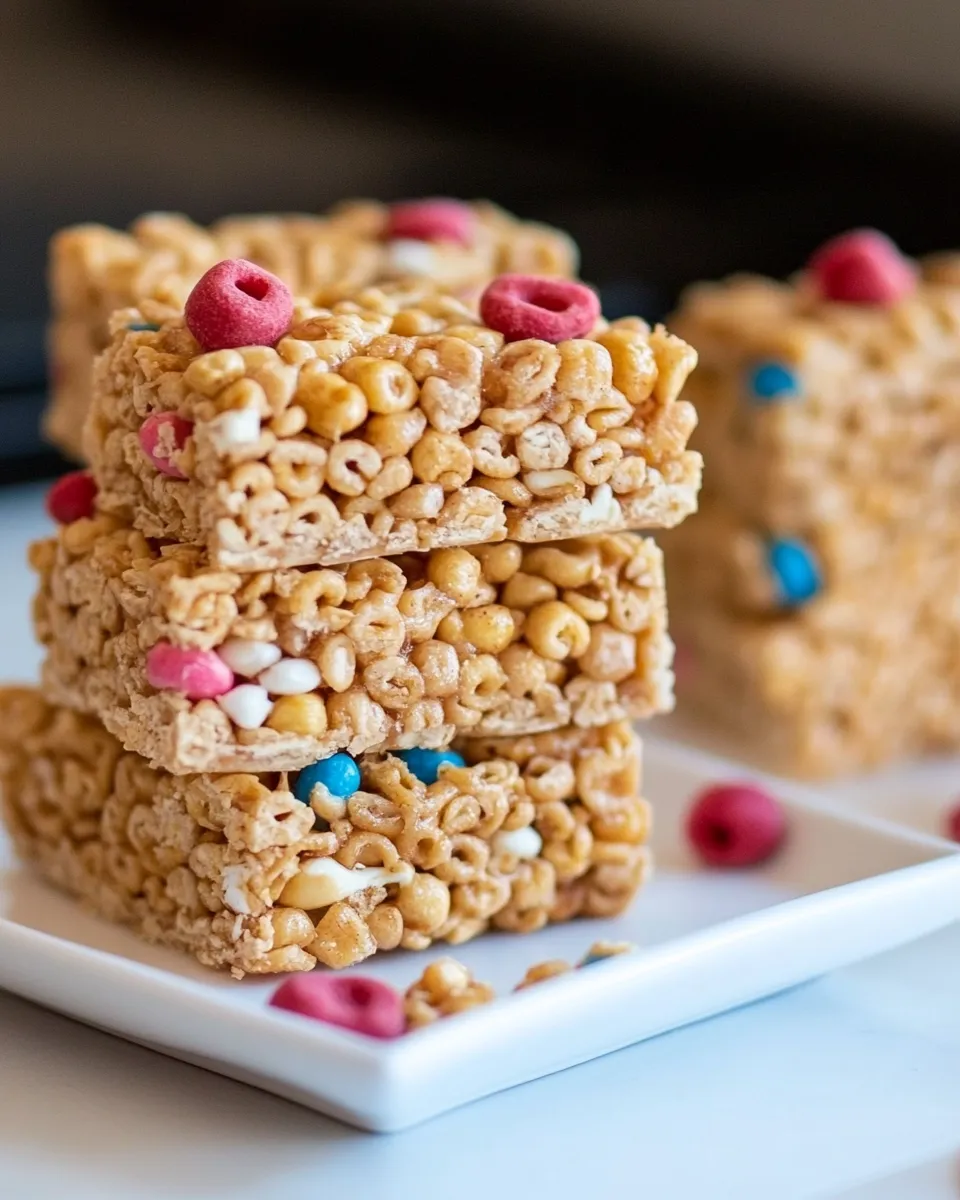
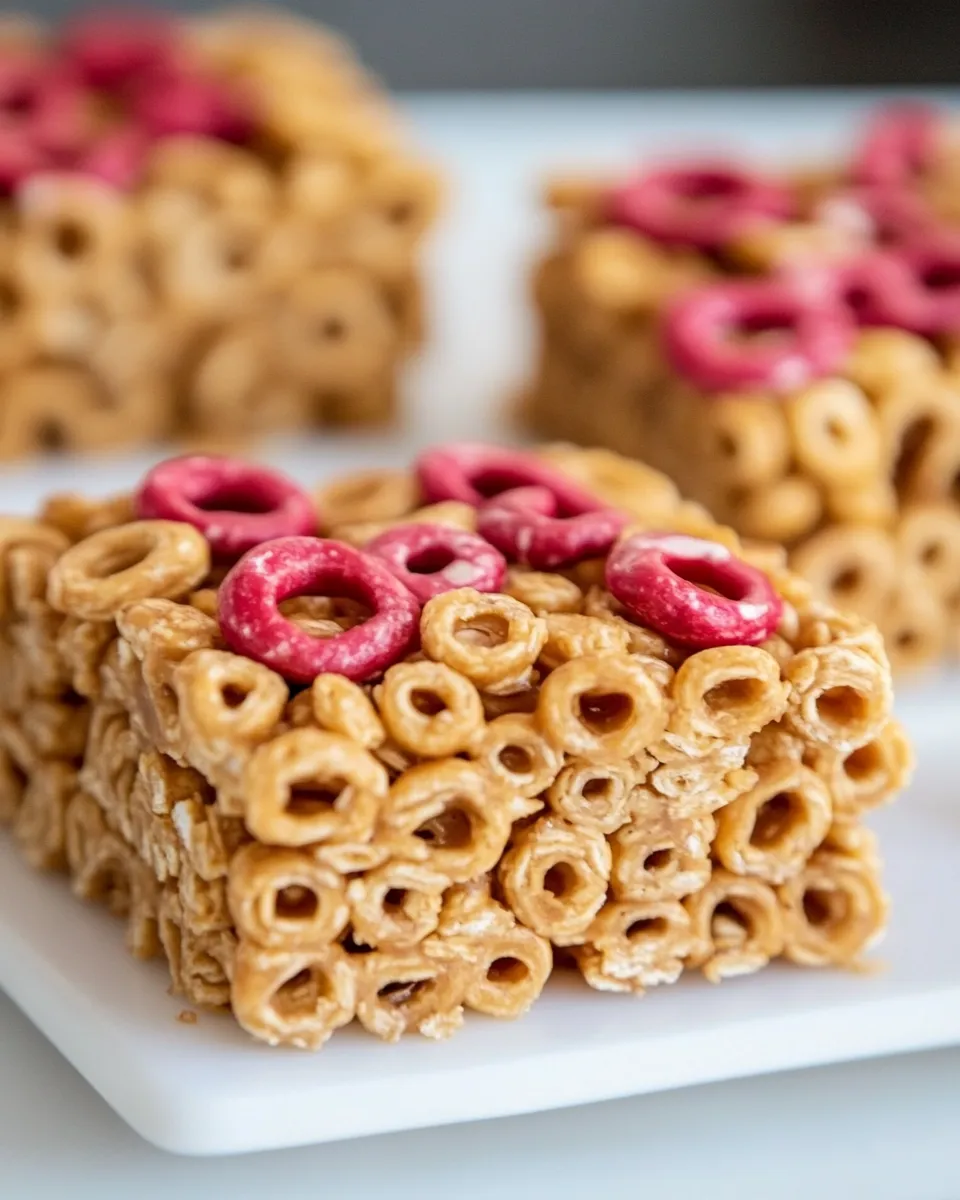
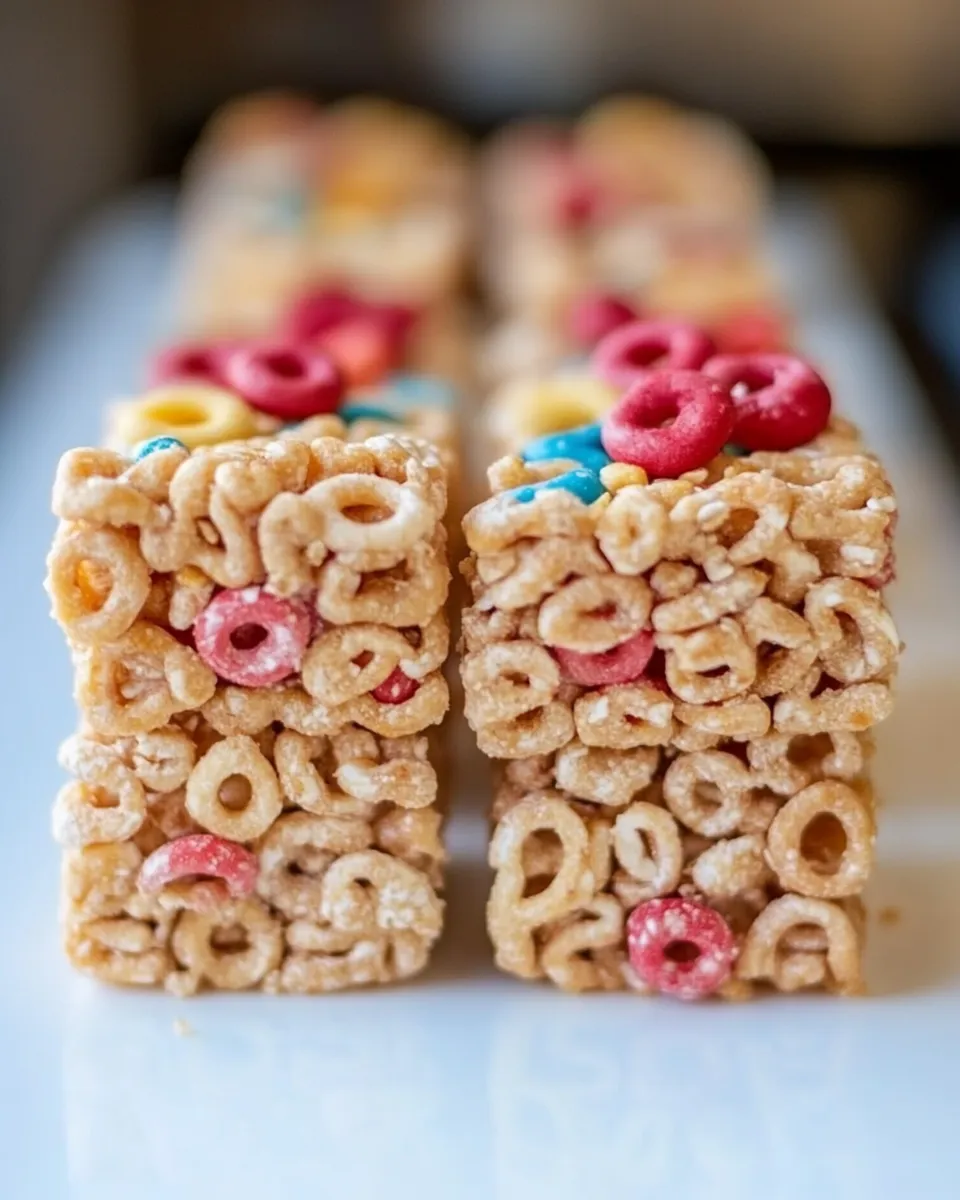
Cereal Bars
Cereal bars are the perfect on-the-go snack, combining nutritious ingredients with a satisfying crunch that’s hard to resist. Whether you need a quick breakfast, a pre-workout boost, or an afternoon pick-me-up, these homemade cereal bars are a delicious and healthy choice. With a base of your favorite cereal, a creamy nut butter, and a touch of sweetness from agave or honey, you can customize them to suit your taste. Let’s dive into why you’ll love these treats and how to make them!
Reasons to Love Cereal Bars
Cereal bars are a fantastic snack option for many reasons. Here are just a few:
- Convenience: Easy to make ahead of time and grab on the go.
- Customizable: Use your favorite cereals and nut butters to create a unique flavor.
- Nutritious: Packed with fiber and healthy fats, they provide lasting energy.
- Kid-Friendly: A hit with kids, making them perfect for school lunches or after-school snacks.
- Budget-Friendly: Making your own means you save money compared to store-bought options.
Ingredient Rundown
To create these scrumptious cereal bars, you’ll need a few basic ingredients. Here’s what you will use:
- 3 cups cereal of choice: Choose from oats, rice cereal, or any whole-grain option for a nutritious base.
- 2/3 cup peanut butter or nut butter of choice: Creamy or crunchy, this adds protein and flavor.
- 1/2 cup agave, honey, or brown rice syrup: A natural sweetener that binds the ingredients together.
- Optional 1/2 tsp salt: Enhances the flavor and balances the sweetness.
- Optional 3 tbsp protein powder: Boosts the protein content, making these bars even more satisfying.
Essential Tools for Success
Gather a few kitchen tools before you start your cereal bar adventure. Having the right equipment makes all the difference.
- Mixing Bowl: A large bowl for combining your ingredients.
- Spatula: Helps in mixing and spreading the mixture evenly.
- 9×9-inch Baking Pan: The perfect size for compact, chewy bars.
- Parchment Paper: Use this to line your baking pan for easy removal.
- Measuring Cups and Spoons: Accurate measurements are key to the perfect cereal bars.
From Start to Finish: Cereal Bars
Making cereal bars is a straightforward process. Follow these simple steps to create your own delicious snacks.
Step 1: Prep the Baking Pan
Start by lining a 9×9-inch baking pan with parchment paper. Leave some overhang for easy removal later.
Step 2: Mix the Wet Ingredients
In a mixing bowl, combine the 2/3 cup of peanut butter or your chosen nut butter with the 1/2 cup of agave, honey, or brown rice syrup. If you’re using salt, add it now. Microwave the mixture for about 30 seconds to 1 minute to soften the nut butter, making it easier to mix. Stir until smooth and well-combined.
Step 3: Add the Dry Ingredients
Gradually stir in the 3 cups of cereal of your choice. If you’re using protein powder, add it at this stage. Mix until the cereal is evenly coated with the wet mixture.
Step 4: Press into the Pan
Transfer the cereal mixture into the prepared baking pan. Using a spatula, press the mixture down firmly and evenly into the pan. This step is crucial for ensuring your bars hold together once cut.
Step 5: Chill and Set
Place the pan in the refrigerator for at least 1 hour, or until the mixture is firm. This chilling time allows the bars to set properly.
Step 6: Cut and Serve
Once set, remove the bars from the pan using the parchment overhang. Place on a cutting board and cut into squares or rectangles. Enjoy immediately or store as directed below.
Better Choices & Swaps
Customization is key when it comes to cereal bars. Here are some ideas for swaps and better choices:
- Try almond butter or sunflower seed butter for a nut-free option.
- Use maple syrup instead of agave or honey for a different flavor profile.
- Incorporate dried fruit, nuts, or seeds for added texture and nutrition.
- Substitute the cereal with granola for an extra crunch.
- Use vegan protein powder for a plant-based boost.
Insider Tips
To ensure your cereal bars turn out perfectly every time, consider these insider tips:
- Don’t skip the chilling step; it’s essential for the bars to hold together.
- Feel free to experiment with flavors by adding vanilla extract or cinnamon to the wet mixture.
- If the mixture seems too dry, add a splash of water or more nut butter to help it stick.
- Make a double batch and freeze half for later; they freeze beautifully!
Keep It Fresh: Storage Guide
Cereal bars can be stored to maintain their freshness and flavor. Here’s how:
- Store in an airtight container at room temperature for up to 1 week.
- For longer storage, keep them in the fridge for up to 2 weeks.
- For maximum freshness, wrap individual bars in plastic wrap and freeze for up to 3 months.
Ask the Chef
Can I use any type of cereal for these bars?
Absolutely! Feel free to use your favorite cereal. Just make sure it’s not overly sweetened, as the bars already have a sweetener added.
What if I don’t have nut butter?
You can substitute nut butter with seed butter, like sunflower seed butter, or even use coconut oil for a different texture.
Can I add chocolate chips to my cereal bars?
Yes! Adding chocolate chips or cacao nibs can enhance the flavor. Just mix them in after combining the cereals with the wet ingredients.
How do I know when the bars are set?
The bars should feel firm to the touch and not stick to your fingers when they are properly set. If they are still soft, give them additional time in the fridge.
Don’t Miss These
- Sally’s Baking Addiction for more fantastic baking recipes.
- Pinch of Yum for great meal ideas and tips.
- Minimalist Baker for simple, delicious recipes.
- The Kitchn for kitchen tips and inspiration.
Bring It Home
Now that you have all the information you need, it’s time to gather your ingredients and start making your own cereal bars! These treats are not only delicious but also provide a wholesome option for your snacking needs. With just a few simple ingredients and some creativity, you can whip up a batch that is perfect for you and your family. So why wait? Get in the kitchen and enjoy the fun of making your own cereal bars today!
Cereal bars are a delightful and healthy choice for any time of day. Their versatility allows you to tailor them to your personal preferences, making them a fun project for both novice and experienced cooks. Whether you’re fueling up for a busy day or seeking a sweet treat, these homemade cereal bars are sure to satisfy. Enjoy your culinary adventure!
Cereal Bars
Ingredients
Equipment
Method
- Step 1: Prep the Baking Pan - Line a 9x9-inch baking pan with parchment paper, leaving some overhang.
- Step 2: Mix the Wet Ingredients - In a mixing bowl, combine peanut butter with agave, honey, or brown rice syrup. Microwave for 30 seconds to 1 minute to soften, then stir until smooth.
- Step 3: Add the Dry Ingredients - Gradually stir in the cereal of your choice. If using, add protein powder and mix until evenly coated.
- Step 4: Press into the Pan - Transfer the mixture to the prepared pan and press down firmly with a spatula.
- Step 5: Chill and Set - Place in the refrigerator for at least 1 hour until firm.
- Step 6: Cut and Serve - Remove from the pan using parchment overhang, cut into squares or rectangles, and enjoy!
Notes
- Don’t skip the chilling step; it’s essential for the bars to hold together.
- Experiment with flavors by adding vanilla extract or cinnamon.
- If the mixture seems too dry, add a splash of water or more nut butter.