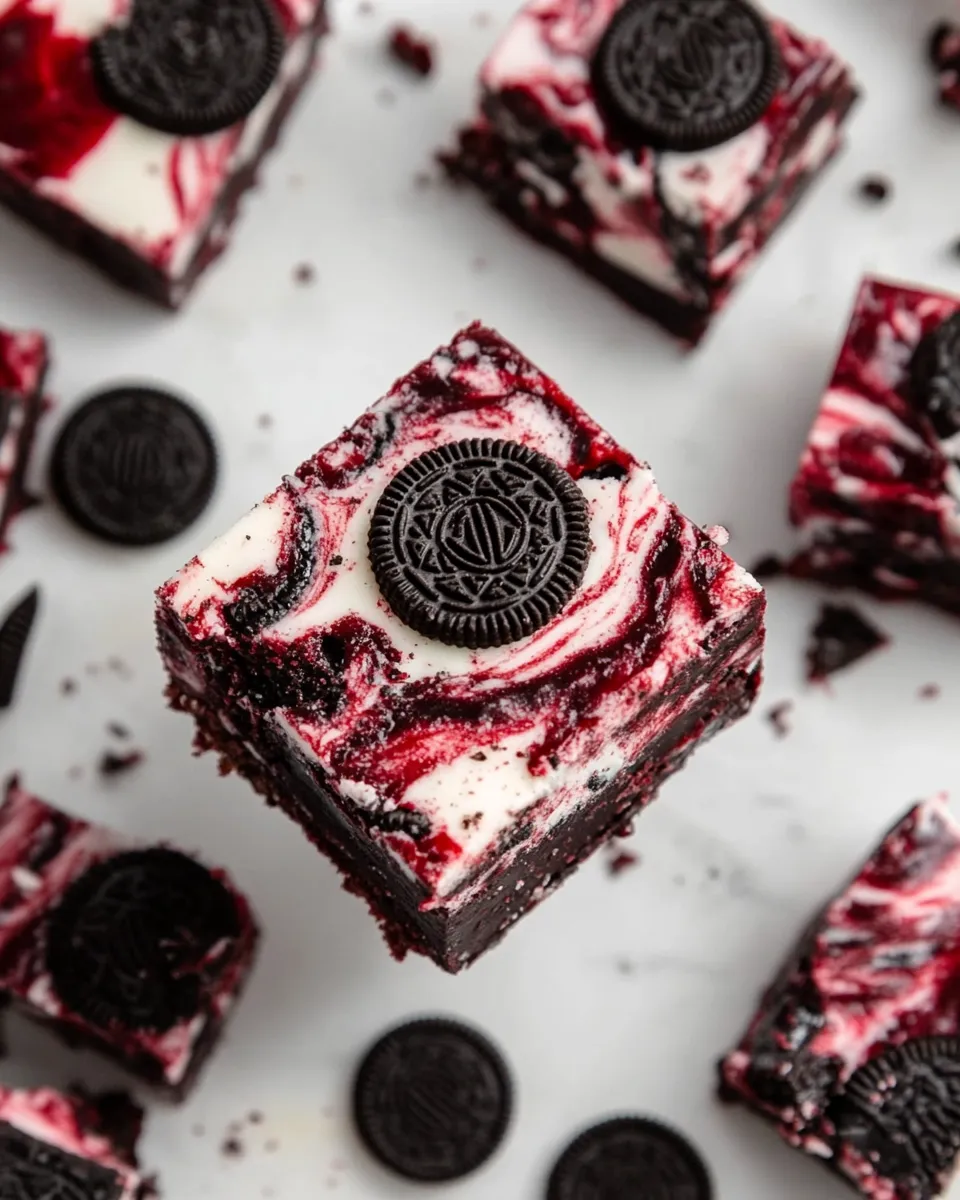
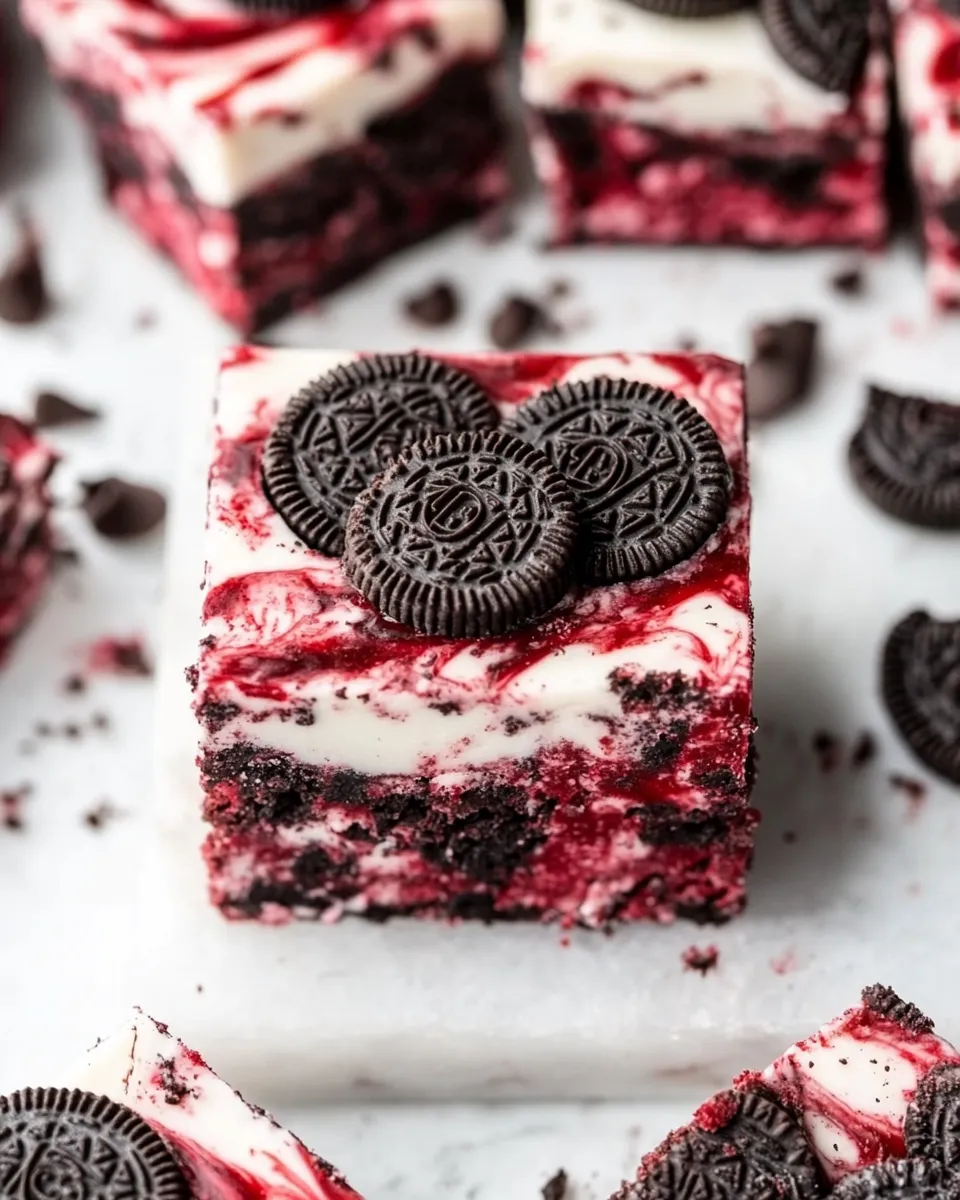
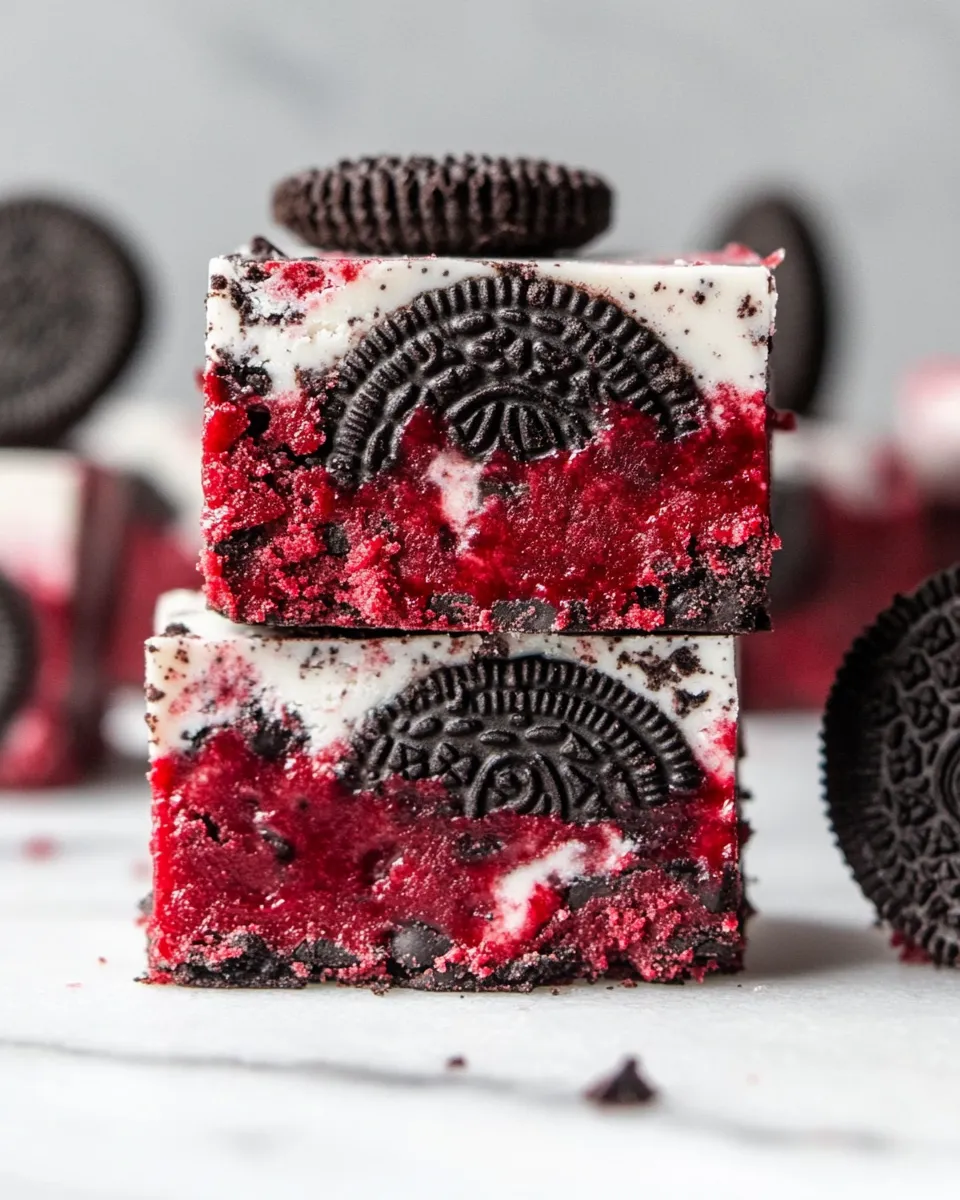
Red Velvet Oreo Fudge
Red Velvet Oreo Fudge is an indulgent treat that combines the rich flavors of red velvet cake and creamy fudge, all packed with the delightful crunch of Oreos. This decadent dessert is perfect for any occasion, whether you’re hosting a party, celebrating a holiday, or simply craving something sweet. With its vibrant red color and irresistible taste, this fudge will surely impress your family and friends. Let’s dive into this easy and delicious recipe that you’ll want to make again and again!
Why This Recipe Belongs in Your Rotation
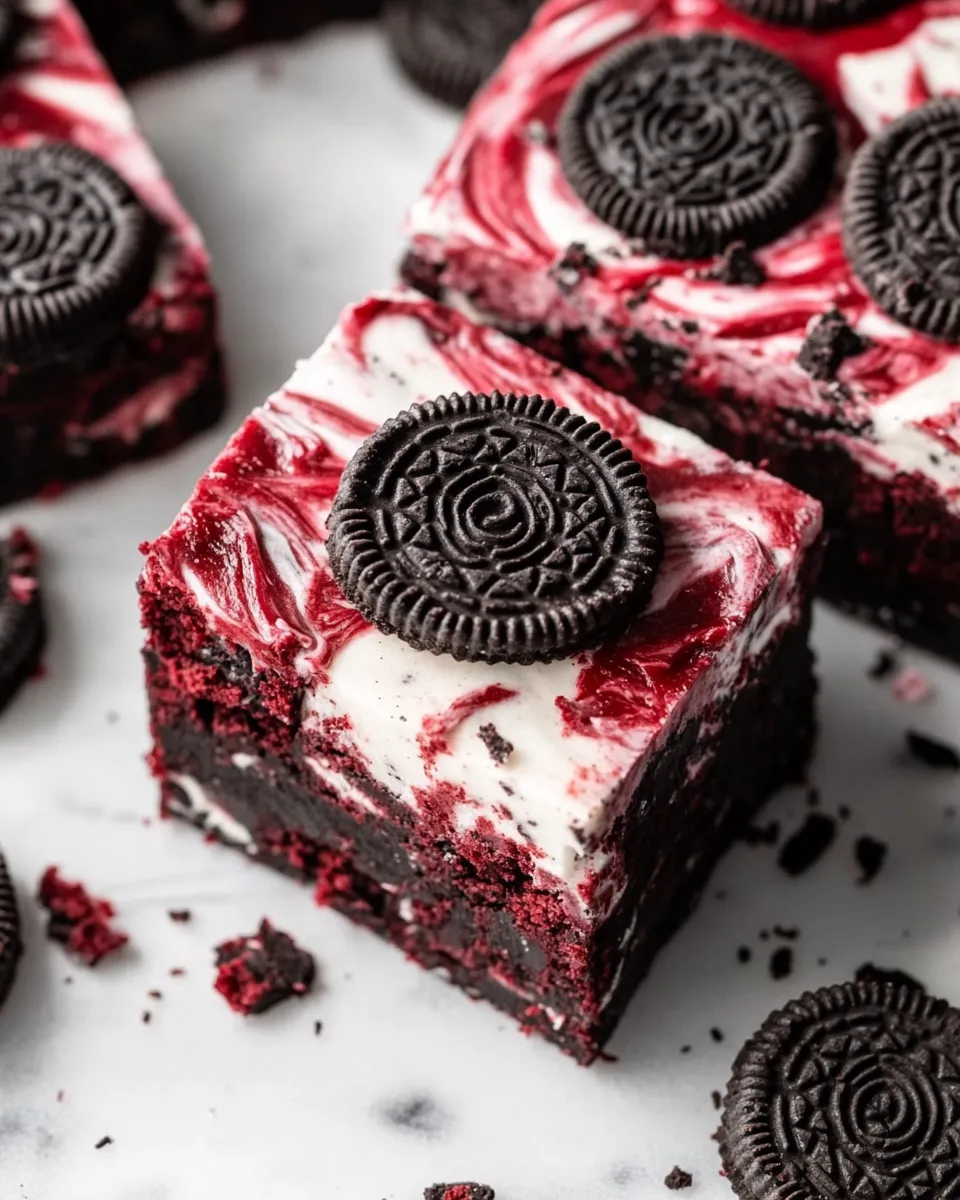
This Red Velvet Oreo Fudge is not just visually stunning; it’s also incredibly easy to make. With a handful of simple ingredients, you can create a luscious dessert that feels fancy but requires minimal effort. The combination of sweetened condensed milk, white and semi-sweet chocolate chips, and mini marshmallows creates a creamy base that pairs perfectly with the crushed Oreos and red food coloring. Whether it’s a birthday celebration or a cozy night in, this fudge will always be a hit.
Your Shopping Guide
To make this delectable Red Velvet Oreo Fudge, here’s what you’ll need to gather:
- 1 can sweetened condensed milk (14 oz) – The base for your fudge that adds sweetness and creaminess.
- 2 cups white chocolate chips – For a smooth and sweet fudge flavor.
- 1 cup semi-sweet chocolate chips – To balance the sweetness with a bit of richness.
- 2 cups mini marshmallows – These add a delightful chewy texture.
- 2 tablespoons unsalted butter – For added creaminess and flavor.
- 1 teaspoon vanilla extract – A must for depth of flavor.
- 1 teaspoon red food coloring – This is what gives your fudge its signature red velvet hue.
- 2 cups crushed Oreos (about 24-28 Oreos) – The star ingredient that adds crunch and chocolatey goodness.
Gear Up: What to Grab
Before you start making your Red Velvet Oreo Fudge, make sure you have the following gear handy:
- Large mixing bowl – For combining all your fudge ingredients.
- Microwave-safe bowl or double boiler – For melting the chocolate chips and butter.
- Spatula – For mixing everything together and scraping the sides of the bowl.
- 9×9-inch baking pan – To set your fudge in the fridge.
- Parchment paper – Optional, but it helps with easy removal from the pan.
Cook Red Velvet Oreo Fudge Like This
Now, let’s get into the step-by-step process to create your Red Velvet Oreo Fudge!
Step 1: Prepare Your Pan
Line your 9×9-inch baking pan with parchment paper, leaving some overhang for easy removal later. This will make cutting the fudge a breeze!
Step 2: Melt the Chocolate
In a microwave-safe bowl or double boiler, combine the white chocolate chips, semi-sweet chocolate chips, and sliced butter. Heat in 30-second intervals, stirring in between, until everything is melted and smooth.
Step 3: Mix in the Condensed Milk
Once the chocolate mixture is melted, remove it from heat and stir in the sweetened condensed milk until well combined.
Step 4: Add Vanilla and Food Coloring
Mix in the vanilla extract and red food coloring. Adjust the amount of food coloring based on how vibrant you want the fudge to be.
Step 5: Fold in the Marshmallows and Oreos
Gently fold in the mini marshmallows and crushed Oreos, ensuring they are evenly distributed throughout the mixture.
Step 6: Spread the Mixture in the Pan
Pour the fudge mixture into the prepared baking pan, spreading it evenly with your spatula. Smooth the top for a polished finish.
Step 7: Chill the Fudge
Refrigerate the fudge for at least 2-3 hours, or until it is completely set.
Step 8: Cut and Serve
Once set, use the parchment overhang to lift the fudge out of the pan. Cut into squares and serve!
Fit It to Your Goals
If you want to customize your Red Velvet Oreo Fudge, consider the following options:
- Make it gluten-free: Use gluten-free Oreos to accommodate dietary restrictions.
- Adjust sweetness: Feel free to reduce the amount of sweetened condensed milk if you prefer a less sweet fudge.
- Add nuts: For a different texture, try folding in some chopped nuts, like pecans or walnuts.
- Flavor variations: Experiment with different extracts, such as almond or peppermint, to create unique flavor profiles.
Testing Timeline
Planning to make this fudge? Here’s a quick timeline to help you:
- Prep Time: 15 minutes
- Chill Time: 2-3 hours
- Total Time: Approximately 3-3.5 hours
Prep Ahead & Store
This Red Velvet Oreo Fudge is perfect for making ahead of time! Here are some storage tips:
- Store in an airtight container: Keep your fudge fresh by storing it in an airtight container at room temperature for up to a week.
- Refrigerate for longer shelf life: If you want to keep it for longer, refrigerate it for up to 2 weeks.
- Freeze for future enjoyment: You can also freeze the fudge for up to 3 months. Just make sure to wrap it tightly in plastic wrap and then place it in a freezer-safe container.
Helpful Q&A
Can I use different types of chocolate for this fudge?
Absolutely! While the combination of white and semi-sweet chocolate creates a balanced flavor, you can experiment with dark chocolate or even milk chocolate if you prefer a sweeter taste.
How do I know when the fudge is set?
The fudge should be firm to the touch and no longer sticky. It will also hold its shape when you cut into it. Make sure to give it enough time in the refrigerator to set completely.
Can I add more Oreos to the fudge?
Yes! Feel free to add more crushed Oreos if you want an extra crunch. Just keep in mind that too many might affect the texture, so balance is key.
What’s the best way to cut the fudge?
For clean cuts, use a sharp knife and make sure to wipe the blade after each cut. This will help prevent the fudge from sticking and will give you nice, even pieces.
Don’t Miss These
If you love this Red Velvet Oreo Fudge, you might also enjoy:
- White Chocolate Oreo Bark
- Easy 3-Ingredient Chocolate Fudge
- Vegan Chocolate Fudge
- Classic Red Velvet Cake
Wrap-Up
Creating this Red Velvet Oreo Fudge is a delightful experience that results in a treat that’s perfect for sharing or indulging in solo. The combination of flavors and textures makes it a standout dessert that is sure to please anyone with a sweet tooth. Plus, it’s incredibly simple to make, which means you can whip it up in no time, whether for a festive gathering or a cozy night in.
So gather your ingredients and get ready to impress with this stunning and delicious fudge! You won’t regret adding this recipe to your dessert repertoire.
Red Velvet Oreo Fudge
Ingredients
Equipment
Method
- Line your 9x9-inch baking pan with parchment paper, leaving some overhang for easy removal later.
- In a microwave-safe bowl or double boiler, combine the white chocolate chips, semi-sweet chocolate chips, and sliced butter. Heat in 30-second intervals, stirring in between, until everything is melted and smooth.
- Once the chocolate mixture is melted, remove it from heat and stir in the sweetened condensed milk until well combined.
- Mix in the vanilla extract and red food coloring. Adjust the amount of food coloring based on how vibrant you want the fudge to be.
- Gently fold in the mini marshmallows and crushed Oreos, ensuring they are evenly distributed throughout the mixture.
- Pour the fudge mixture into the prepared baking pan, spreading it evenly with your spatula. Smooth the top for a polished finish.
- Refrigerate the fudge for at least 2-3 hours, or until it is completely set.
- Once set, use the parchment overhang to lift the fudge out of the pan. Cut into squares and serve!
Notes
- Store in an airtight container at room temperature for up to a week.
- Refrigerate for longer shelf life, up to 2 weeks.
- Freeze for up to 3 months, tightly wrapped.