Momofuku Birthday Cake
If there’s one cake that can instantly brighten any occasion, it’s the Momofuku Birthday Cake. This delightful dessert, made famous by the innovative pastry chefs at Momofuku Milk Bar, embodies the essence of celebration with its vibrant layers, whimsical sprinkles, and rich flavors. Perfectly moist, it combines a rich vanilla flavor with a fun, playful texture that’s sure to delight everyone at the party. In this article, we’ll explore the process of creating this stunning cake from scratch, offering tips and tricks along the way to ensure your Momofuku Birthday Cake turns out beautifully.
Why This Recipe Belongs in Your Rotation
The Momofuku Birthday Cake is not just for birthdays. Its delightful flavor and fun presentation make it an excellent choice for any celebration, be it anniversaries, graduations, or even just a special treat for yourself. The recipe is relatively straightforward, and the ingredients are easily accessible, making this cake a great addition to your baking repertoire. Plus, who can resist a cake adorned with colorful sprinkles?
Ingredient Rundown
- Granulated Sugar: Used in both the cake and frosting for sweetness.
- Light Brown Sugar: Adds moisture and a slight depth of flavor.
- Cake Flour: Ensures a tender, fluffy texture.
- Baking Powder: Provides the necessary lift.
- Kosher Salt: Balances sweetness and enhances flavors.
- Rainbow Sprinkles: Adds color and fun! A must for any birthday cake.
- Grapeseed Oil: Keeps the cake moist and adds a subtle flavor.
- Clear Vanilla Extract: Provides a pure vanilla flavor without coloring the batter.
- Unsalted Butter: Contributes to the richness of the cake and frosting.
- Vegetable Shortening: Helps achieve a smooth frosting texture.
- Eggs: Essential for structure and moisture.
- Buttermilk: Adds moisture and a slight tang, enhancing the cake’s flavor.
- Cream Cheese: Used in the frosting for a rich, creamy texture.
- Glucose and Corn Syrup: Help stabilize the frosting and give it a glossy finish.
- Powdered Sugar: Sweetens the frosting and helps achieve a smooth consistency.
- Milk: Used to adjust the frosting’s consistency.
Tools of the Trade
- Quarter Sheet Pan: Perfect size for baking the cake layers.
- 6-inch Cake Ring: Ideal for assembling and shaping the cake.
- Acetate Strips: Help create clean edges for your cake layers.
- Mixing Bowls: Essential for combining ingredients.
- Electric Mixer: Makes mixing the batter and frosting a breeze.
- Spatula: Great for spreading frosting evenly.
Mastering Momofuku Birthday Cake: How-To
Step 1: Prepare Your Cake Layers
Start by preheating your oven to 350°F (175°C). Grease your quarter sheet pan and line it with parchment paper. In a mixing bowl, combine 1 cup (100g) of granulated sugar, 1.5 tablespoons of light brown sugar, 93.75g of cake flour, 0.5 teaspoon of baking powder, and 0.5 teaspoon of kosher salt. Mix these dry ingredients together until well combined.
In another bowl, whisk together 54.5ml of grapeseed oil, 1 tablespoon of clear vanilla extract, and 4 tablespoons of unsalted butter (at room temperature) until smooth. Gradually add the dry ingredients to this mixture, mixing until just combined. Finally, fold in 2 tablespoons of rainbow sprinkles.
Pour the batter into your prepared pan, spreading it evenly. Bake for about 20-25 minutes, or until a toothpick inserted into the center comes out clean. Allow it to cool in the pan for 10 minutes before transferring it to a wire rack to cool completely.
Step 2: Make the Cake Base
For the base layer of the cake, in a clean bowl, mix together 1 cup (250g) of granulated sugar and 3 tablespoons of light brown sugar with 3 eggs until light and fluffy. Then, add 120ml of buttermilk, 72.67ml of grapeseed oil, and 2 teaspoons of clear vanilla extract. Mix until well incorporated.
Next, sift together 2 cups (250g) of cake flour, 1.5 teaspoons of baking powder, and 0.75 teaspoon of kosher salt. Gradually add the dry ingredients to the wet mixture, mixing until just combined. Don’t forget to fold in 40g + 2 tablespoons of rainbow sprinkles for that festive touch.
Divide the batter equally between two 6-inch round cake pans. Bake at 350°F (175°C) for about 25-30 minutes, or until a toothpick inserted into the center comes out clean. Allow the cakes to cool in the pans for about 10 minutes before transferring to wire racks to cool completely.
Step 3: Prepare the Frosting
In a mixing bowl, beat together 8 tablespoons of unsalted butter and 51.25g of vegetable shortening until creamy. Add 2 ounces (56.7g) of cream cheese, 1 tablespoon of glucose, 1 tablespoon of corn syrup, and 1 tablespoon of clear vanilla extract. Mix until smooth.
Gradually add in 1 cup (150g) of powdered sugar, 0.5 teaspoon of kosher salt, a pinch of baking powder, and a pinch of citric acid. Mix until well combined. If the frosting is too thick, add in 61ml of milk, a little at a time, until you reach your desired consistency.
Step 4: Assemble Your Cake
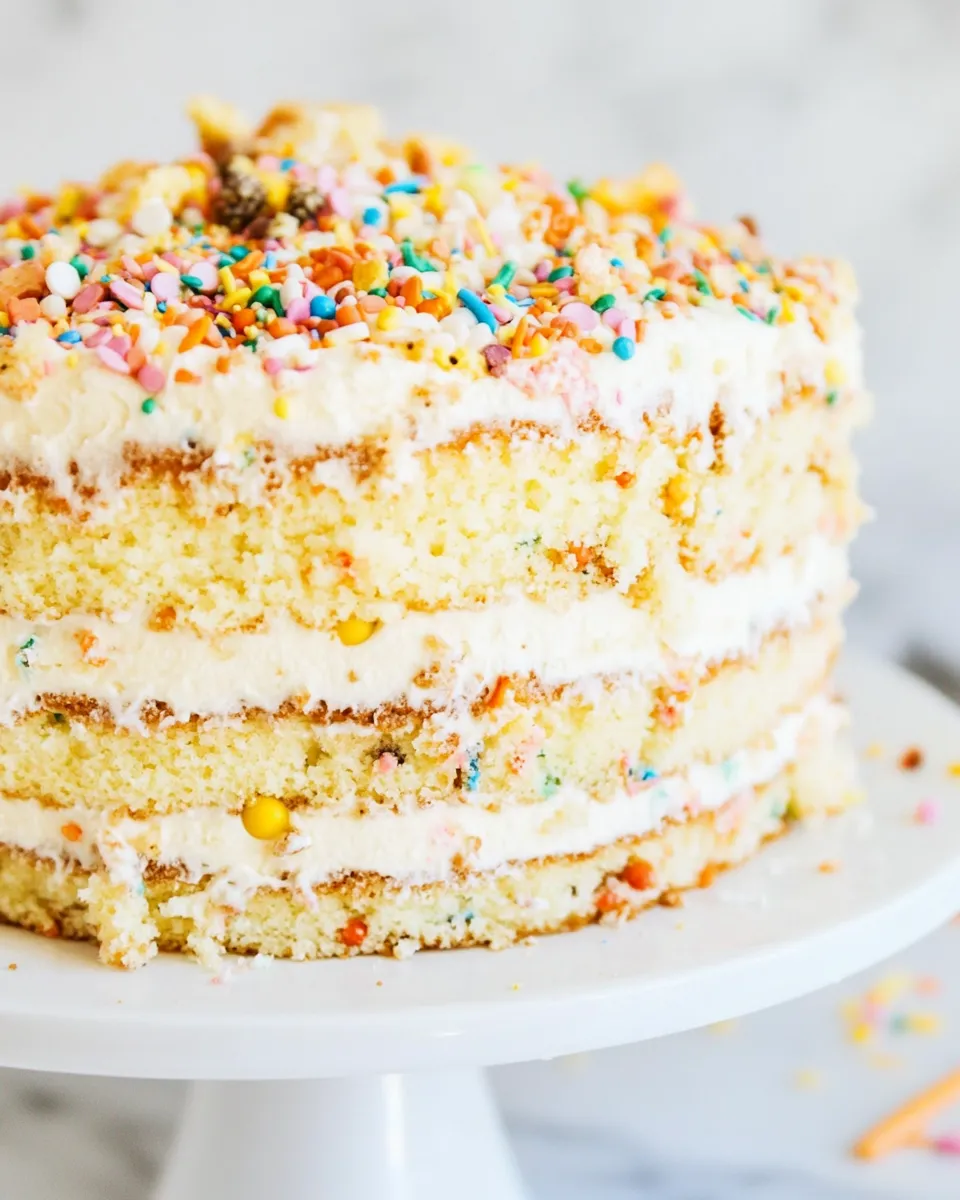
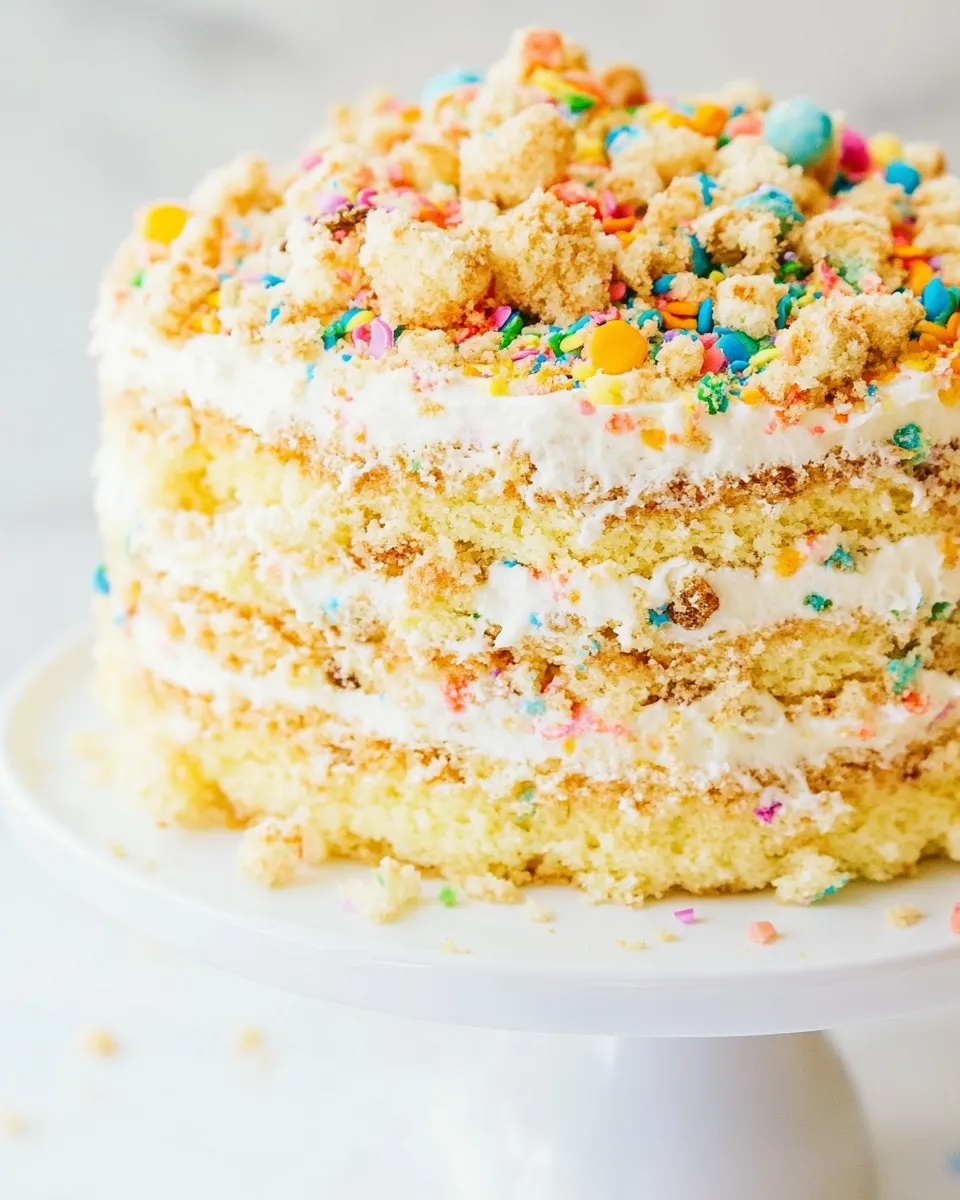
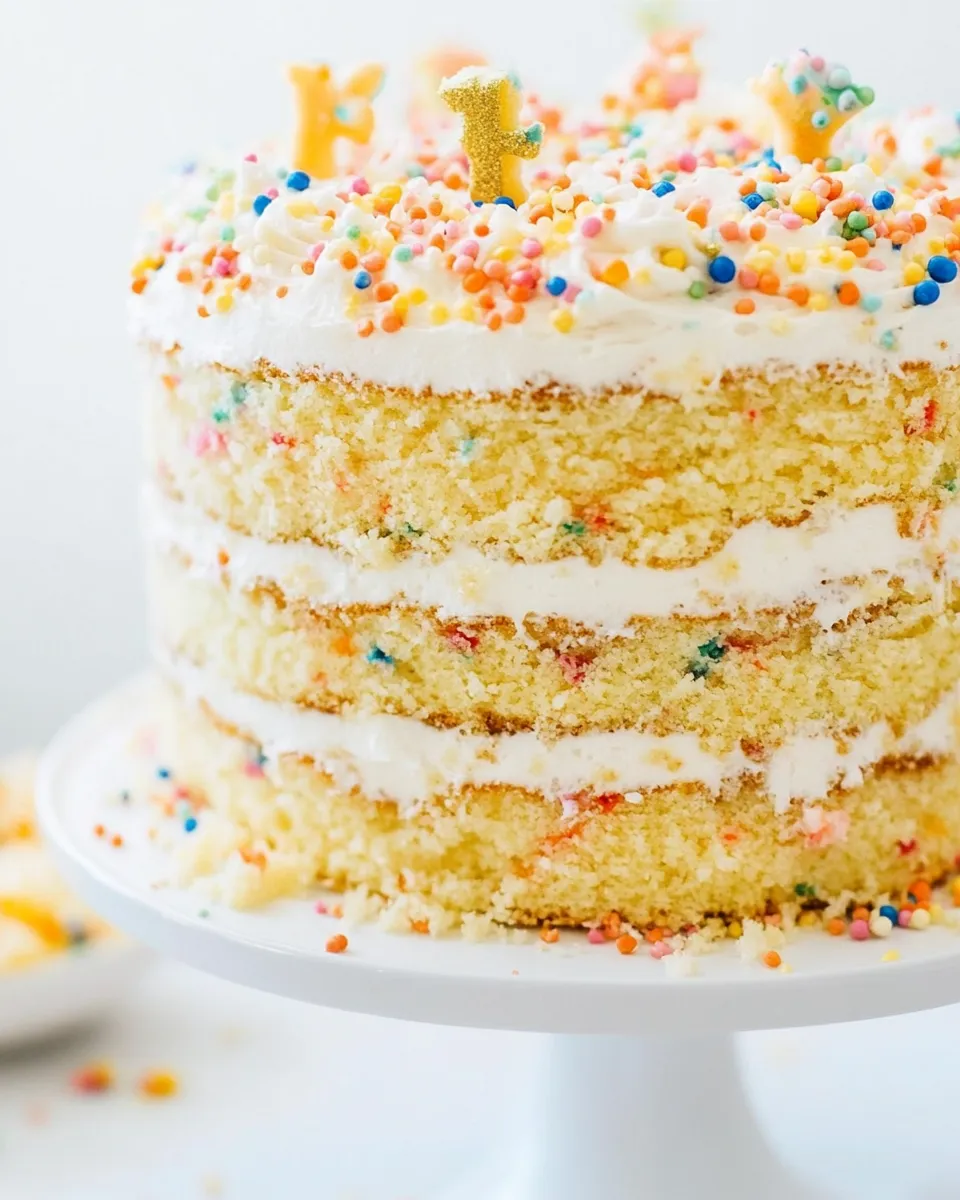
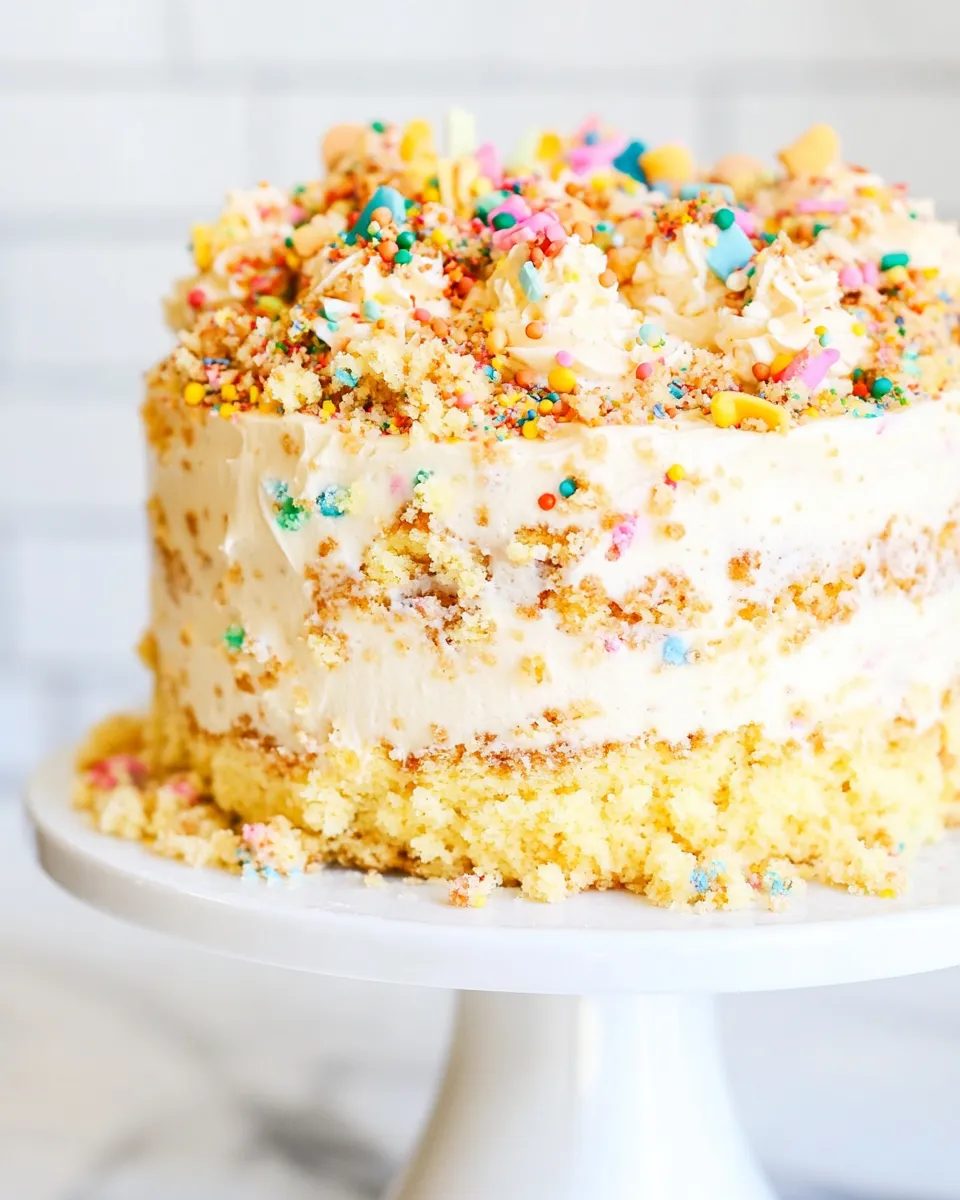
Once all layers are completely cooled, it’s time to assemble. Place one of the 6-inch cake layers on a cake board or plate. Using the cake ring, encircle the cake layer. Spread a layer of frosting on top, then add the second cake layer. Repeat this process until all layers are stacked, adding frosting in between each layer.
After stacking all layers, spread a thin layer of frosting all over the cake to create a “crumb coat.” This helps catch any crumbs and creates a smooth surface for the final layer of frosting. Chill the cake in the refrigerator for at least 30 minutes to set the crumb coat.
Once chilled, apply a final layer of frosting over the entire cake. Decorate the top and sides with the remaining sprinkles, ensuring it’s festive and inviting.
Make It Year-Round
- Flavor Variations: Experiment with different flavors by adding lemon zest or almond extract.
- Seasonal Sprinkles: Use themed sprinkles for holidays like red and green for Christmas or pastel colors for Easter.
- Layering Options: Add layers of fruit or flavored jams between the cake layers for added flavor.
- Frosting Swaps: Try using chocolate or strawberry frosting for a different twist.
Cook’s Commentary
The Momofuku Birthday Cake is truly a celebration of flavor and joy. Each bite is a delightful balance of sweetness with the rainbow sprinkles adding a playful crunch. Don’t hesitate to get creative with your decorations! This cake is versatile, and you can customize it to fit any occasion or theme. The technique of making a crumb coat may seem daunting, but it’s essential for achieving that professional look. Remember, the more love and fun you put into it, the better it will taste!
Leftovers & Meal Prep
If you find yourself with leftover cake, don’t worry! This cake can be stored in an airtight container in the refrigerator for up to five days. The flavors will continue to meld, making it even tastier. You can also freeze the layers individually by wrapping them tightly in plastic wrap and storing them in a freezer-safe container for up to a month. Just make sure to let them thaw in the refrigerator before frosting!
Top Questions & Answers
Can I use regular vanilla extract instead of clear vanilla extract?
Yes, you can use regular vanilla extract, but it may slightly alter the color of your cake and frosting. Clear vanilla extract is recommended for a pure flavor without affecting the appearance.
What can I substitute for buttermilk?
You can easily make a buttermilk substitute by mixing 1 cup of milk with 1 tablespoon of lemon juice or vinegar. Let it sit for about 5-10 minutes before using it in the recipe.
How do I prevent the cake from doming while baking?
To prevent doming, make sure your oven temperature is accurate and consider using cake strips around your cake pans. This helps the cake bake evenly.
Can I make this cake gluten-free?
Yes, you can substitute the cake flour with a gluten-free all-purpose flour blend. Be sure to check that all other ingredients are also gluten-free.
Similar Recipes
Bring It Home
Now that you have all the tools and techniques to create your very own Momofuku Birthday Cake, it’s time to get baking! This cake not only looks stunning but tastes divine, making it the perfect centerpiece for any celebration. With its nostalgic flavors and bright colors, your friends and family will be begging for seconds. So gather your ingredients, roll up your sleeves, and let’s make some magic happen in the kitchen!
Momofuku Birthday Cake
Ingredients
Equipment
Method
- Preheat your oven to 350°F (175°C). Grease your quarter sheet pan and line it with parchment paper. In a mixing bowl, combine the granulated sugar, light brown sugar, cake flour, baking powder, and kosher salt. Mix these dry ingredients together until well combined.
- In another bowl, whisk together the grapeseed oil, clear vanilla extract, and unsalted butter until smooth. Gradually add the dry ingredients to this mixture, mixing until just combined. Fold in the rainbow sprinkles.
- Pour the batter into your prepared pan, spreading it evenly. Bake for about 20-25 minutes, or until a toothpick inserted into the center comes out clean. Allow it to cool in the pan for 10 minutes before transferring it to a wire rack to cool completely.
- In a clean bowl, mix together the granulated sugar and light brown sugar with the eggs until light and fluffy. Add the buttermilk, grapeseed oil, and clear vanilla extract. Mix until well incorporated.
- Sift together the cake flour, baking powder, and kosher salt. Gradually add the dry ingredients to the wet mixture, mixing until just combined. Fold in the rainbow sprinkles.
- Divide the batter equally between two 6-inch round cake pans. Bake at 350°F (175°C) for about 25-30 minutes, or until a toothpick inserted into the center comes out clean. Allow the cakes to cool in the pans for about 10 minutes before transferring to wire racks to cool completely.
- In a mixing bowl, beat together the unsalted butter and vegetable shortening until creamy. Add the cream cheese, glucose, corn syrup, and clear vanilla extract. Mix until smooth.
- Gradually add in the powdered sugar, kosher salt, a pinch of baking powder, and a pinch of citric acid. Mix until well combined. If the frosting is too thick, add in milk, a little at a time, until you reach your desired consistency.
- Once all layers are completely cooled, place one of the 6-inch cake layers on a cake board or plate. Using the cake ring, encircle the cake layer. Spread a layer of frosting on top, then add the second cake layer. Repeat this process until all layers are stacked, adding frosting in between each layer.
- Spread a thin layer of frosting all over the cake to create a crumb coat. Chill the cake in the refrigerator for at least 30 minutes to set the crumb coat.
- Once chilled, apply a final layer of frosting over the entire cake. Decorate the top and sides with the remaining sprinkles.
Notes
- Store leftover cake in an airtight container in the refrigerator for up to five days.
- Freeze individual layers tightly wrapped for up to a month; thaw in the refrigerator before frosting.
- Experiment with flavors by adding lemon zest or different extracts.