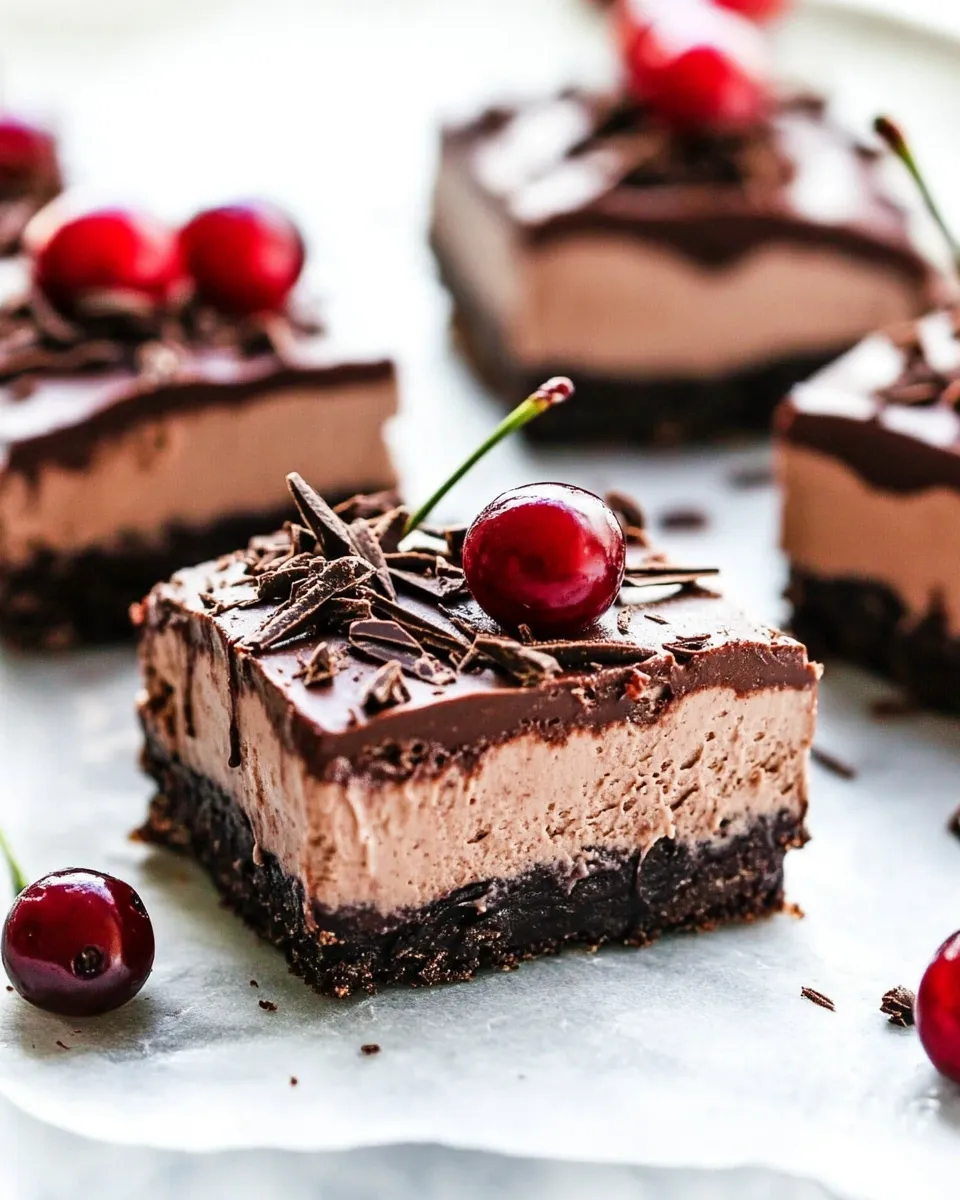
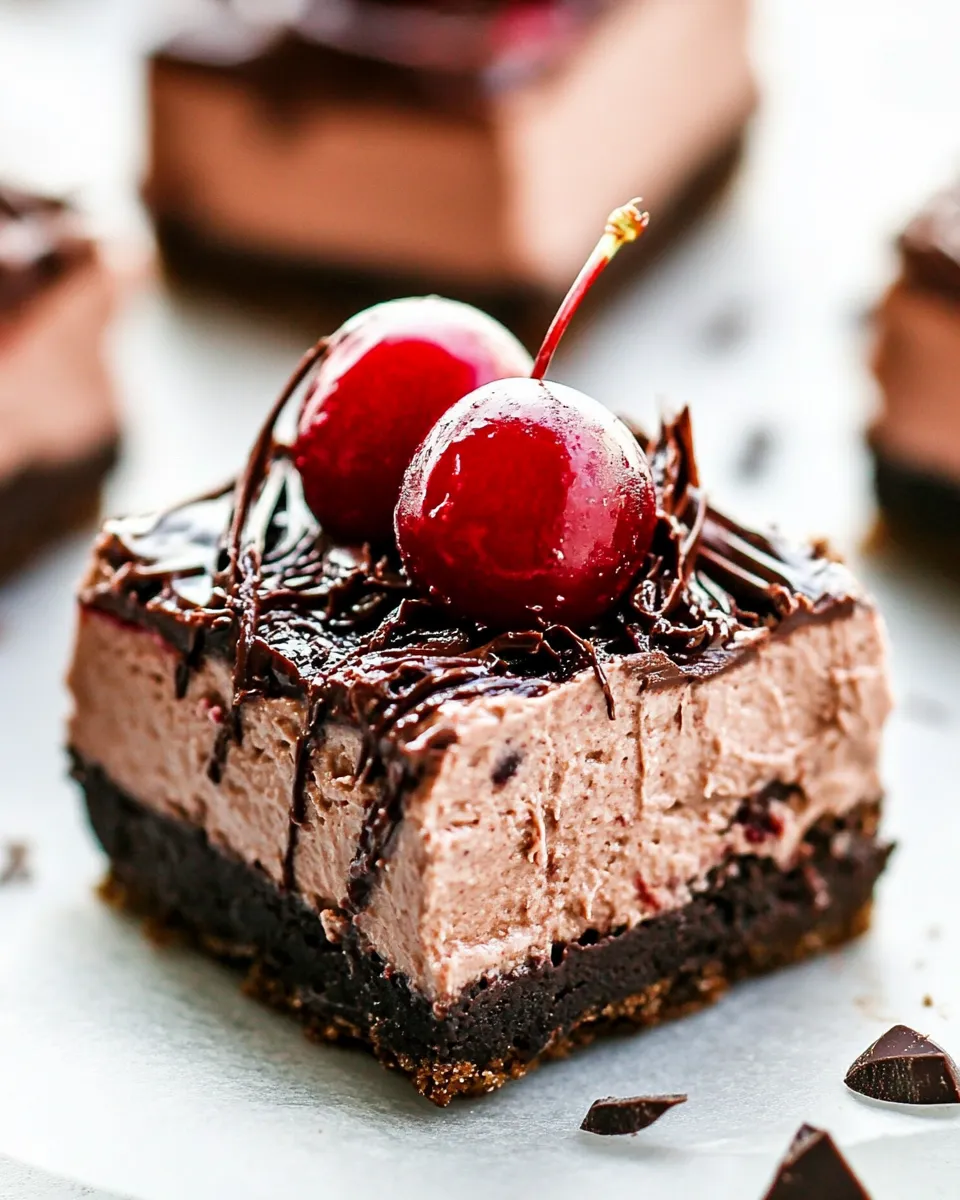
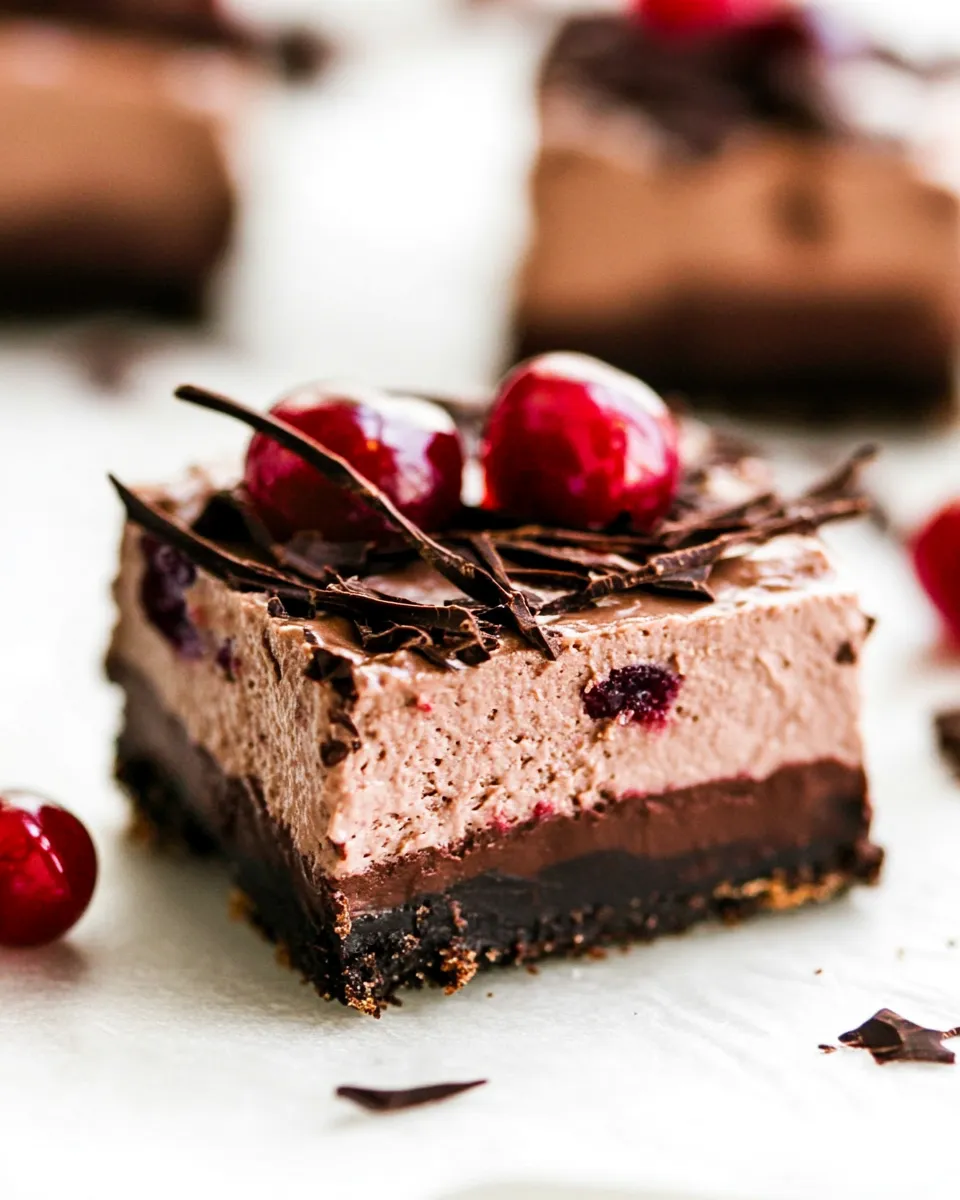
Chocolate Cherry Mousse Bars
Indulging in a rich dessert is one of life’s simple pleasures, and these Chocolate Cherry Mousse Bars deliver both decadence and delight in every bite. Imagine a buttery Oreo crust, luscious chocolate mousse, and a sweet cherry layer that makes it impossible to resist. Whether you serve them at a gathering or enjoy them solo, these bars promise to elevate any occasion.
Why This Chocolate Cherry Mousse Bars Stands Out
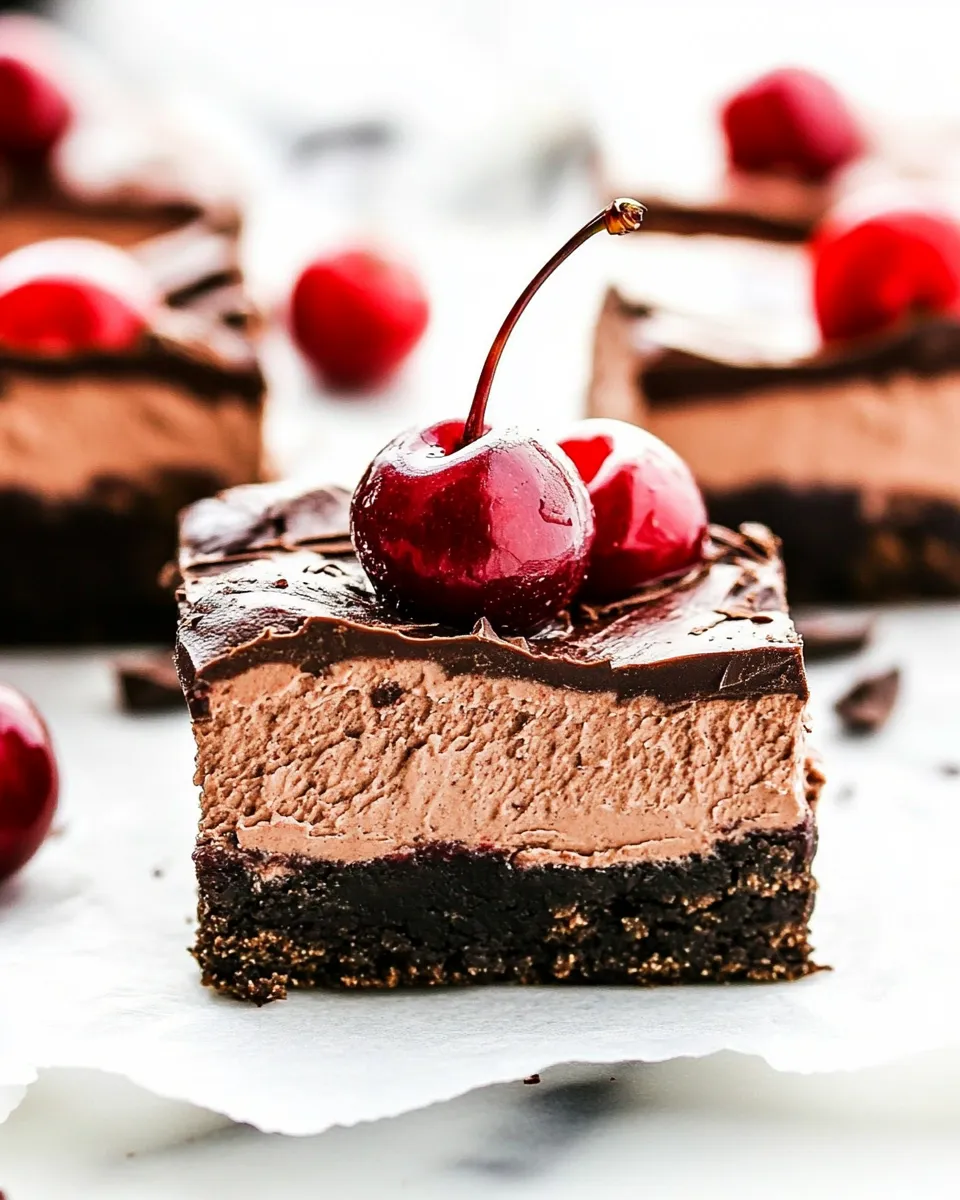
The combination of chocolate and cherry is a classic pairing that never goes out of style. These Chocolate Cherry Mousse Bars shine with their three distinct layers, each contributing to a perfect balance of flavors and textures. The crunchy Oreo crust provides an inviting foundation, while the velvety mousse layer adds richness. Topping it all off is the sweet and tangy cherry filling that brings brightness to each bite. The result is a dessert that feels luxurious yet is surprisingly easy to prepare.
The Ingredient Lineup
To create these delightful Chocolate Cherry Mousse Bars, gather the following ingredients:
- 20 Oreo cookies – Crushed to form the base.
- 5 tablespoons unsalted butter – Melted, to bind the crust together.
- 2 cups semi-sweet chocolate chips – For a rich chocolate flavor.
- 1 (8-ounce) package softened cream cheese – Adds creaminess to the mousse.
- 1 cup sugar – Sweetens the filling perfectly.
- 1 cup whipping cream – Whipped to create a light texture.
- 1 Lucky Leaf cherry pie filling – The crowning layer of sweetness.
These ingredients come together to create a dessert that is not only delicious but also visually appealing, making it a great choice for any celebration.
Recommended Tools
To make your baking experience smooth and enjoyable, consider having the following tools on hand:
- 9×9-inch baking pan – For assembling the mousse bars.
- Mixing bowls – To combine the different layers easily.
- Electric mixer – For whipping the cream and cream cheese.
- Rubber spatula – To fold ingredients and scrape down the sides of the bowls.
- Measuring cups and spoons – For accurate ingredient measurements.
Having these tools ready will help streamline the process of making your Chocolate Cherry Mousse Bars.
Build Chocolate Cherry Mousse Bars Step by Step
Creating these bars is a straightforward process. Follow these steps for a successful outcome:
Step 1: Prepare the Crust
Start by preheating your oven to 350°F (175°C). In a mixing bowl, combine the crushed Oreo cookies with the melted butter. Mix until the crumbs are evenly coated. Press this mixture firmly into the bottom of your 9×9-inch baking pan to form a solid crust. Bake for 10 minutes, then remove from the oven and let it cool.
Step 2: Make the Chocolate Mousse
In a microwave-safe bowl, melt 1 ½ cups of the semi-sweet chocolate chips in 30-second intervals, stirring after each interval until smooth. Allow it to cool slightly. In another mixing bowl, beat the softened cream cheese and sugar until well combined and creamy. Gradually add the melted chocolate to the cream cheese mixture, mixing until smooth.
Step 3: Whip the Cream
In a separate bowl, whip the whipping cream until stiff peaks form. Carefully fold the whipped cream into the chocolate mixture in three additions, being gentle to retain the lightness of the mousse.
Step 4: Assemble the Bars
Pour the chocolate mousse over the cooled Oreo crust, smoothing the top with a spatula. Spread the Lucky Leaf cherry pie filling evenly over the mousse layer. Refrigerate for at least 4 hours, or until set.
Step 5: Slice and Serve
Once set, remove the bars from the refrigerator. Use a sharp knife to slice them into squares. For the best presentation, wipe your knife between cuts to maintain clean edges.
Make It Your Way
These Chocolate Cherry Mousse Bars are versatile! Here are a few ideas to customize your dessert:
- Swap the Oreos for graham crackers or digestive biscuits for a different crust flavor.
- Add a splash of almond extract to the mousse for an extra layer of flavor.
- Top with fresh cherries or chocolate shavings for a decorative touch.
- Experiment with different chocolate types, such as dark or white chocolate.
Feel free to get creative while making this dessert your own!
Common Errors (and Fixes)
Even the best bakers can encounter challenges. Here are some common pitfalls and how to avoid them:
- Crust falling apart: Ensure you press the crust firmly into the pan and use enough melted butter to hold it together.
- Mousse not setting: Make sure to refrigerate the bars long enough to allow the mousse to firm up.
- Chocolate seizing: When melting chocolate, be careful not to overheat it. Stir frequently and remove from heat once melted.
- Too sweet: If you prefer a less sweet mousse, reduce the sugar in the cream cheese mixture.
With these tips, you can troubleshoot any issues and create the perfect Chocolate Cherry Mousse Bars.
Store, Freeze & Reheat
To enjoy your Chocolate Cherry Mousse Bars even longer, consider these storage tips:
Store the bars in an airtight container in the refrigerator for up to 5 days. If you want to freeze them, cut the bars into squares and place them in a single layer on a baking sheet. Once frozen solid, transfer them to a freezer-safe container. They can be stored in the freezer for up to 3 months.
To thaw, transfer the bars to the refrigerator for several hours before serving. Avoid refreezing thawed mousse bars to maintain their texture and flavor.
Popular Questions
Can I use other fruit fillings instead of cherry?
Absolutely! Feel free to substitute with other fruit fillings, such as blueberry or raspberry, for a different flavor experience.
Can I make these bars ahead of time?
Yes! These bars can be made a day or two in advance, making them perfect for gatherings or events.
Is there a way to make this recipe gluten-free?
Yes! Use gluten-free Oreo cookies or a gluten-free cookie alternative for the crust to make a gluten-free version of these bars.
What can I use instead of cream cheese?
If you want a dairy-free option, try using a vegan cream cheese substitute made from nuts or soy. Just be aware that the flavor may vary slightly.
Similar Recipes
If you’re a fan of these Chocolate Cherry Mousse Bars, you might also enjoy:
- No-Bake Chocolate Cheesecake
- Raspberry Chocolate Tart
- Cherry Almond Crumble Bars
- Layered Chocolate Mousse Cake
The Takeaway
These Chocolate Cherry Mousse Bars are the epitome of dessert perfection, blending rich chocolate and sweet cherries in a delightful layered format. With a simple preparation process and minimal ingredients, they are sure to become a favorite in your baking repertoire. Whether you’re celebrating a special occasion or simply craving something sweet, these bars are a guaranteed crowd-pleaser. So gather your ingredients, follow the steps, and treat yourself to a delightful dessert experience!
Chocolate Cherry Mousse Bars
Ingredients
Equipment
Method
- Step 1: Prepare the Crust - Preheat oven to 350°F (175°C). Combine crushed Oreo cookies with melted butter and press into the bottom of the baking pan. Bake for 10 minutes and let cool.
- Step 2: Make the Chocolate Mousse - Melt 1 ½ cups of chocolate chips in a microwave-safe bowl. In another bowl, beat cream cheese and sugar until creamy, then mix in the melted chocolate.
- Step 3: Whip the Cream - Whip the cream until stiff peaks form, then fold it into the chocolate mixture carefully.
- Step 4: Assemble the Bars - Pour the mousse over the cooled crust and spread the cherry pie filling on top. Refrigerate for at least 4 hours.
- Step 5: Slice and Serve - Once set, slice into squares and serve.
Notes
- Store bars in an airtight container in the refrigerator for up to 5 days.
- Freeze cut bars for up to 3 months for later enjoyment.
- Experiment with different fruit fillings for a unique twist.